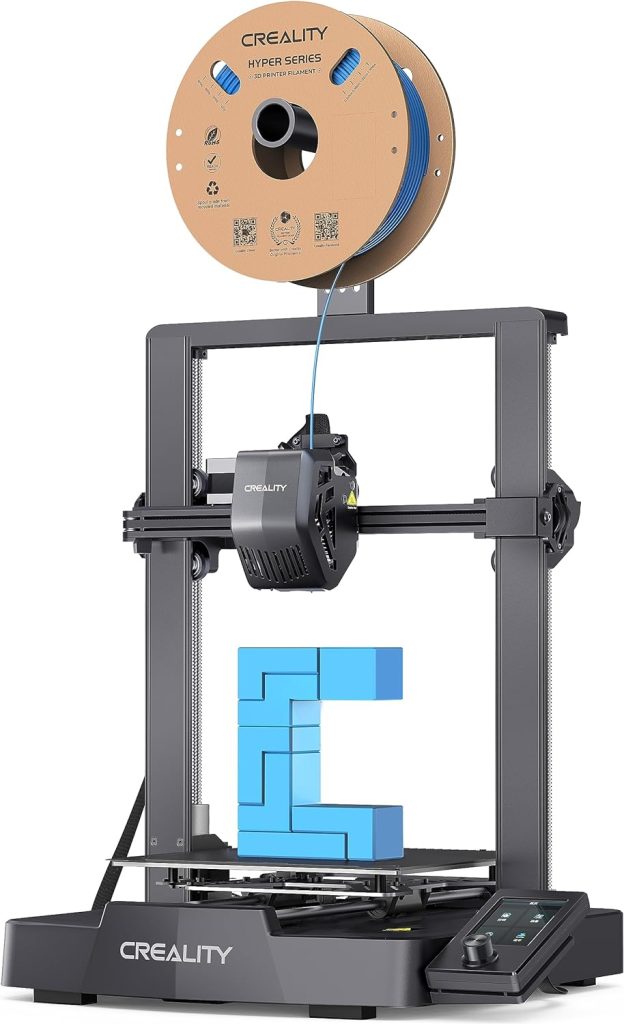
Review Summary
Creality’s Ender 3 series has been a popular choice for entry-level 3D printer for a long time. Now with its latest iteration, the Ender 3 V3 SE, step ups the game to the next level by bringing so many features in a sleek and compact design, great printing quality and increased speeds.
Pros
- Great print quality
- Increased print speeds
- Excellent Automatic bed leveling
- Direct drive extruder
- Easy interface
- Sleek and compact design
- Amazing value
Cons
- Slow heating
- No filament runout sensor
The best part is that all of this comes at an unbeatable price of just under $200. That’s just crazy and it makes the Creality Ender 3 V3 SE an excellent option for 3D printing beginners, as well as enthusiast that are on a tight budget.
Check the best deals on the Creality Ender 3 V3 SE 3D Printer
Now let’s take a look at the key features this 3D printer offers, and then I will walk you through the unboxing process, see what’s inside, assemble the 3D printer, as well do some test prints to see the real printing quality and speed the Ender 3 V3 SE offers.
Design and Features
Although a budget 3D printer, to me the Ender 3 V3 SE looks and feels like a premium 3D printer. It has a nice design with a sleek plastic base that covers all the electronics, and smooth hood for the tool head.

The Y-axis has dual stainless steel rods and linear bearings which provides smoother printing experience. The X-axis stepper is nicely placed on the inside, which reduces the overall footprint of the 3D printer. The Z-axis has dual screws synced with a timing belt, again, ensuring higher print quality.
Sprite Direct Extruder
A direct drive Sprite extruder is responsible for pushing out the filament on this Ender 3 V3 SE 3D printer. It’s a proven workhorse, reliable and compatible with wide range of filaments, and especially helpful when it comes to printing TPU as it has excellent grip.
The hot end is also reliable but doesn’t offer anything special. It can handle nozzle temperatures of up to 260°C. That’s enough for materials like PLA, PETG and TPU, but for ABS or Nylon for example, you would an upgrade.
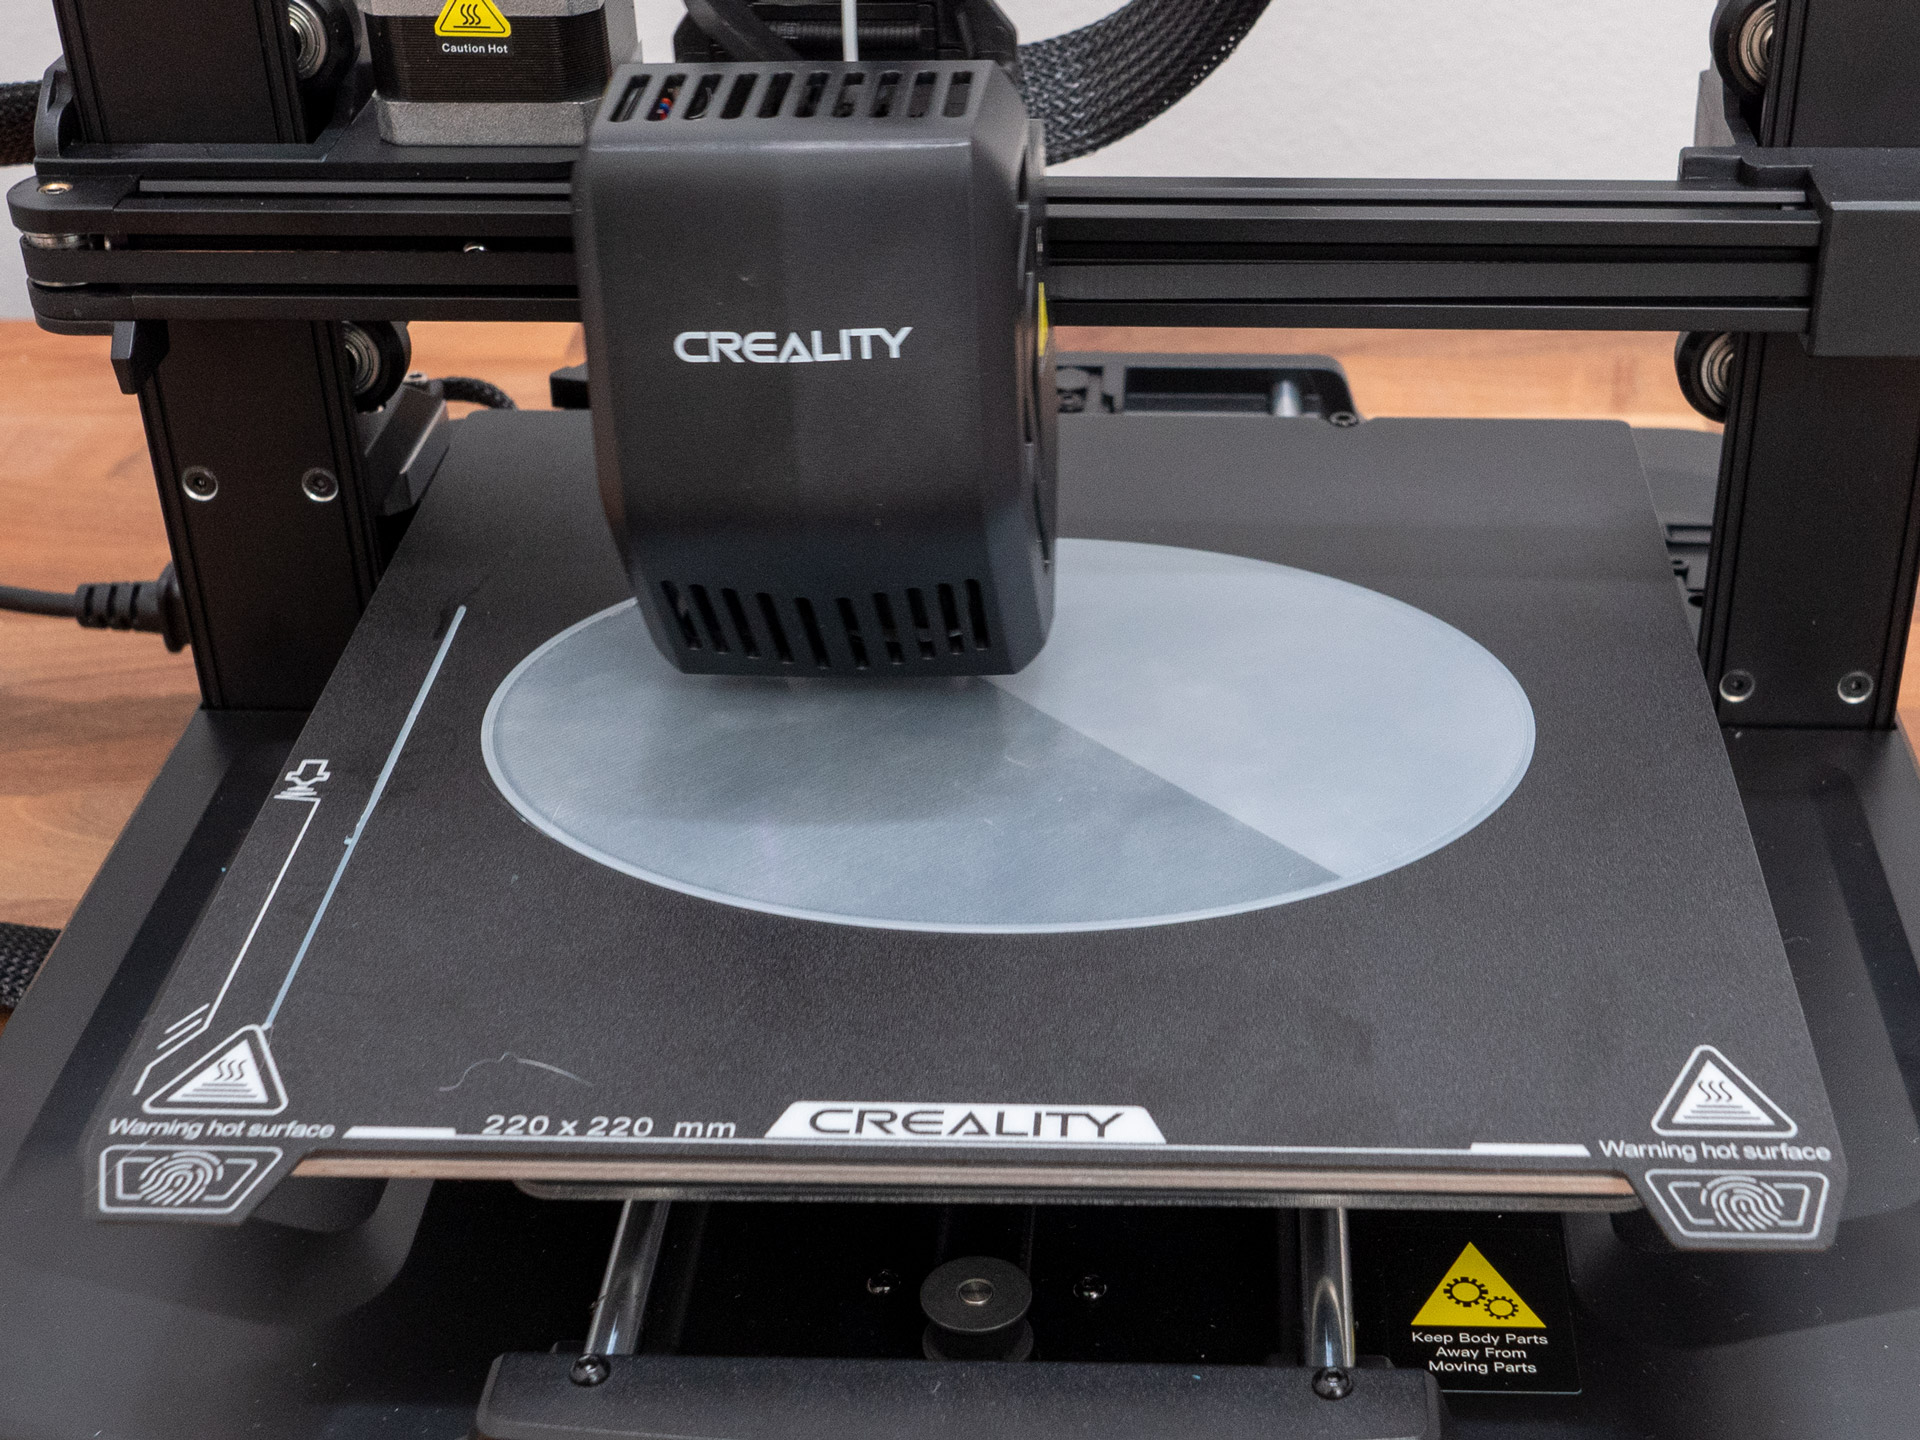
Automatic Bed Leveling
This is probably the most important feature for 3D printing beginners. We just have to click on the Level icon on the display, and the printer will auto level the bed so we can start printing right away and get a perfect first layer.
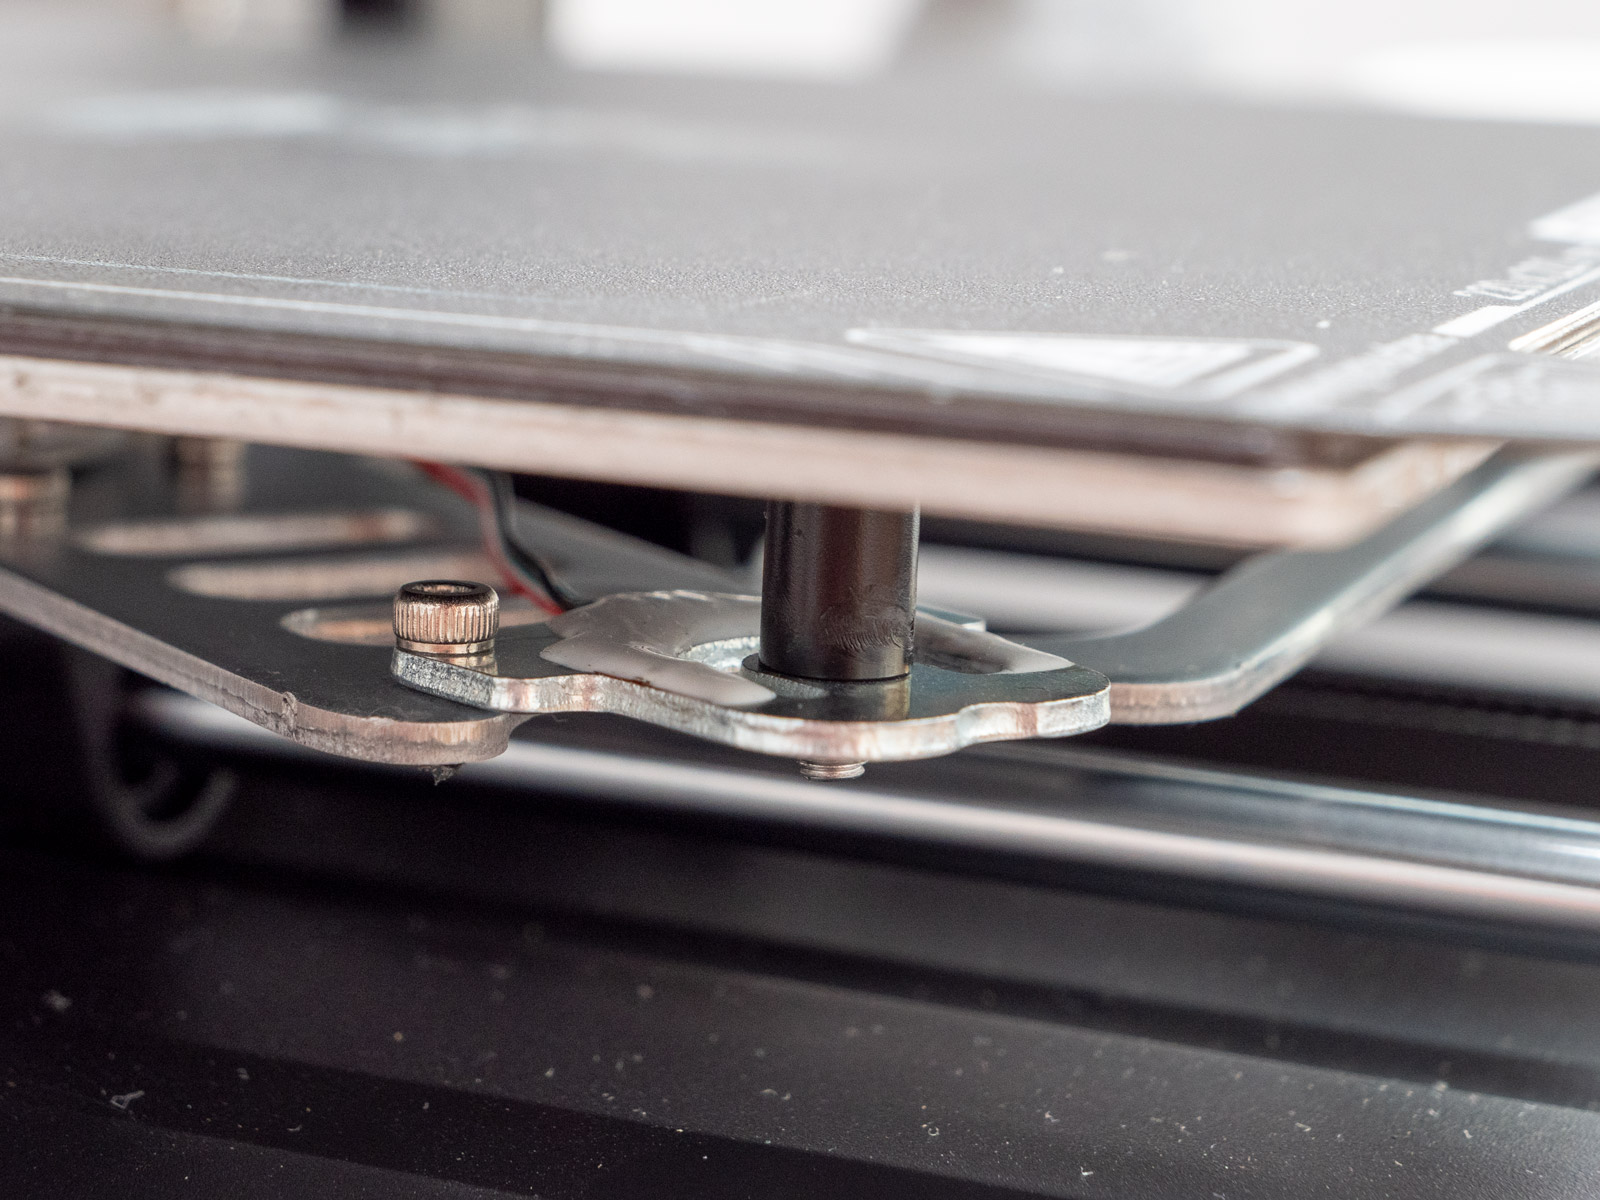
For getting that perfect first layer, the Creality Ender 3 V3 SE first calibrates the Z-offset with the help of a pressure of strain-gauge sensor. Under the front left corner of the print bed, there is a strain-gauge sensor which can detects deformation on the structure that is mounted on.
The printer moves the nozzle down until it gently touches the print bed, which is detected by the sensor, and according to it can properly position the nozzle or set the Z-offset.
Then the Auto Leveling process starts with the help of the Creality CR-Touch sensor.

It will tap 16 points across the print bed and create virtual mesh that will compensate for the inaccuracies of the flatness of the print surface.
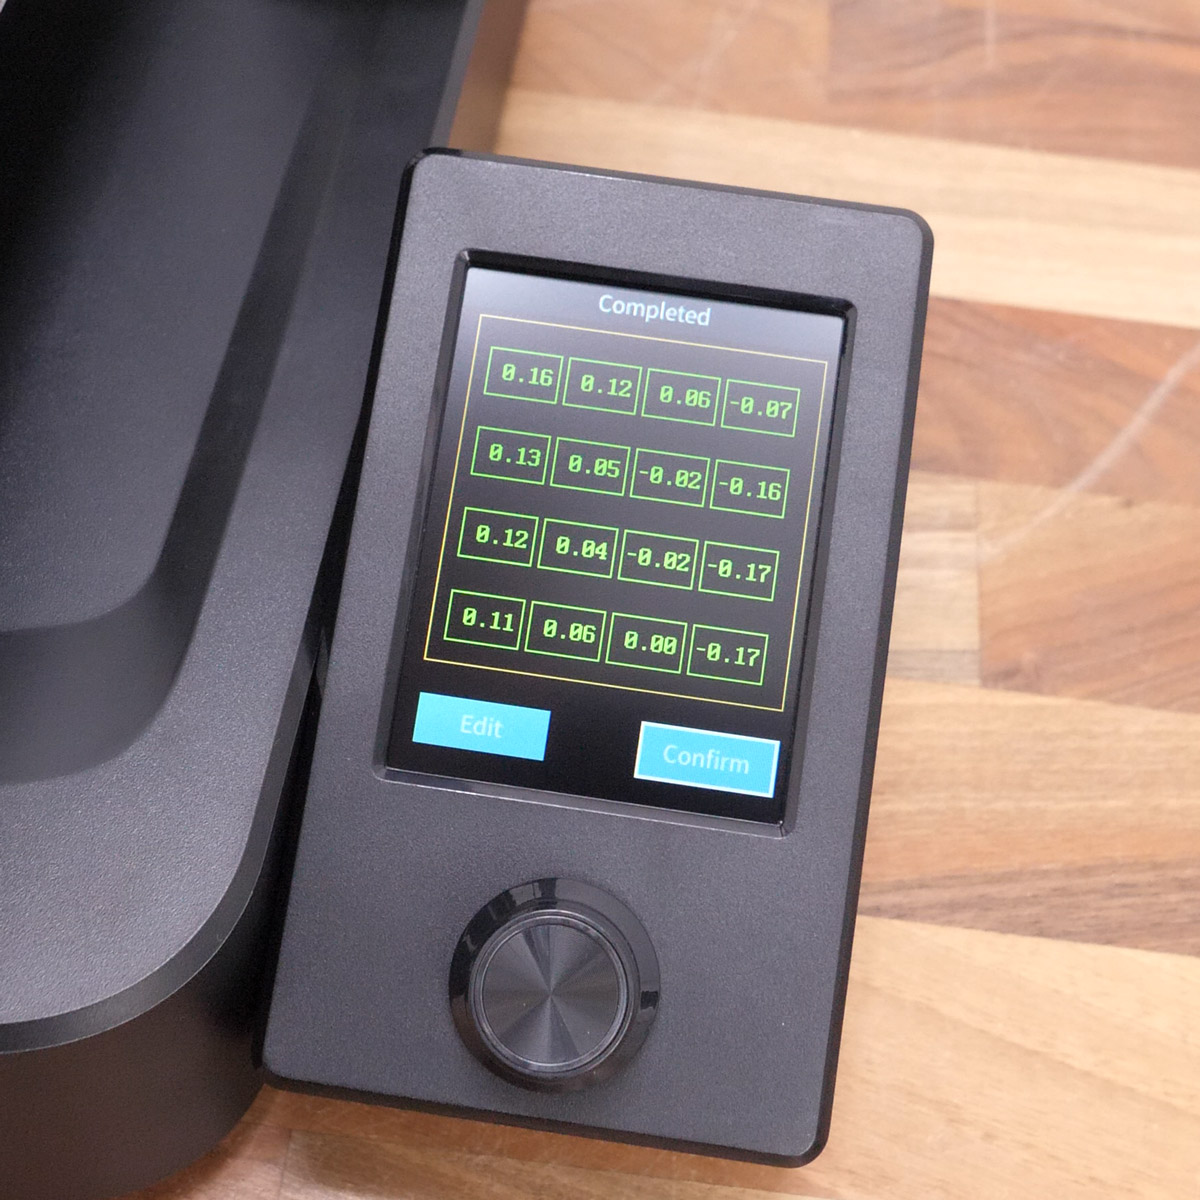
This will result in getting a perfect first layer, that will stick well and won’t create any elephant foot on the print.
Sticky Print Bed
The printing surface of the Ender 3 V3 SE is a removable PC-coated stainless steel sheet. It’s surprisingly sticky, even a bit too stick I would say. Luckily it bends well and we can easily remove even bigger prints.
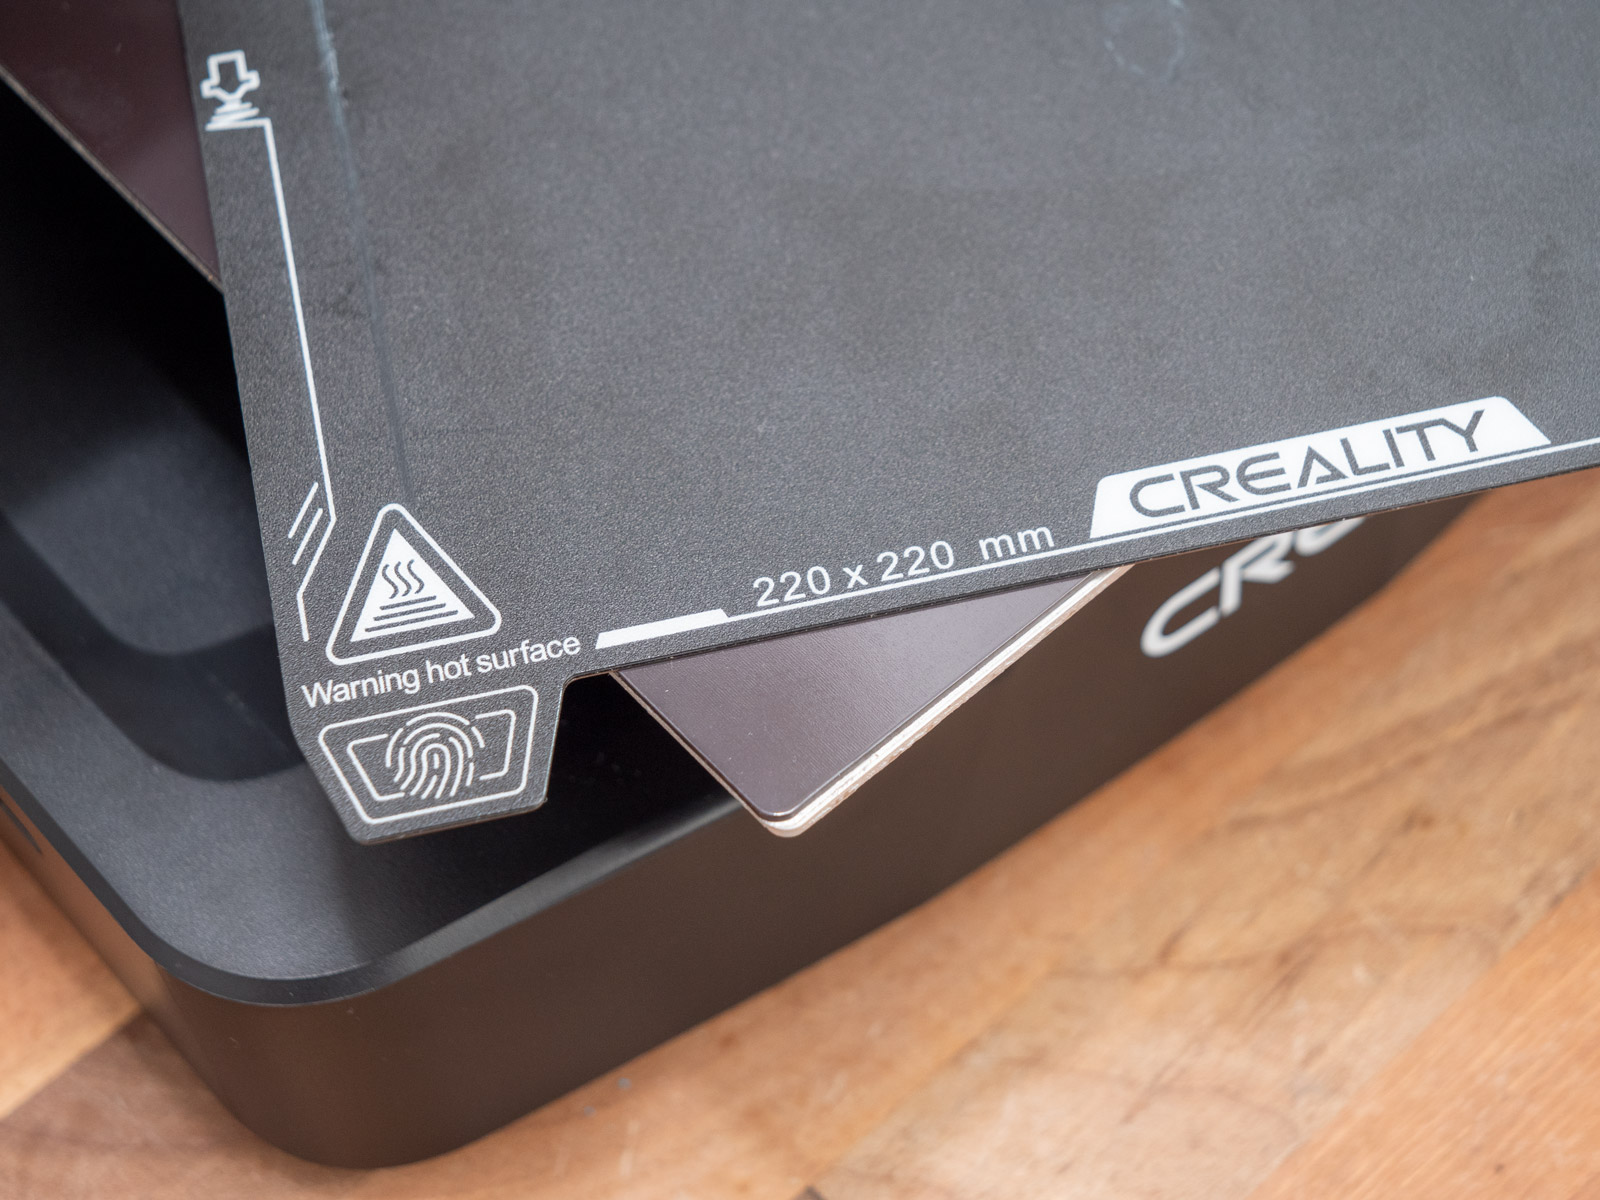
The design is well thought, with two protruding surfaces on the front for grabbing the surface. Also two cavities on the back which make it easier to position the plate back on the bed.
Unboxing and Assembling
The Ender 3 V3 SE comes relatively small box, well packed in with foam cushions, keeping it safe during shipping.
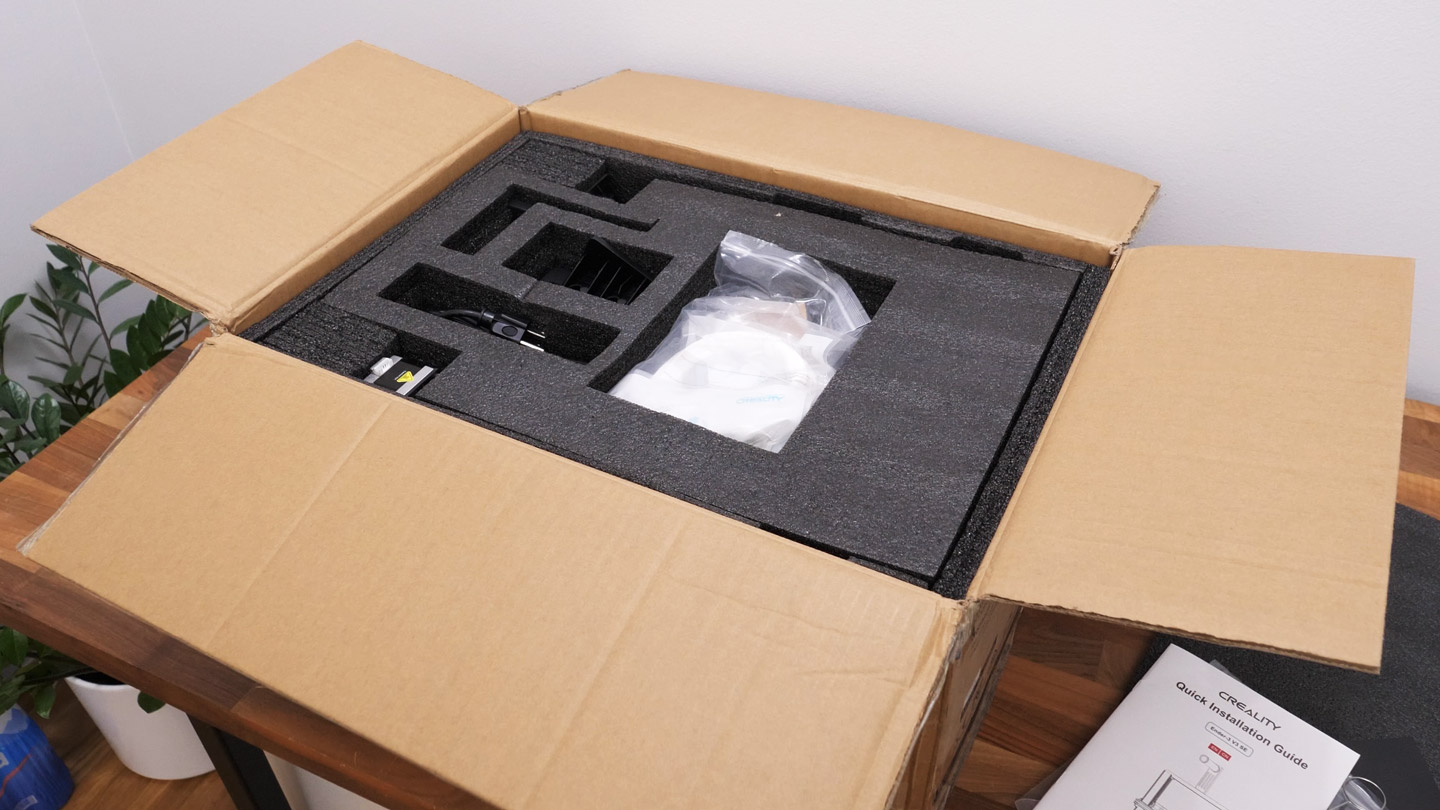
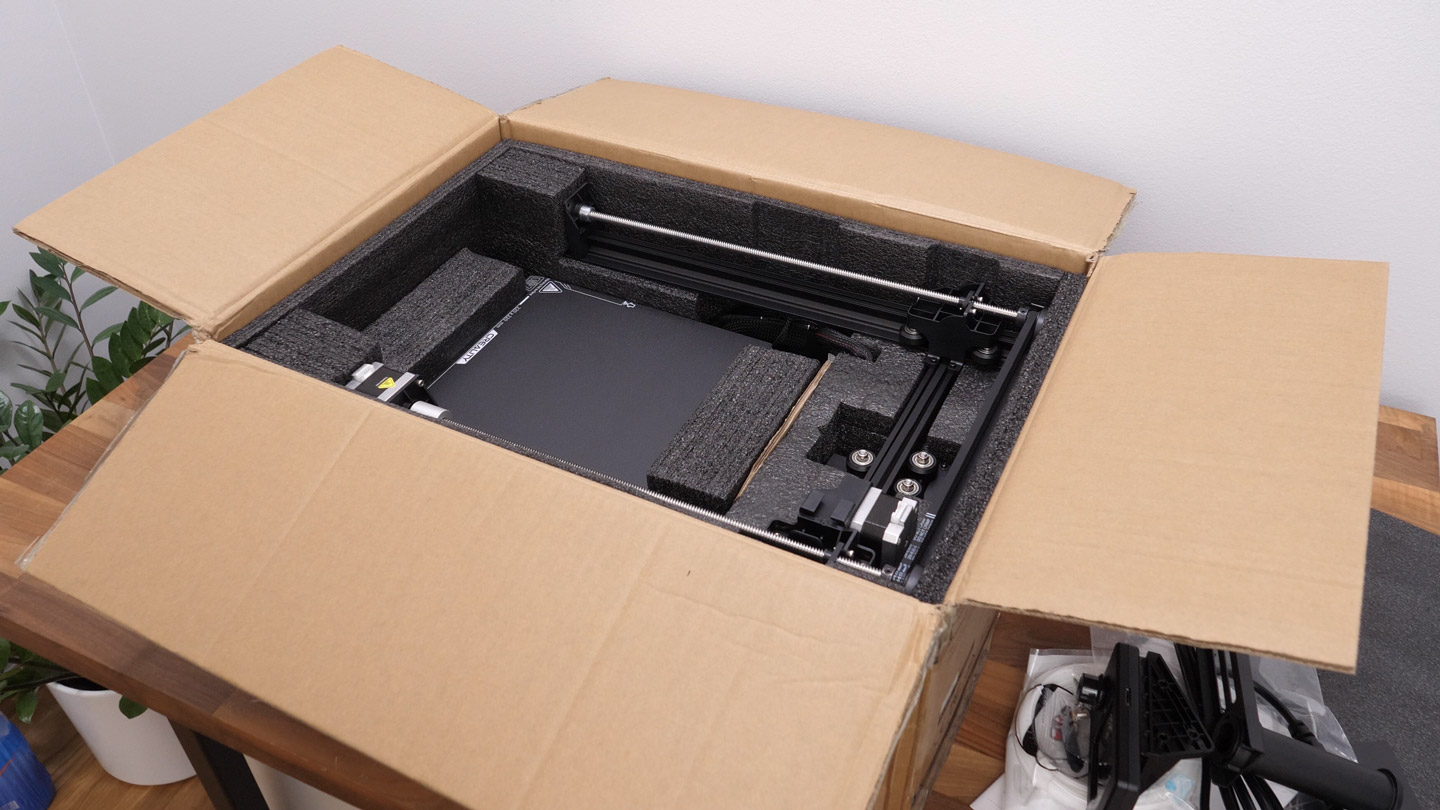
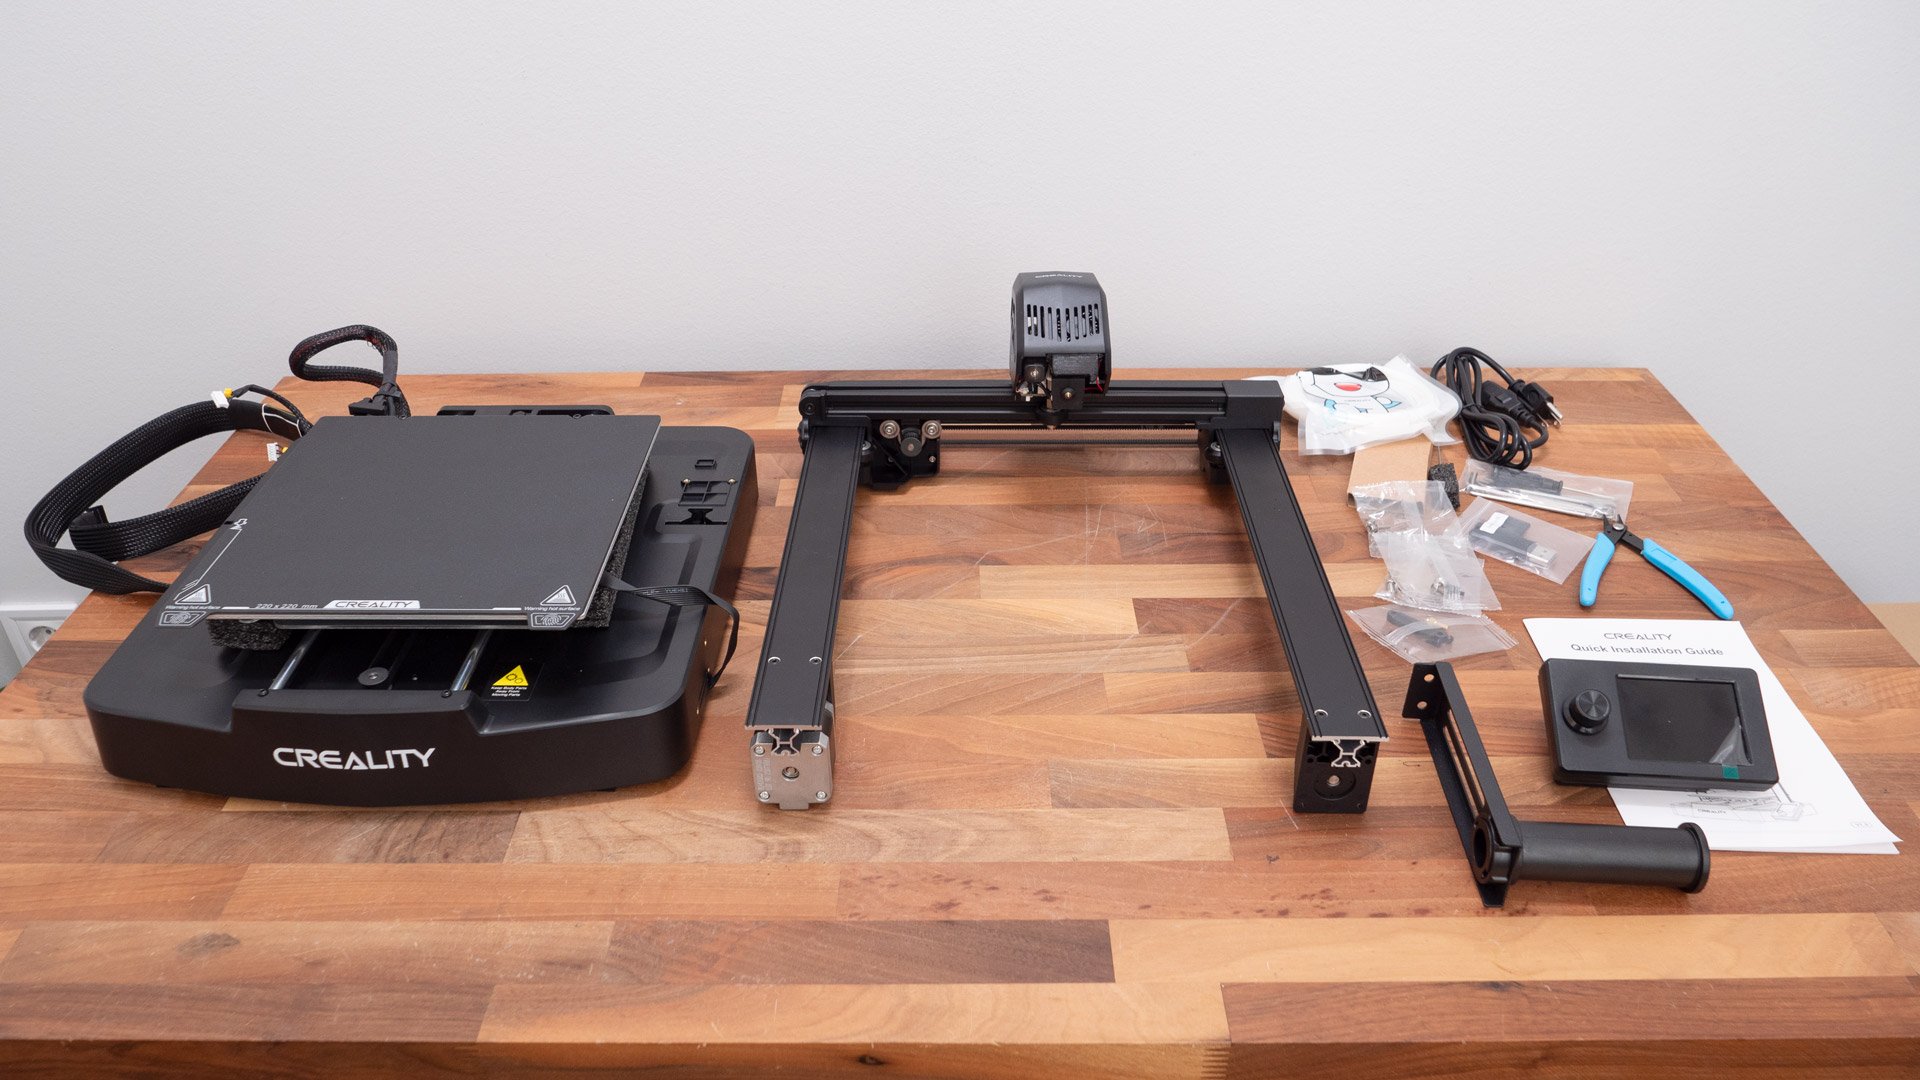
The package includes everything you need to assemble the 3D printer, and assembling it is like a breeze. It takes literally 10 minutes to fully assemble the Ender 3 V3 SE, just as advertised by Creality.
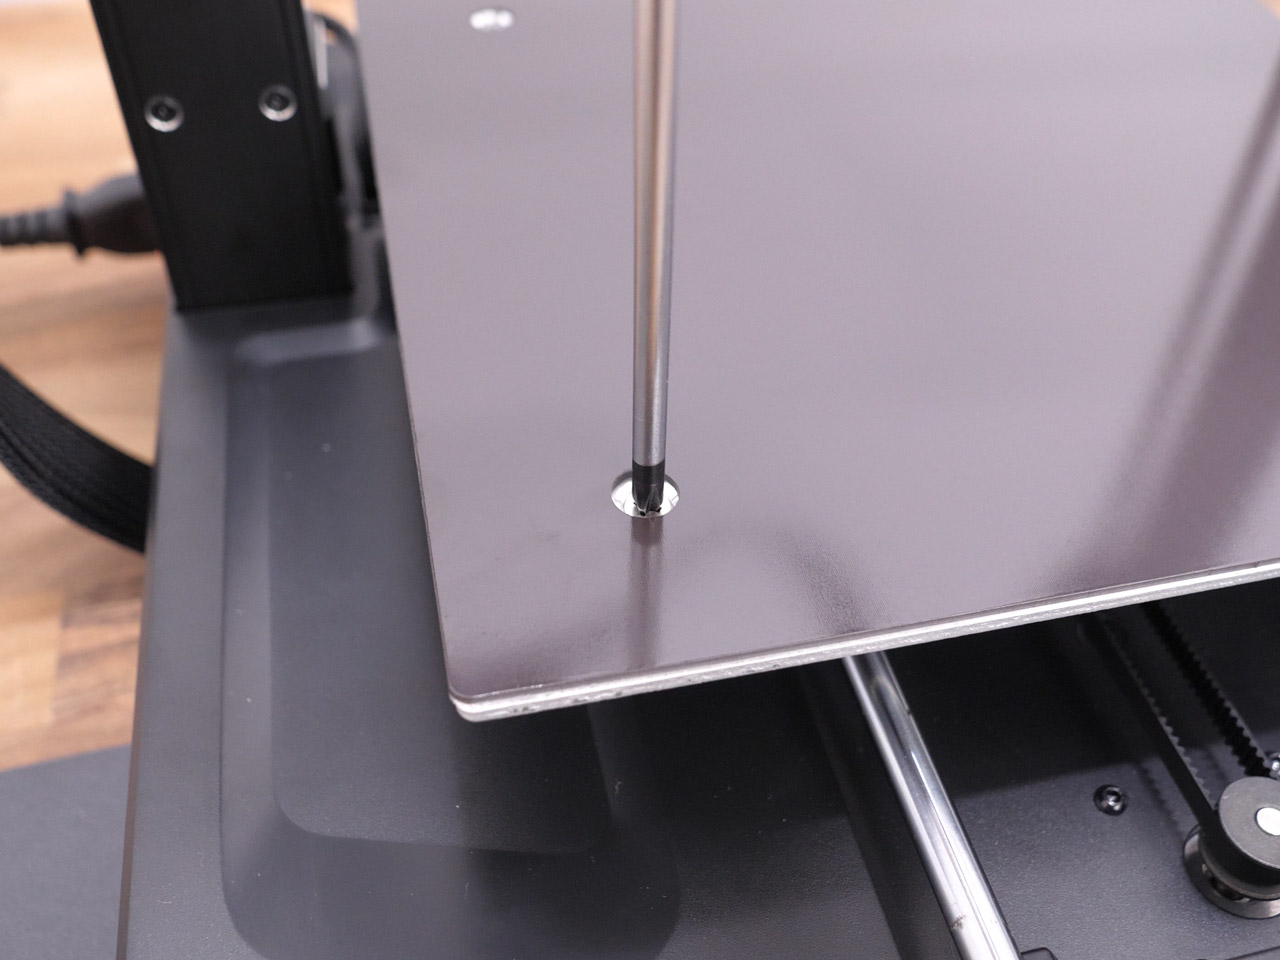
The base has slots to accept the Z-axis gantry and steadily hold it in place while securing it place with three M3 bolts on each side.
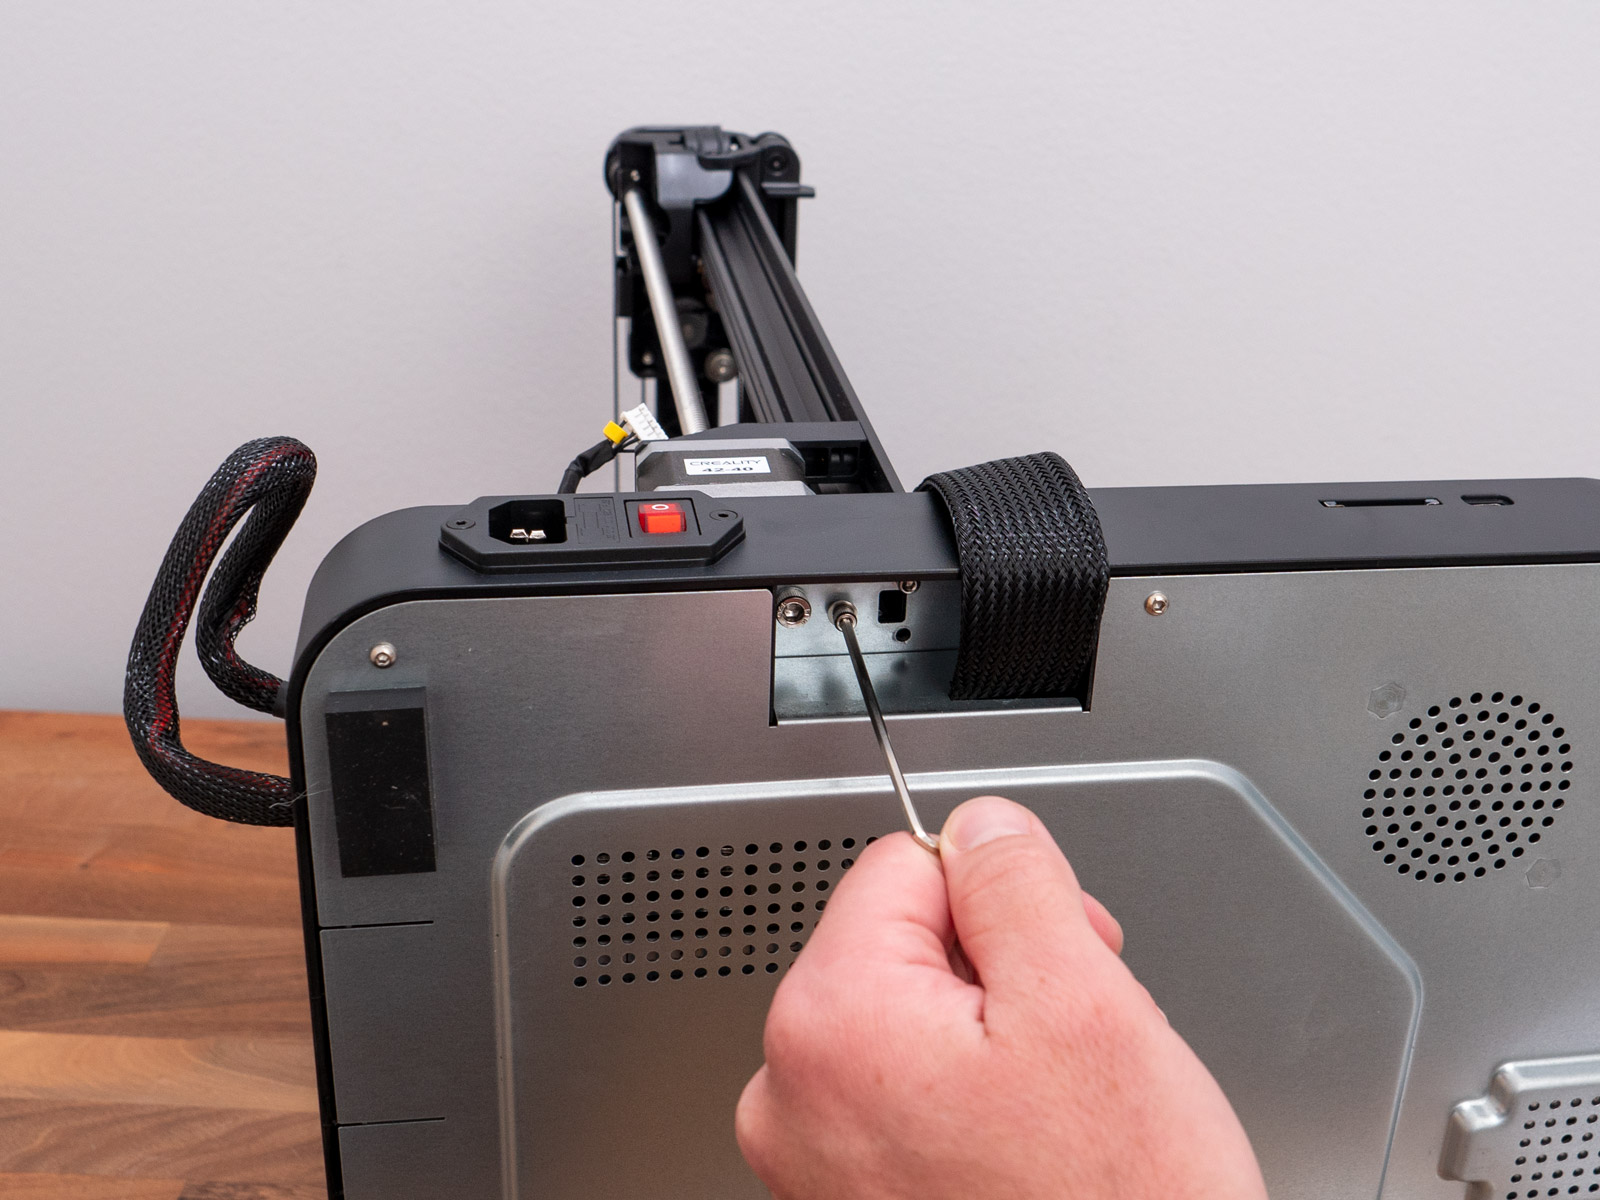
Then there are just few wire connections for the extruder, and Y and Z axis motors, and the display. Everything is nicely explained in the 3D printer manual.
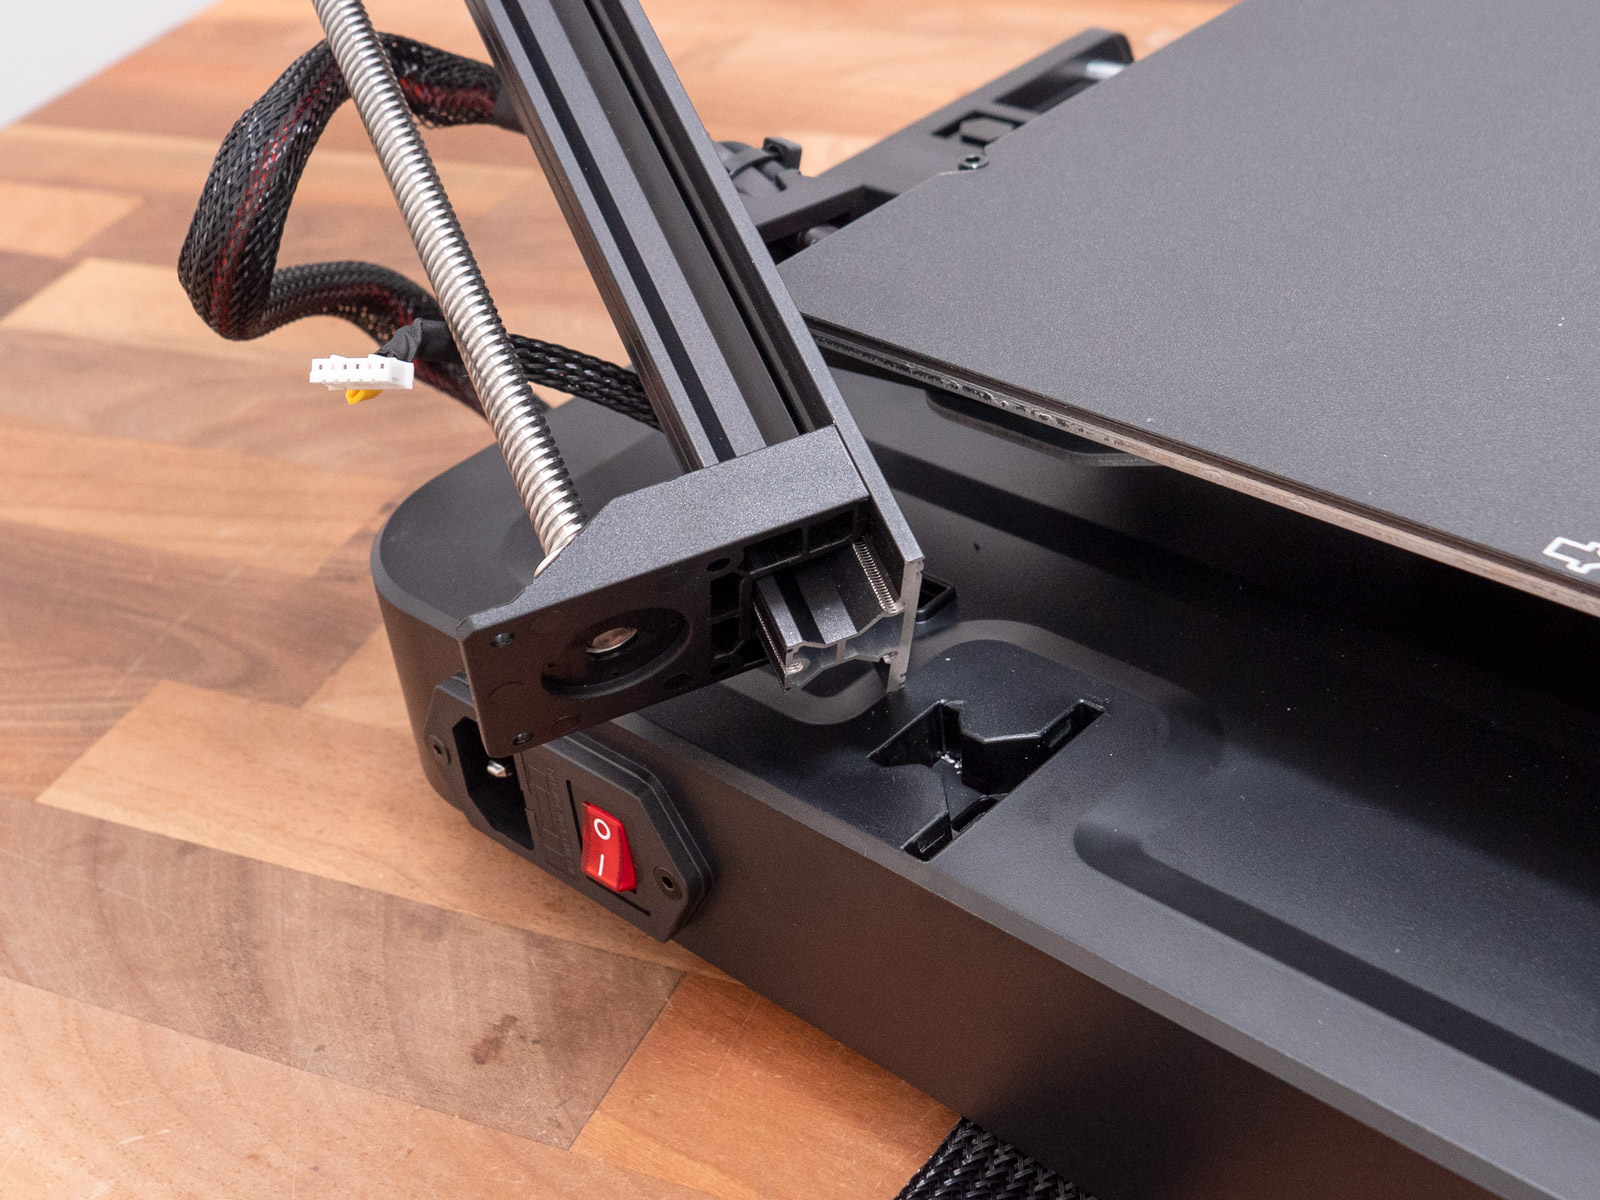
It’s worth mentioning here a small issue that I encountered while assembling the printer. The print bed was a bit loose, which scared me a bit, but it was an easy fix. I just had to tighten the four bolts located under the removable print print surface.
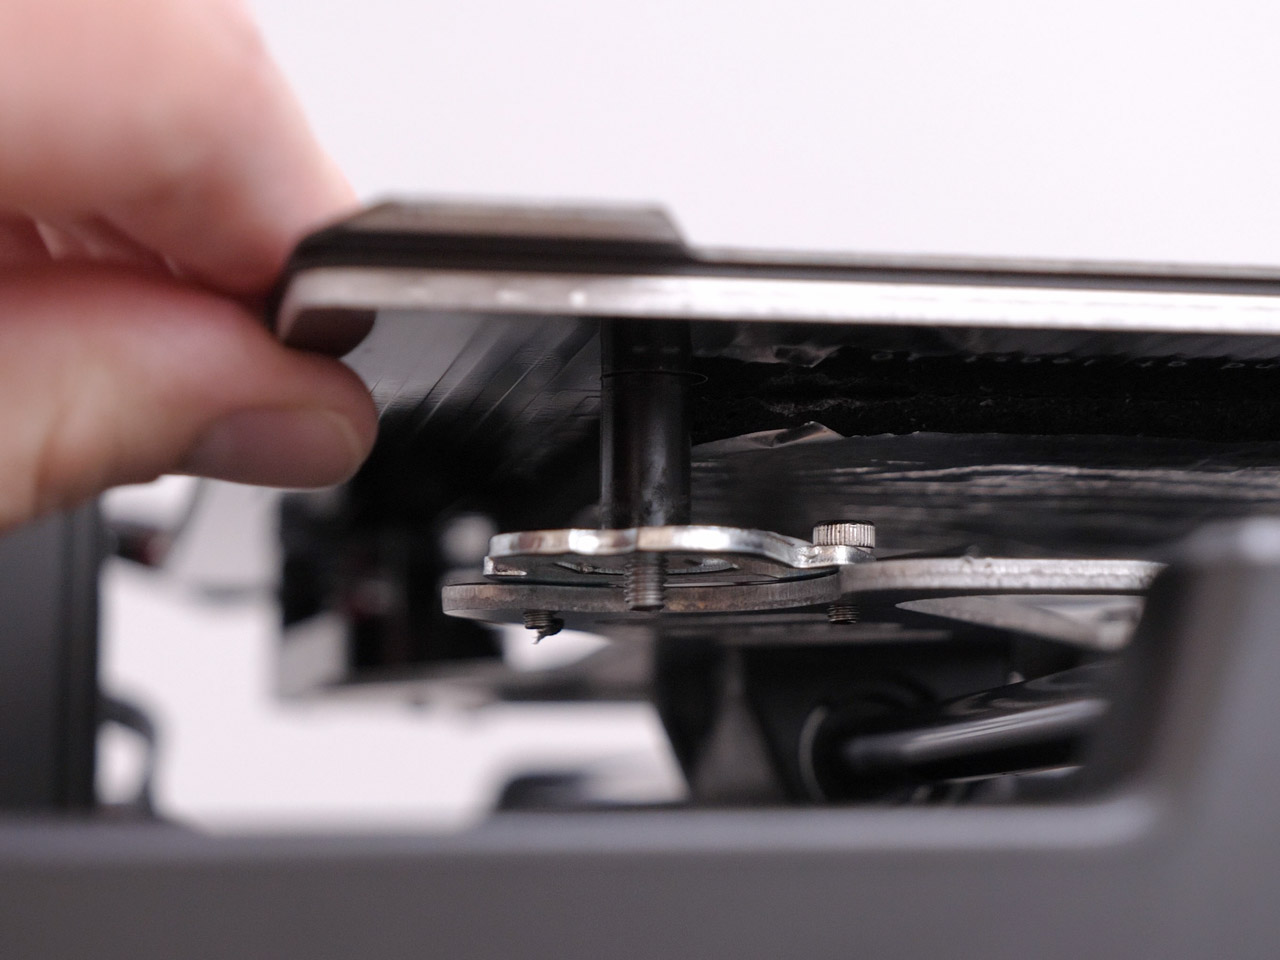
Make sure you check this on your 3D printer and do this easy fix if it’s there, as it would affect print quality and I have seen other people reported that issue as well.
User Interface
Setting up the printer is a breeze. We just have to power it up, select a language and we are ready to dive into the wonderful world of 3D printing. The LCD screen interface is so clean and intuitive.
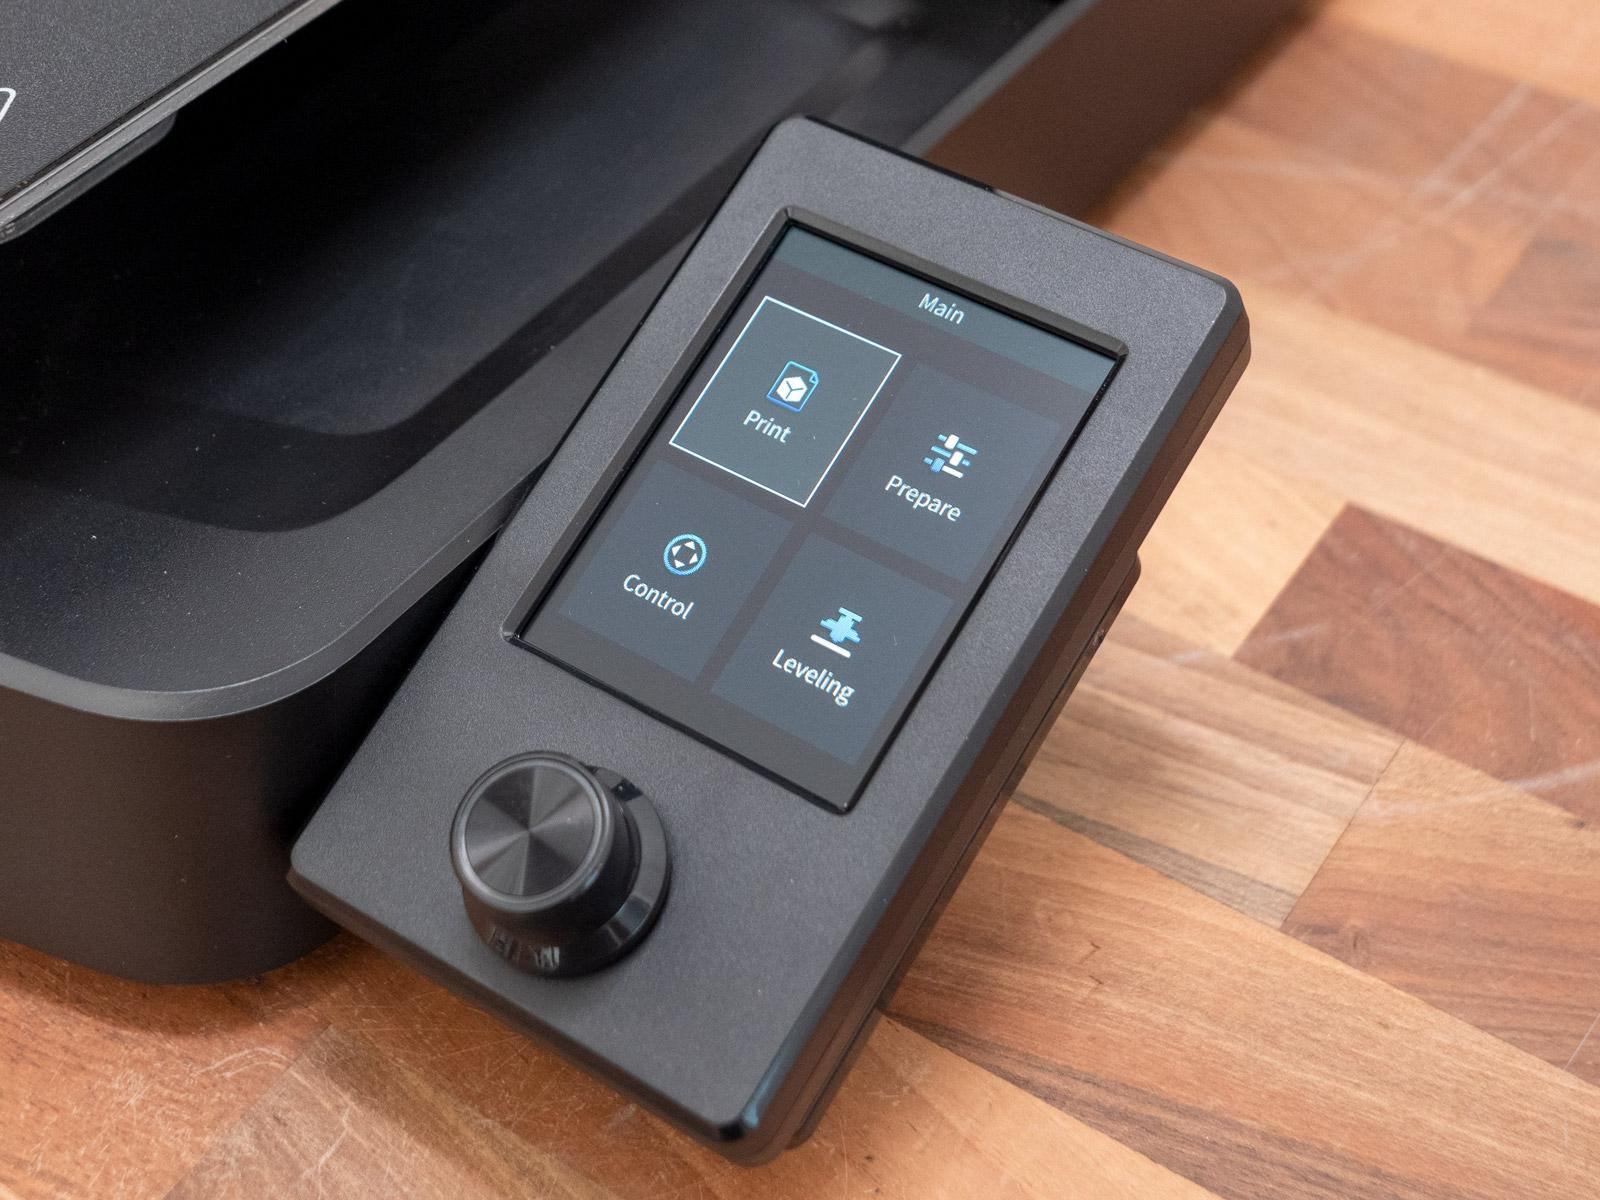
Although it’s not a touch display and it has a single rotary knob, it has all the information you need, it has decent color graphics and it’s fast. The only missing this I would say is a dedicated back button. That would make navigating faster through the menus, but it’s not a big deal of course.
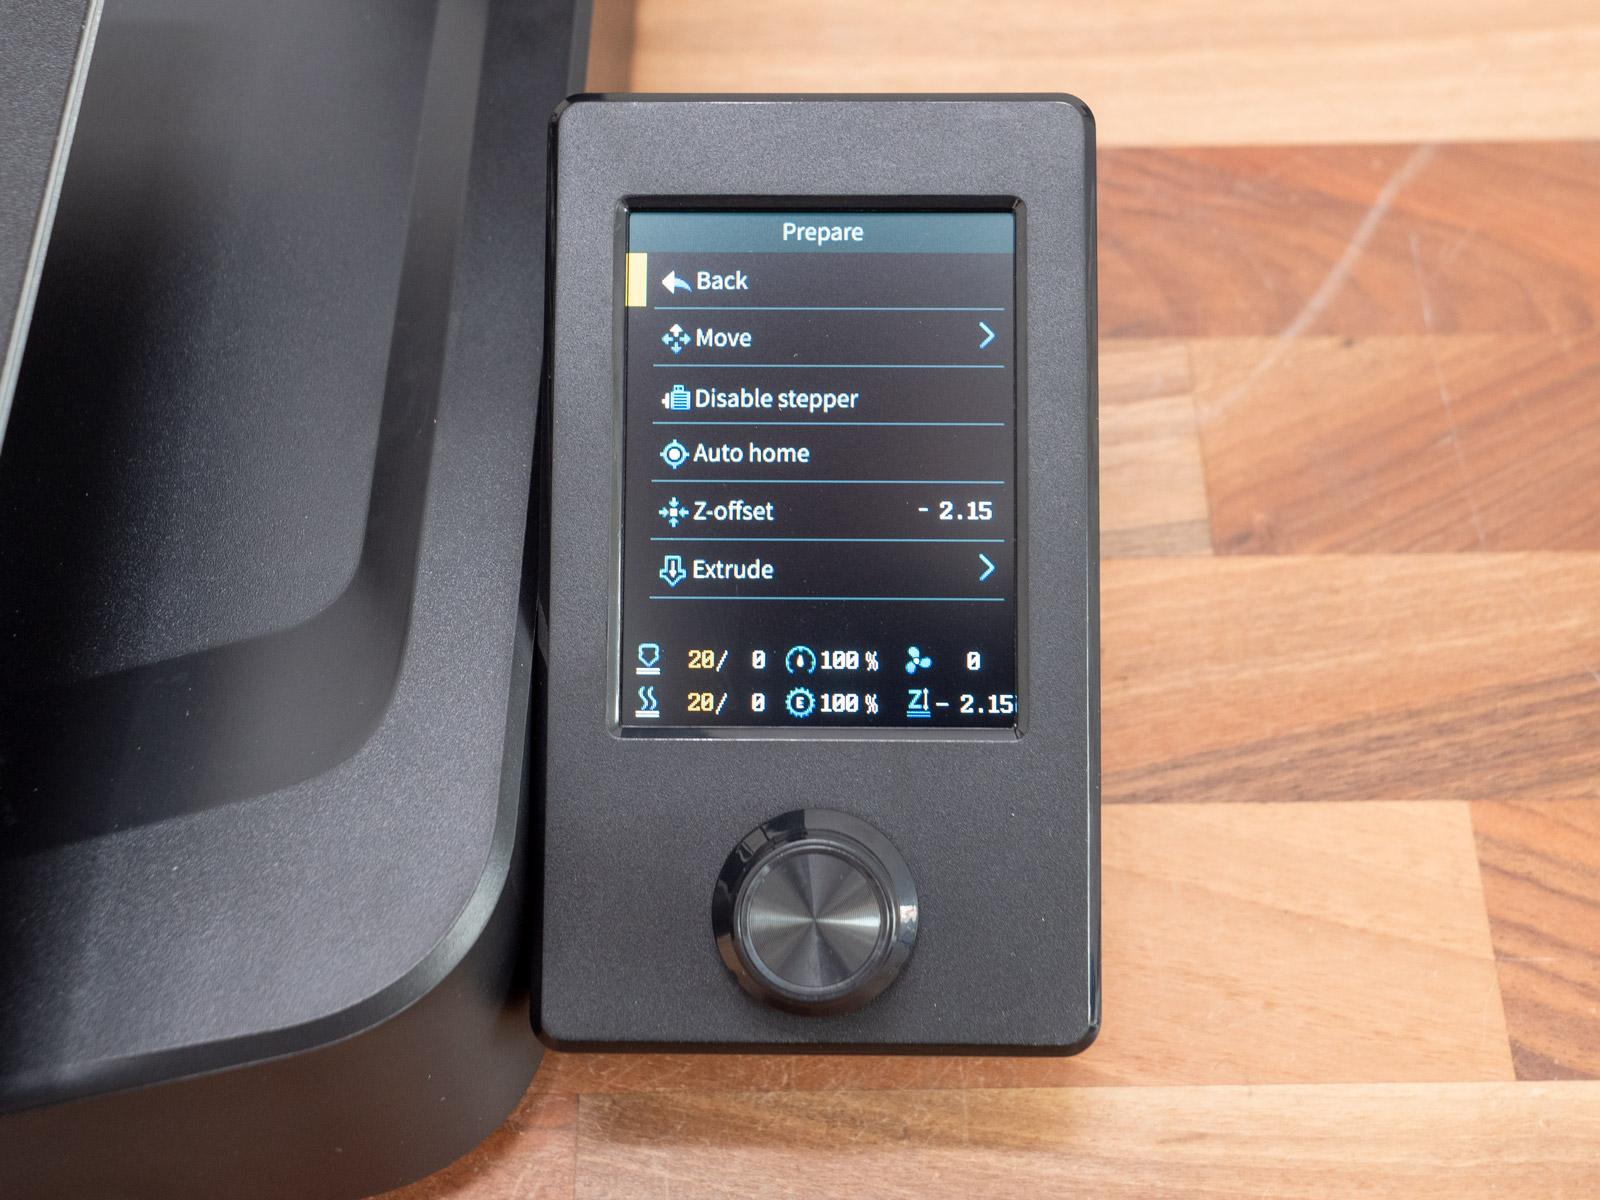
Initially, we have to run the Level process from the home menu. The printer will perform the Z-offset and the auto leveling of the bed, and we are ready to start 3D printing.
For loading the filament, we should click on the Prepare icon from the home menu, and then select Preheat. The temperature is displayed on the bottom right corner of the screen. Once it reaches the desired value, we can simply insert the filament in the print head while holding the lever on the top for releasing the extruder gear set. The same procedure goes for unloading the filament.
To load the print files, the printer uses full-sized SD card, which is simple as it gets.
Software
The printer comes with a copy of Creality Print, a slicer that Creality has been working on for some time. The slicer has ideal profiles for any Creality 3D printer and I found it has a good user experience.
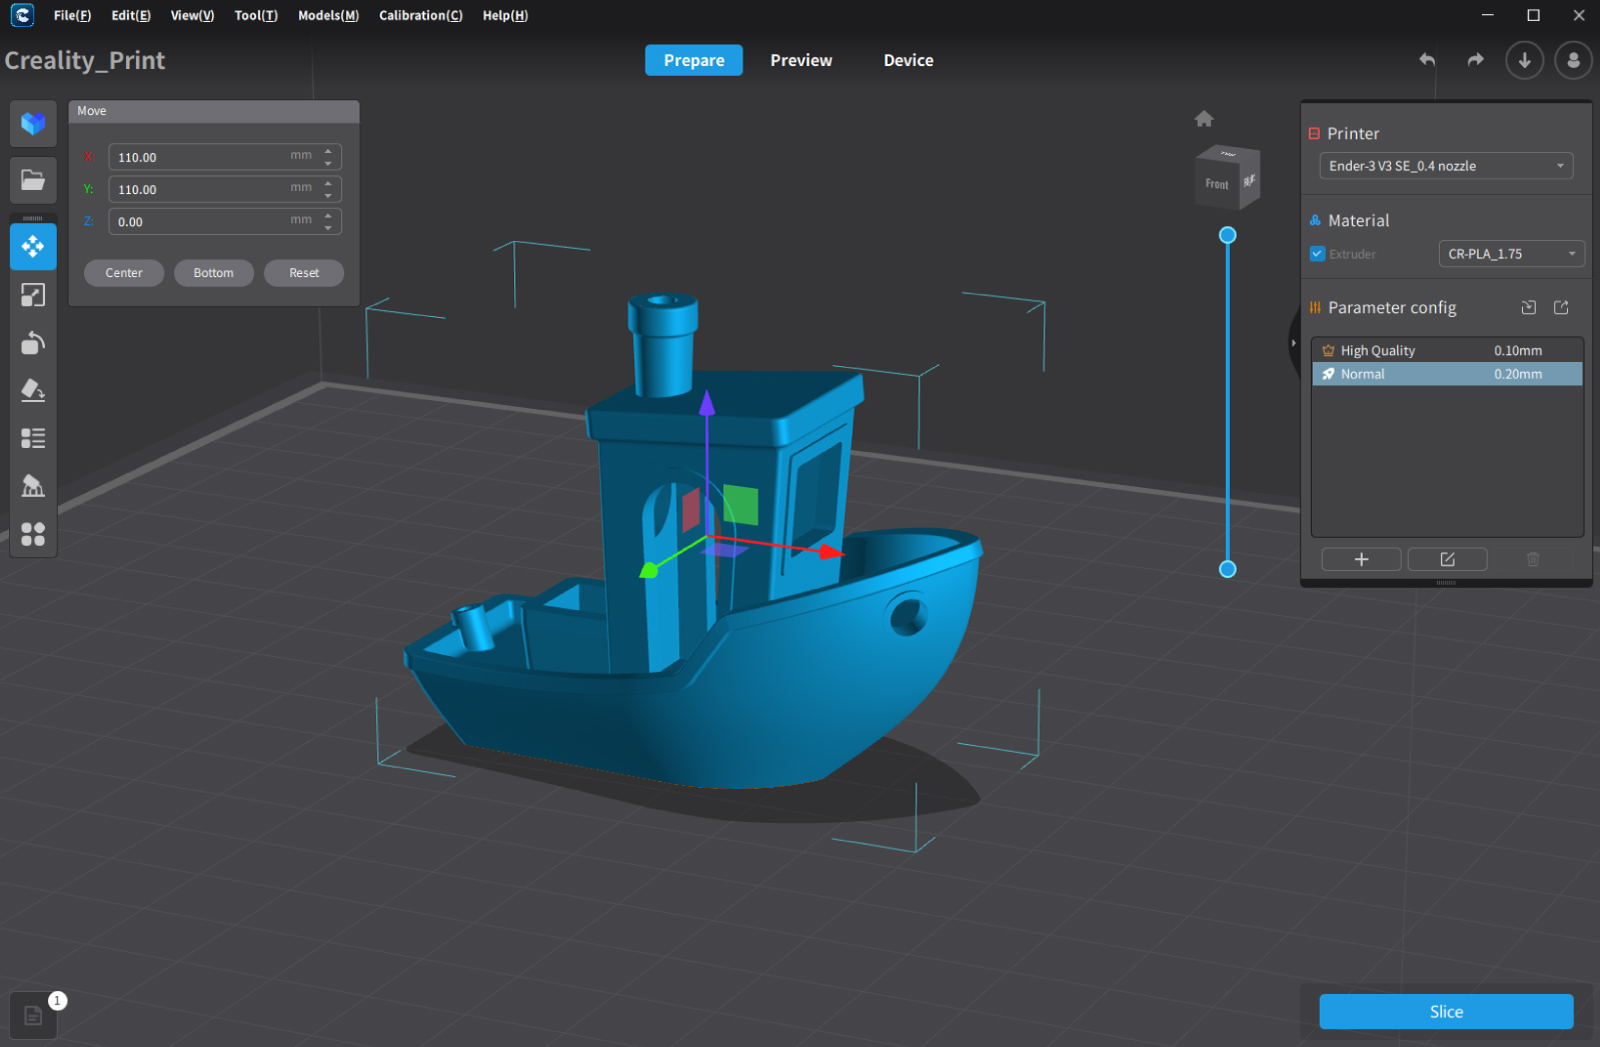
Of course, we could also use Cura or PrusaSlicer, but we will have to make our own profiles to get the most of out the 3D printer.
Print Quality Tests with Creality Ender 3 V3 SE
All right, this is the most important part of this whole review, to see the print quality and speed the Ender 3 V3 SE 3D printer offers. I did quite some printing tests and I was simply blown away by the results. It prints really well and detailed even at higher speeds.
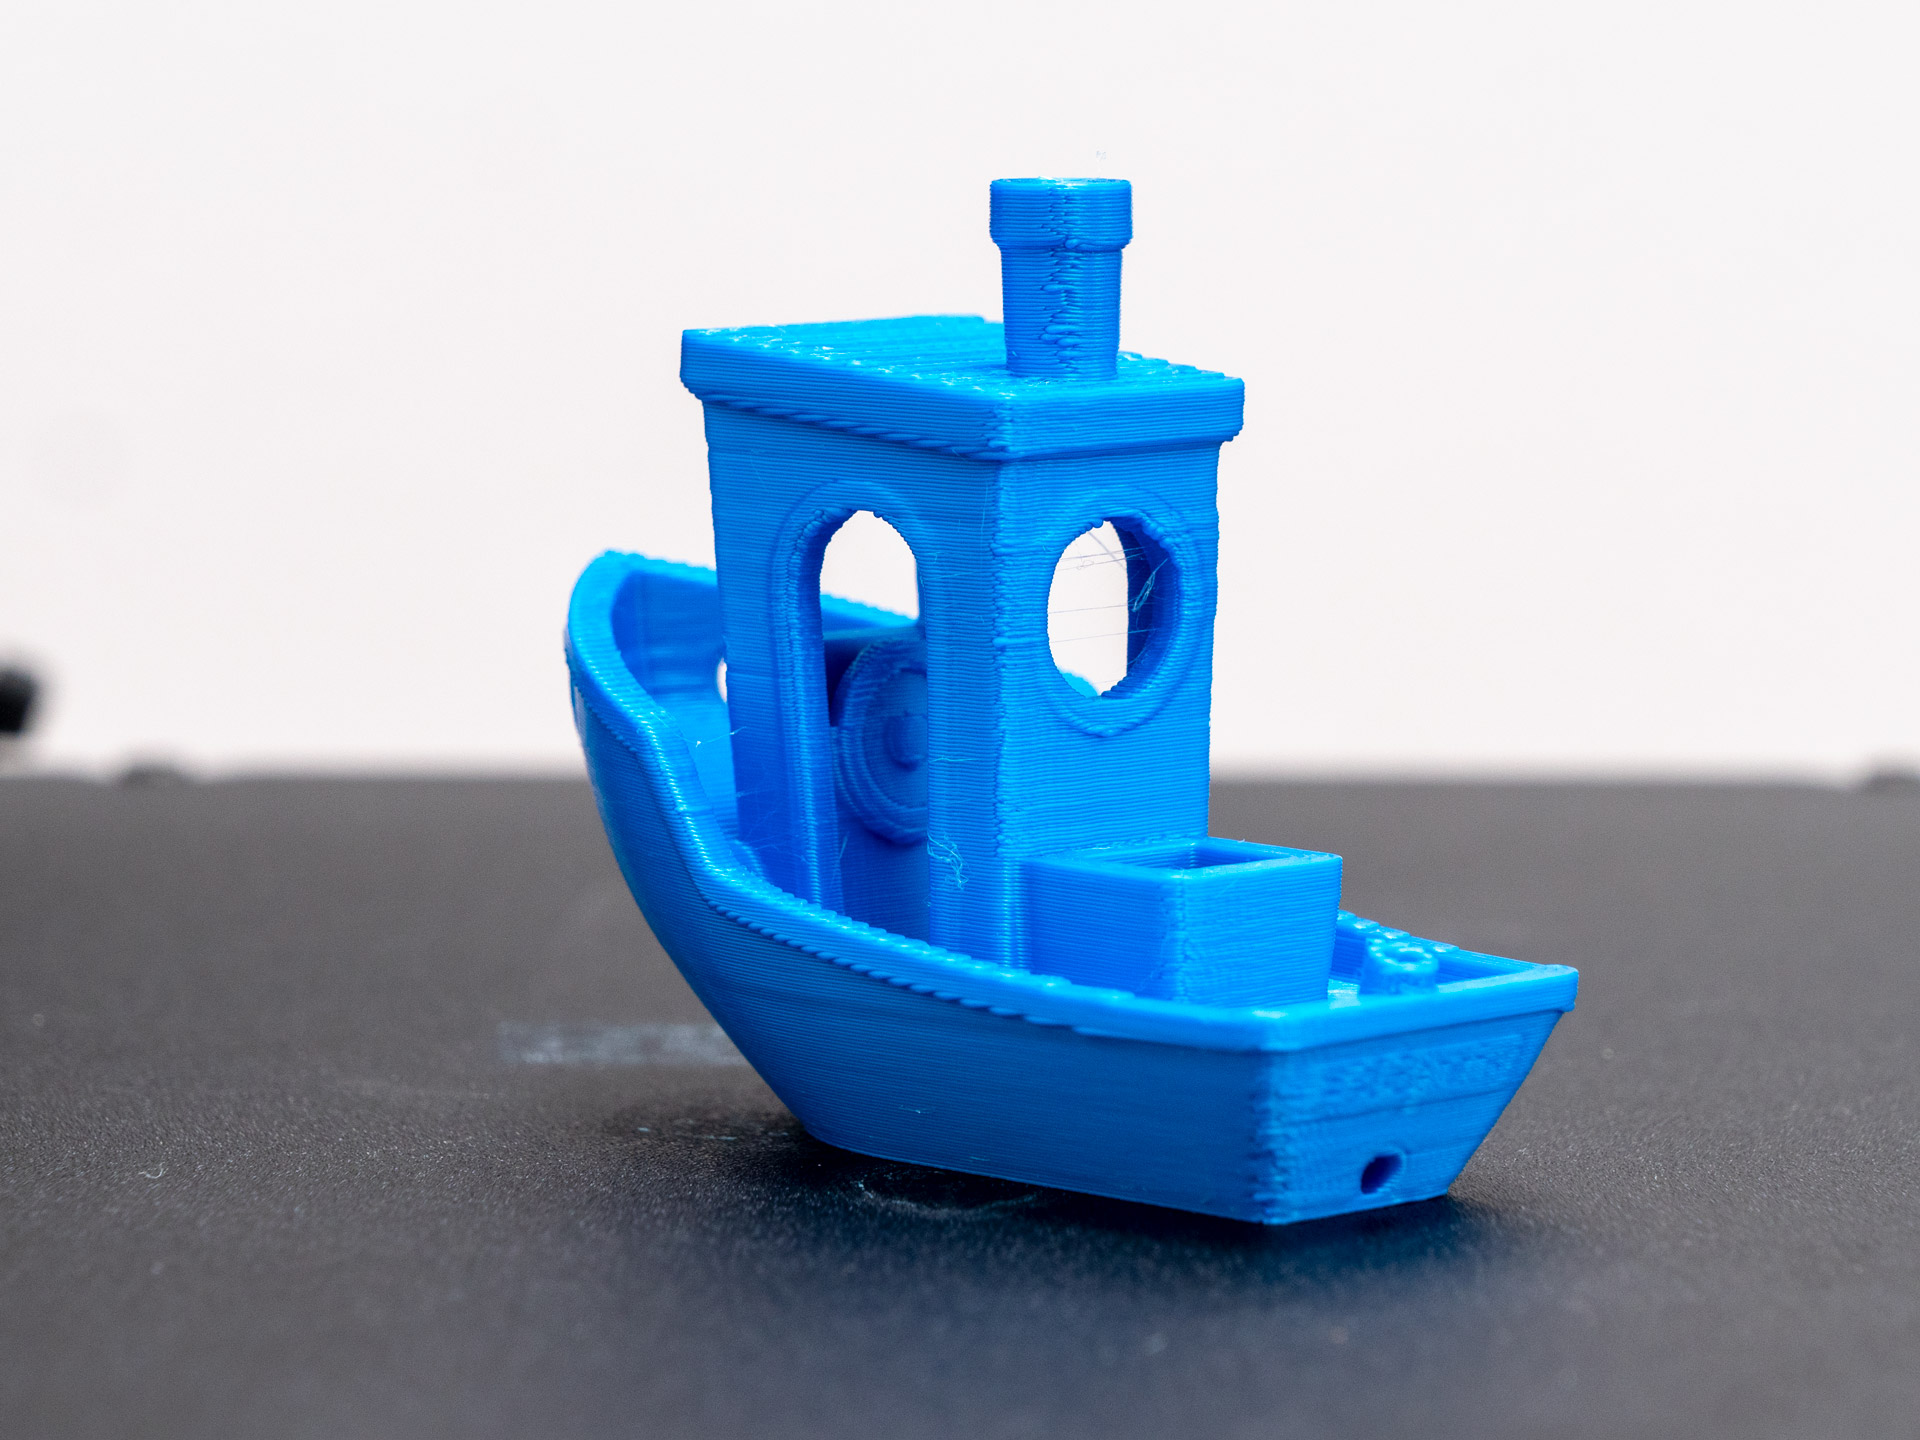
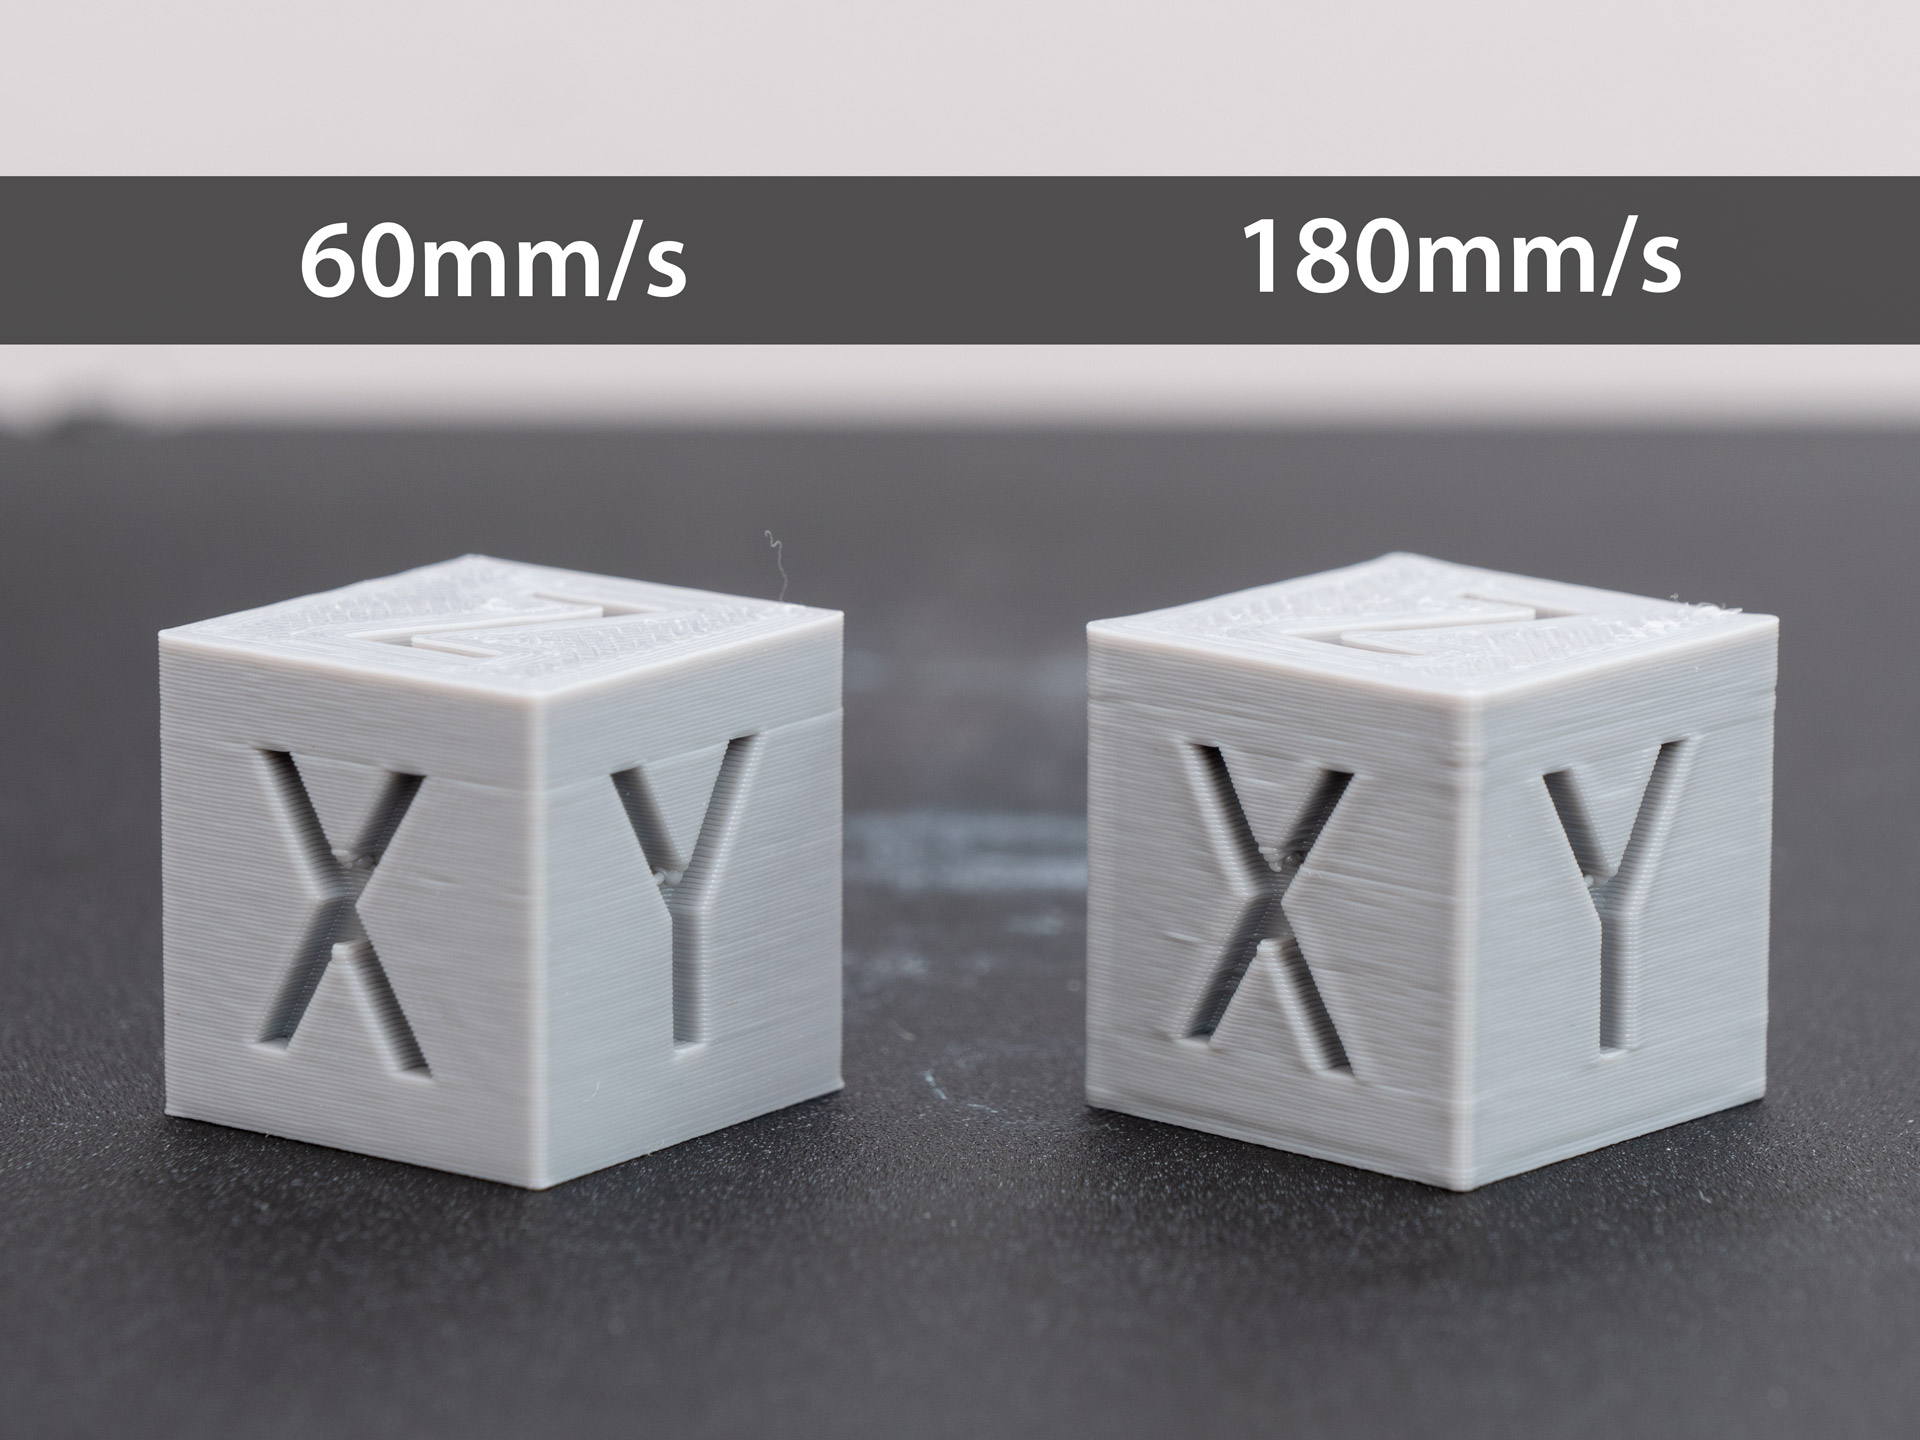
3D Benchy
Here are the classic Benchy print results that I got. First I printed it with 60mm/s speed in order to get the maximum quality of the 3D Printer. It took 1 hour and 10 minutes to finish it with 2 walls, 10% infill, 0.2mm layer height. The results were phenomenal.
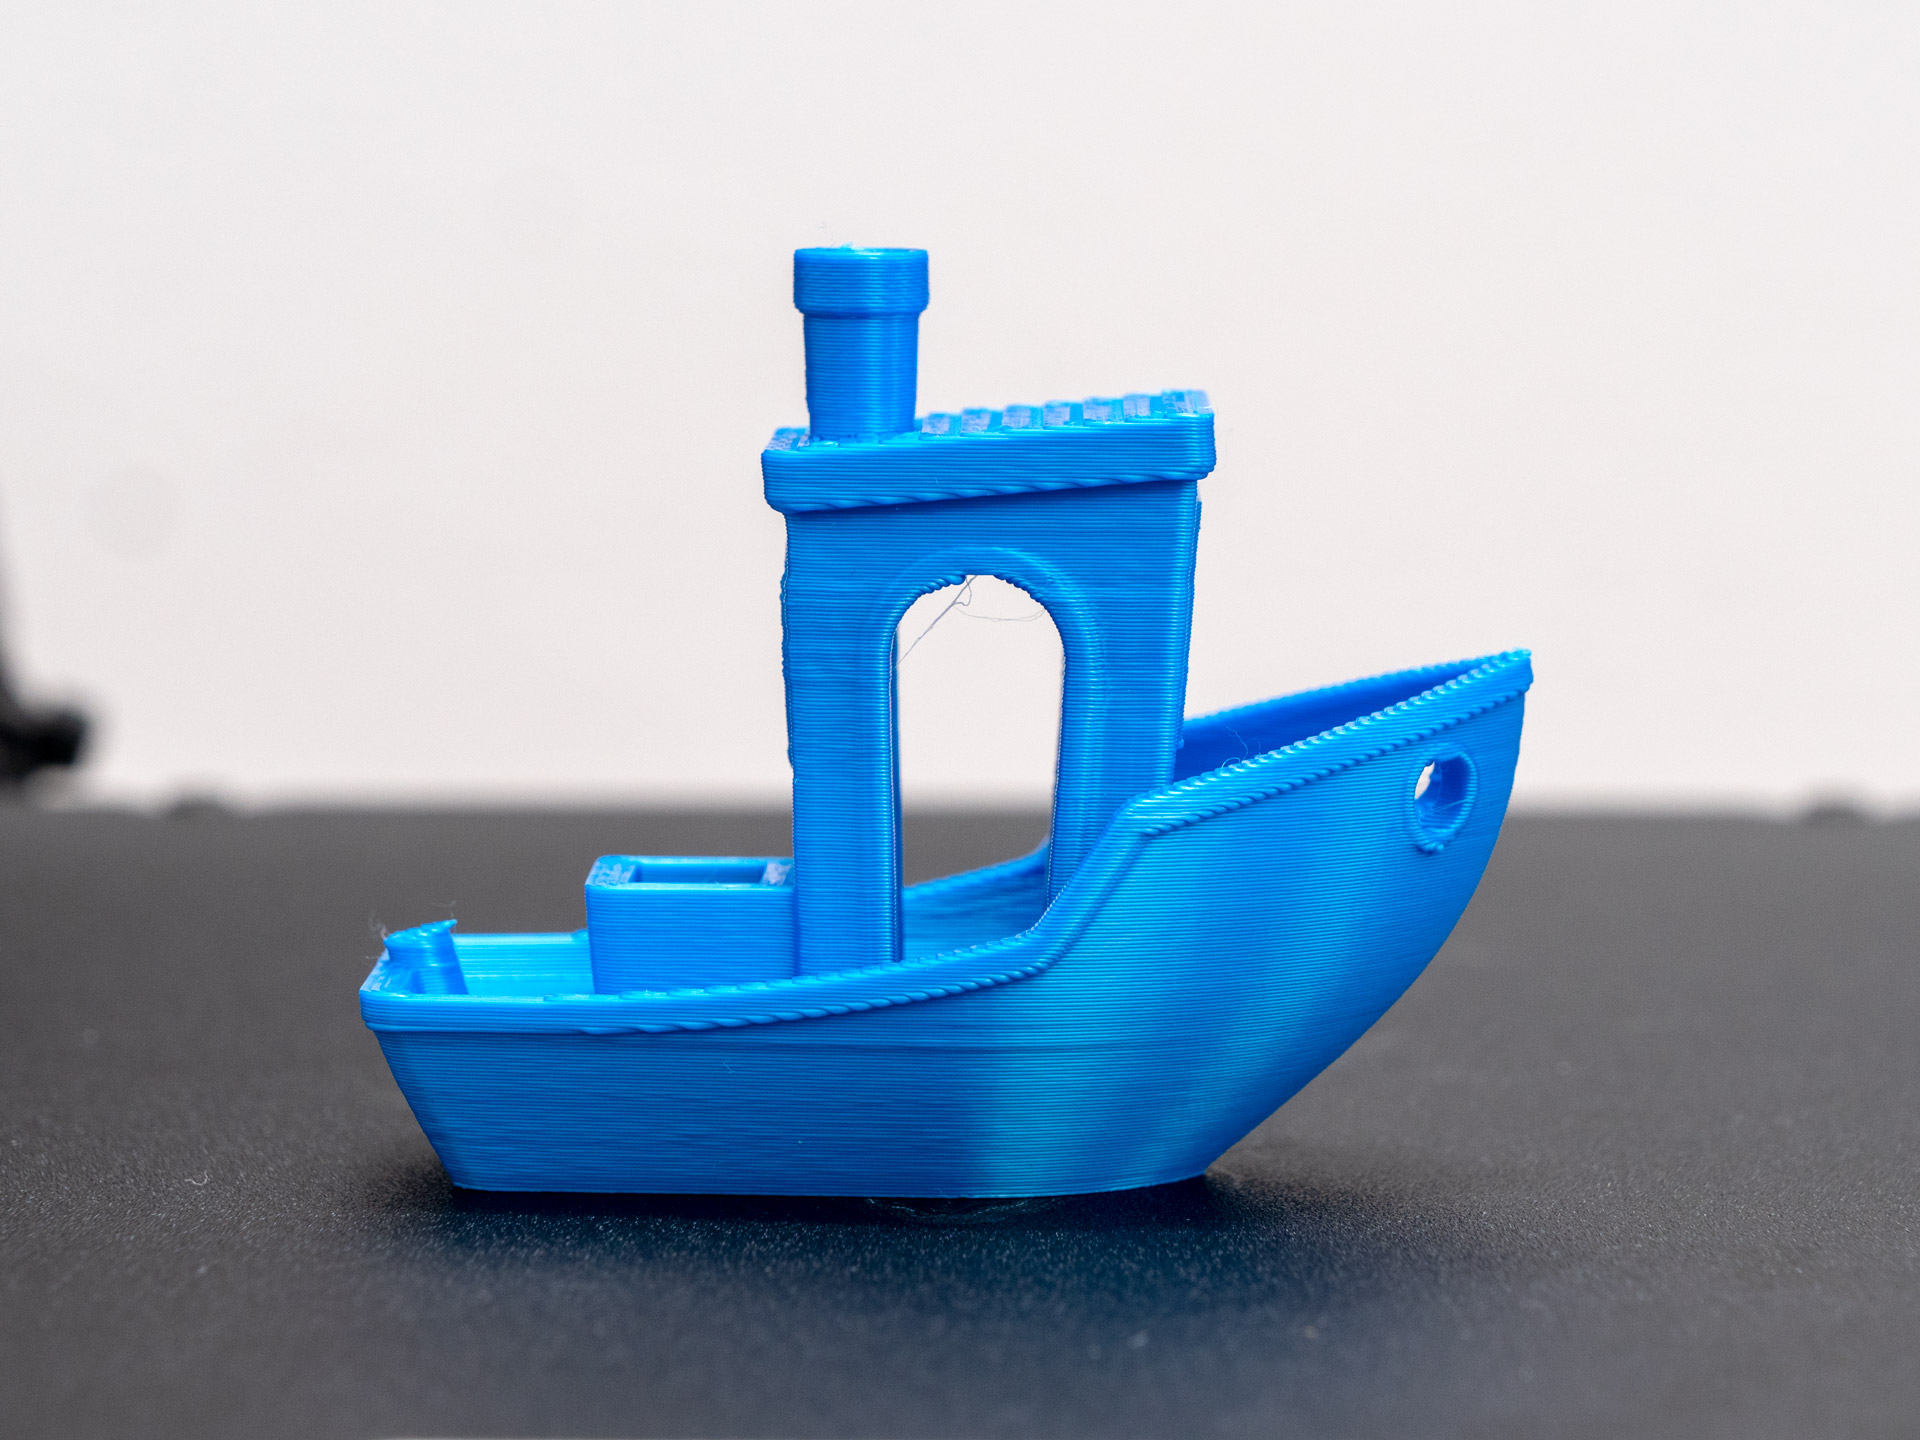
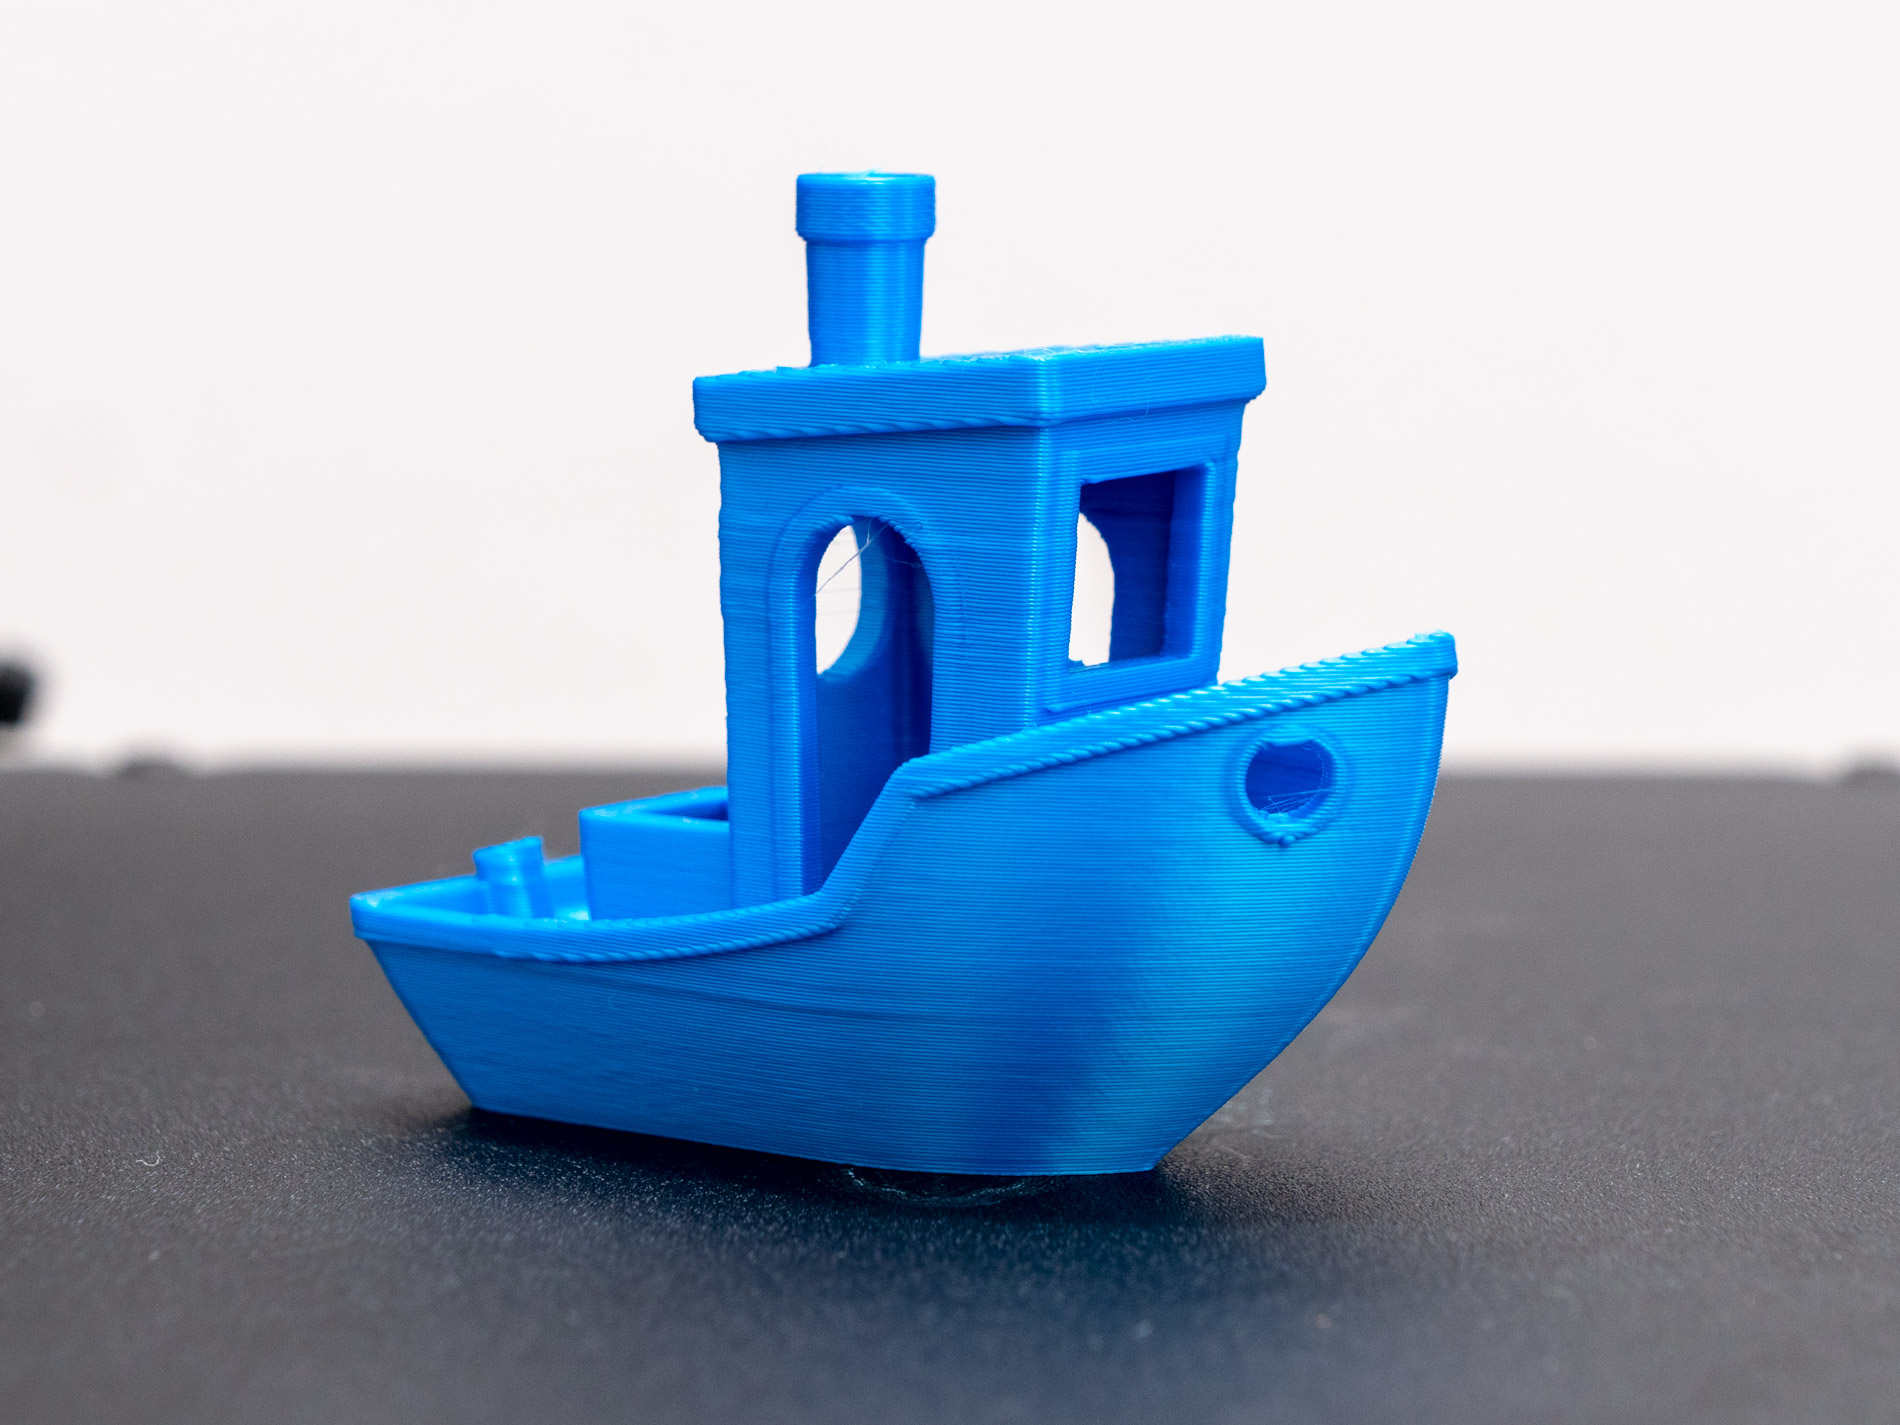
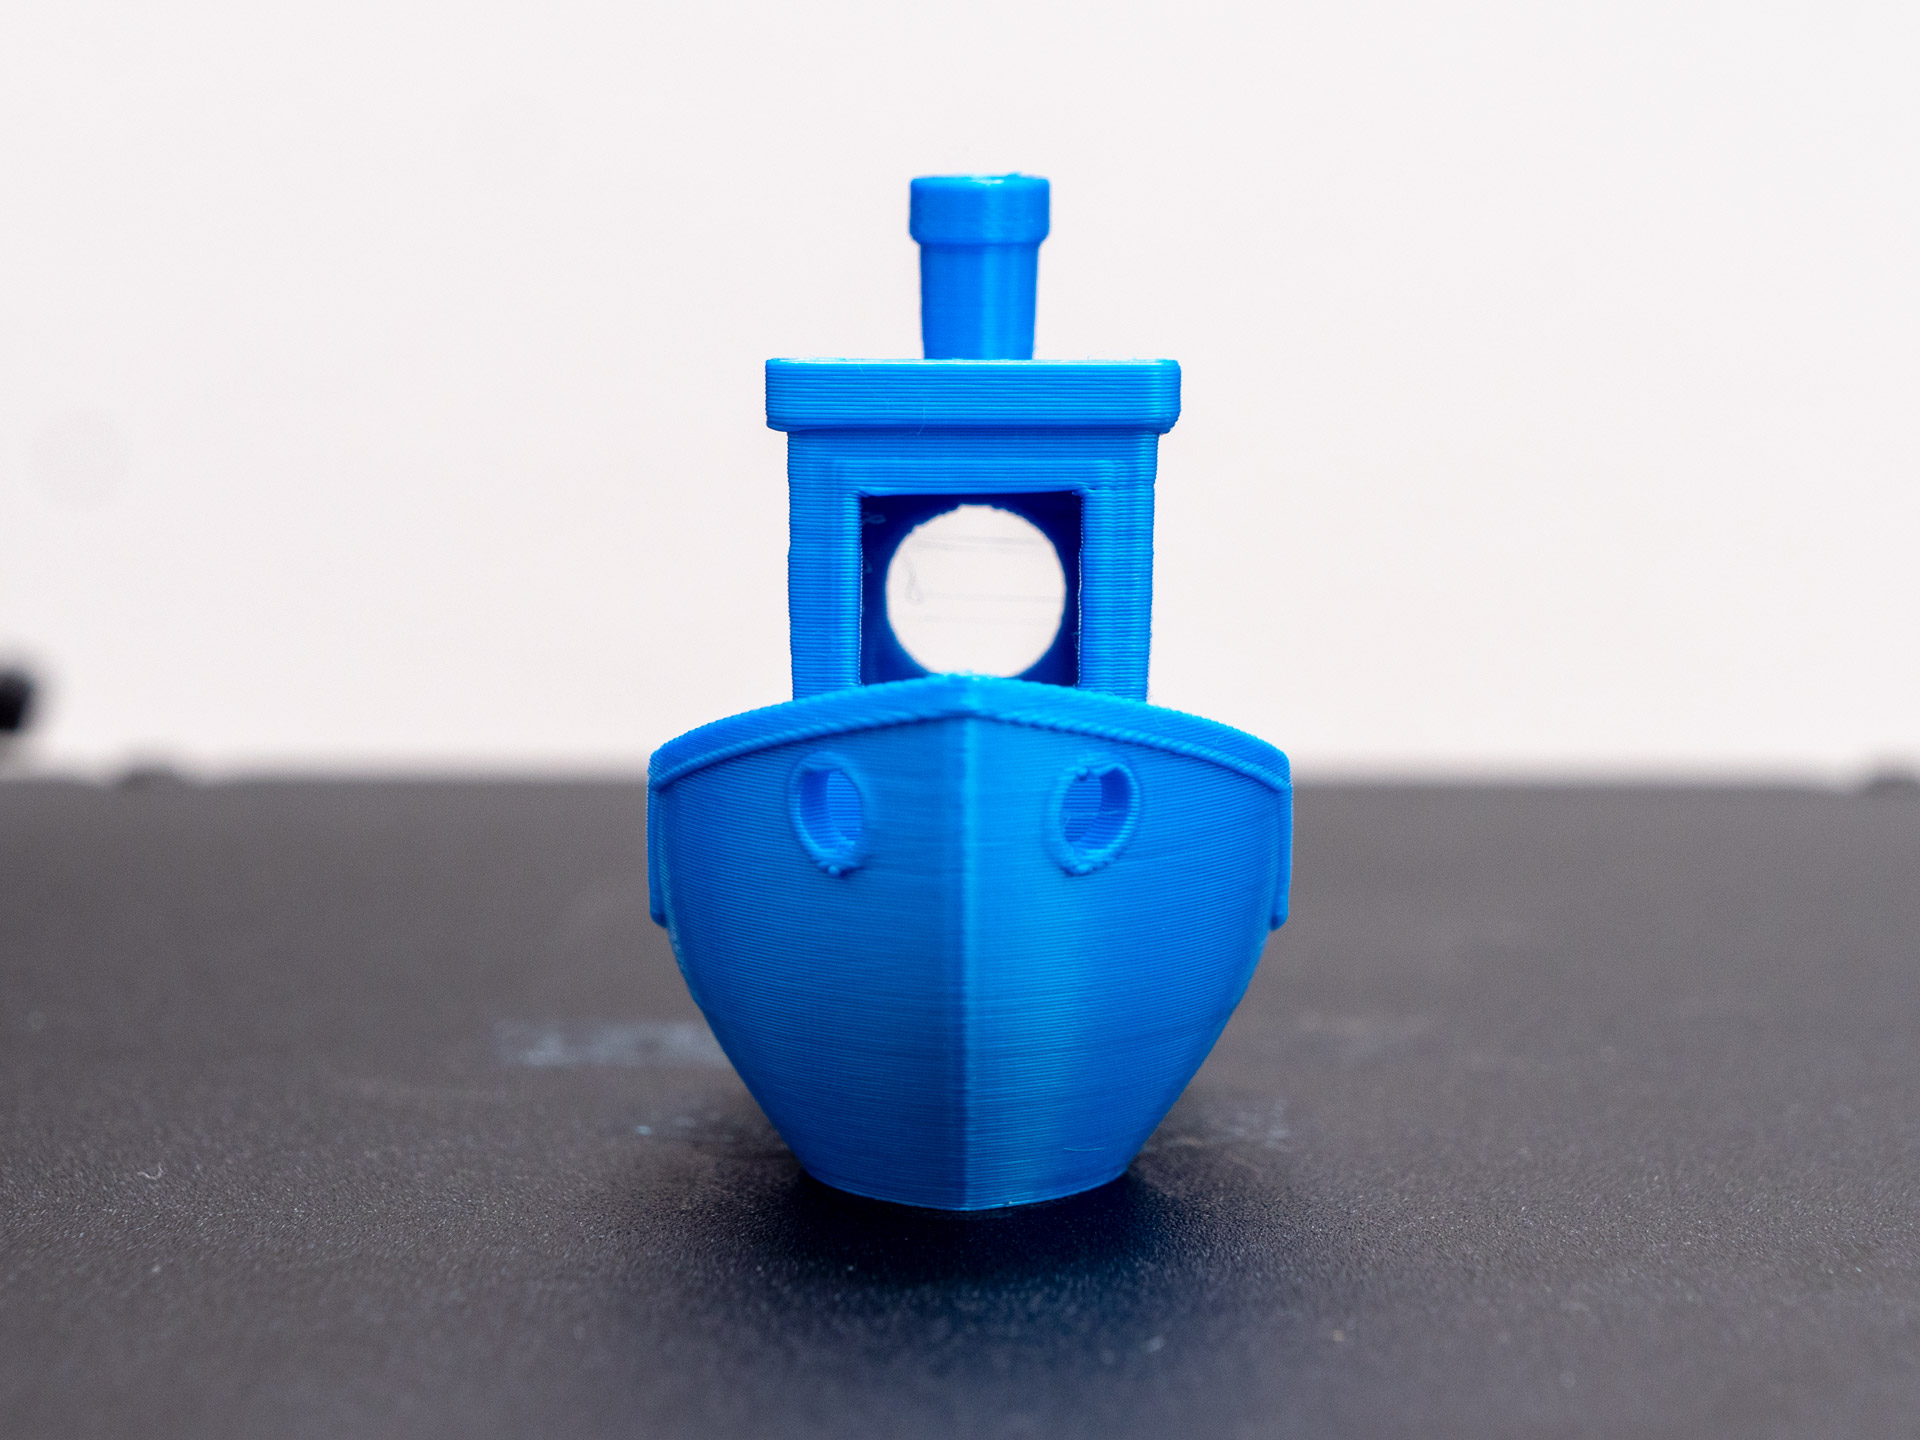
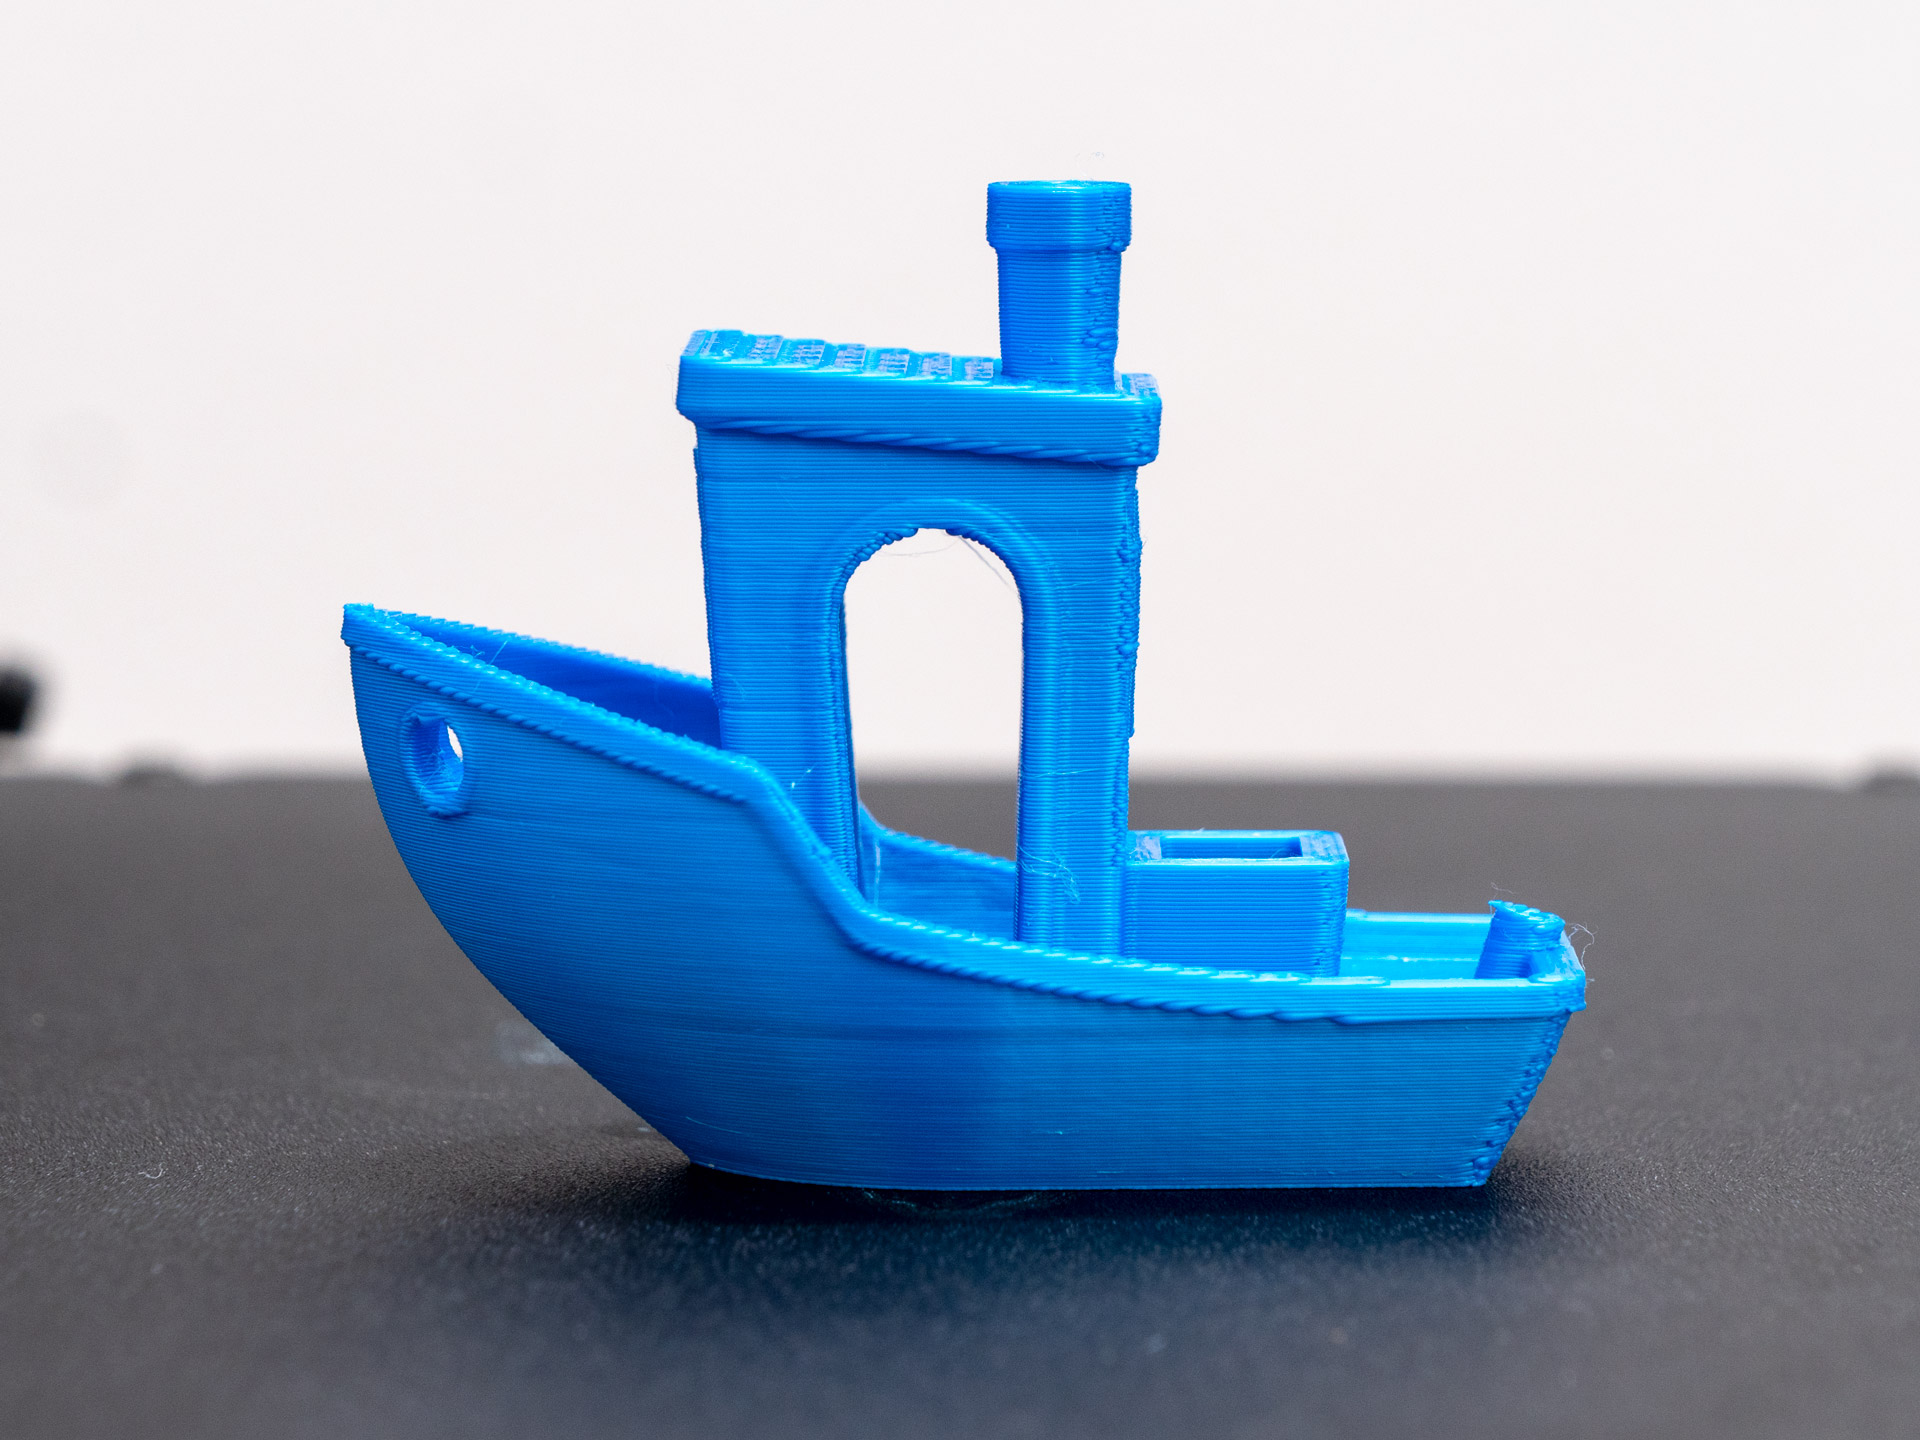
The Benchy came out really nice at 60mm/s. It took 1 hour and 10 minutes to print, which is faster than other printers at the same speed that cannot handle 250 mm/s speeds.
I printed three more Benchys at 120mm/s, 180mm/s and 250mm/s to see how well the Ender 3 V3 SE can keep up with these speeds that Creality advertises.
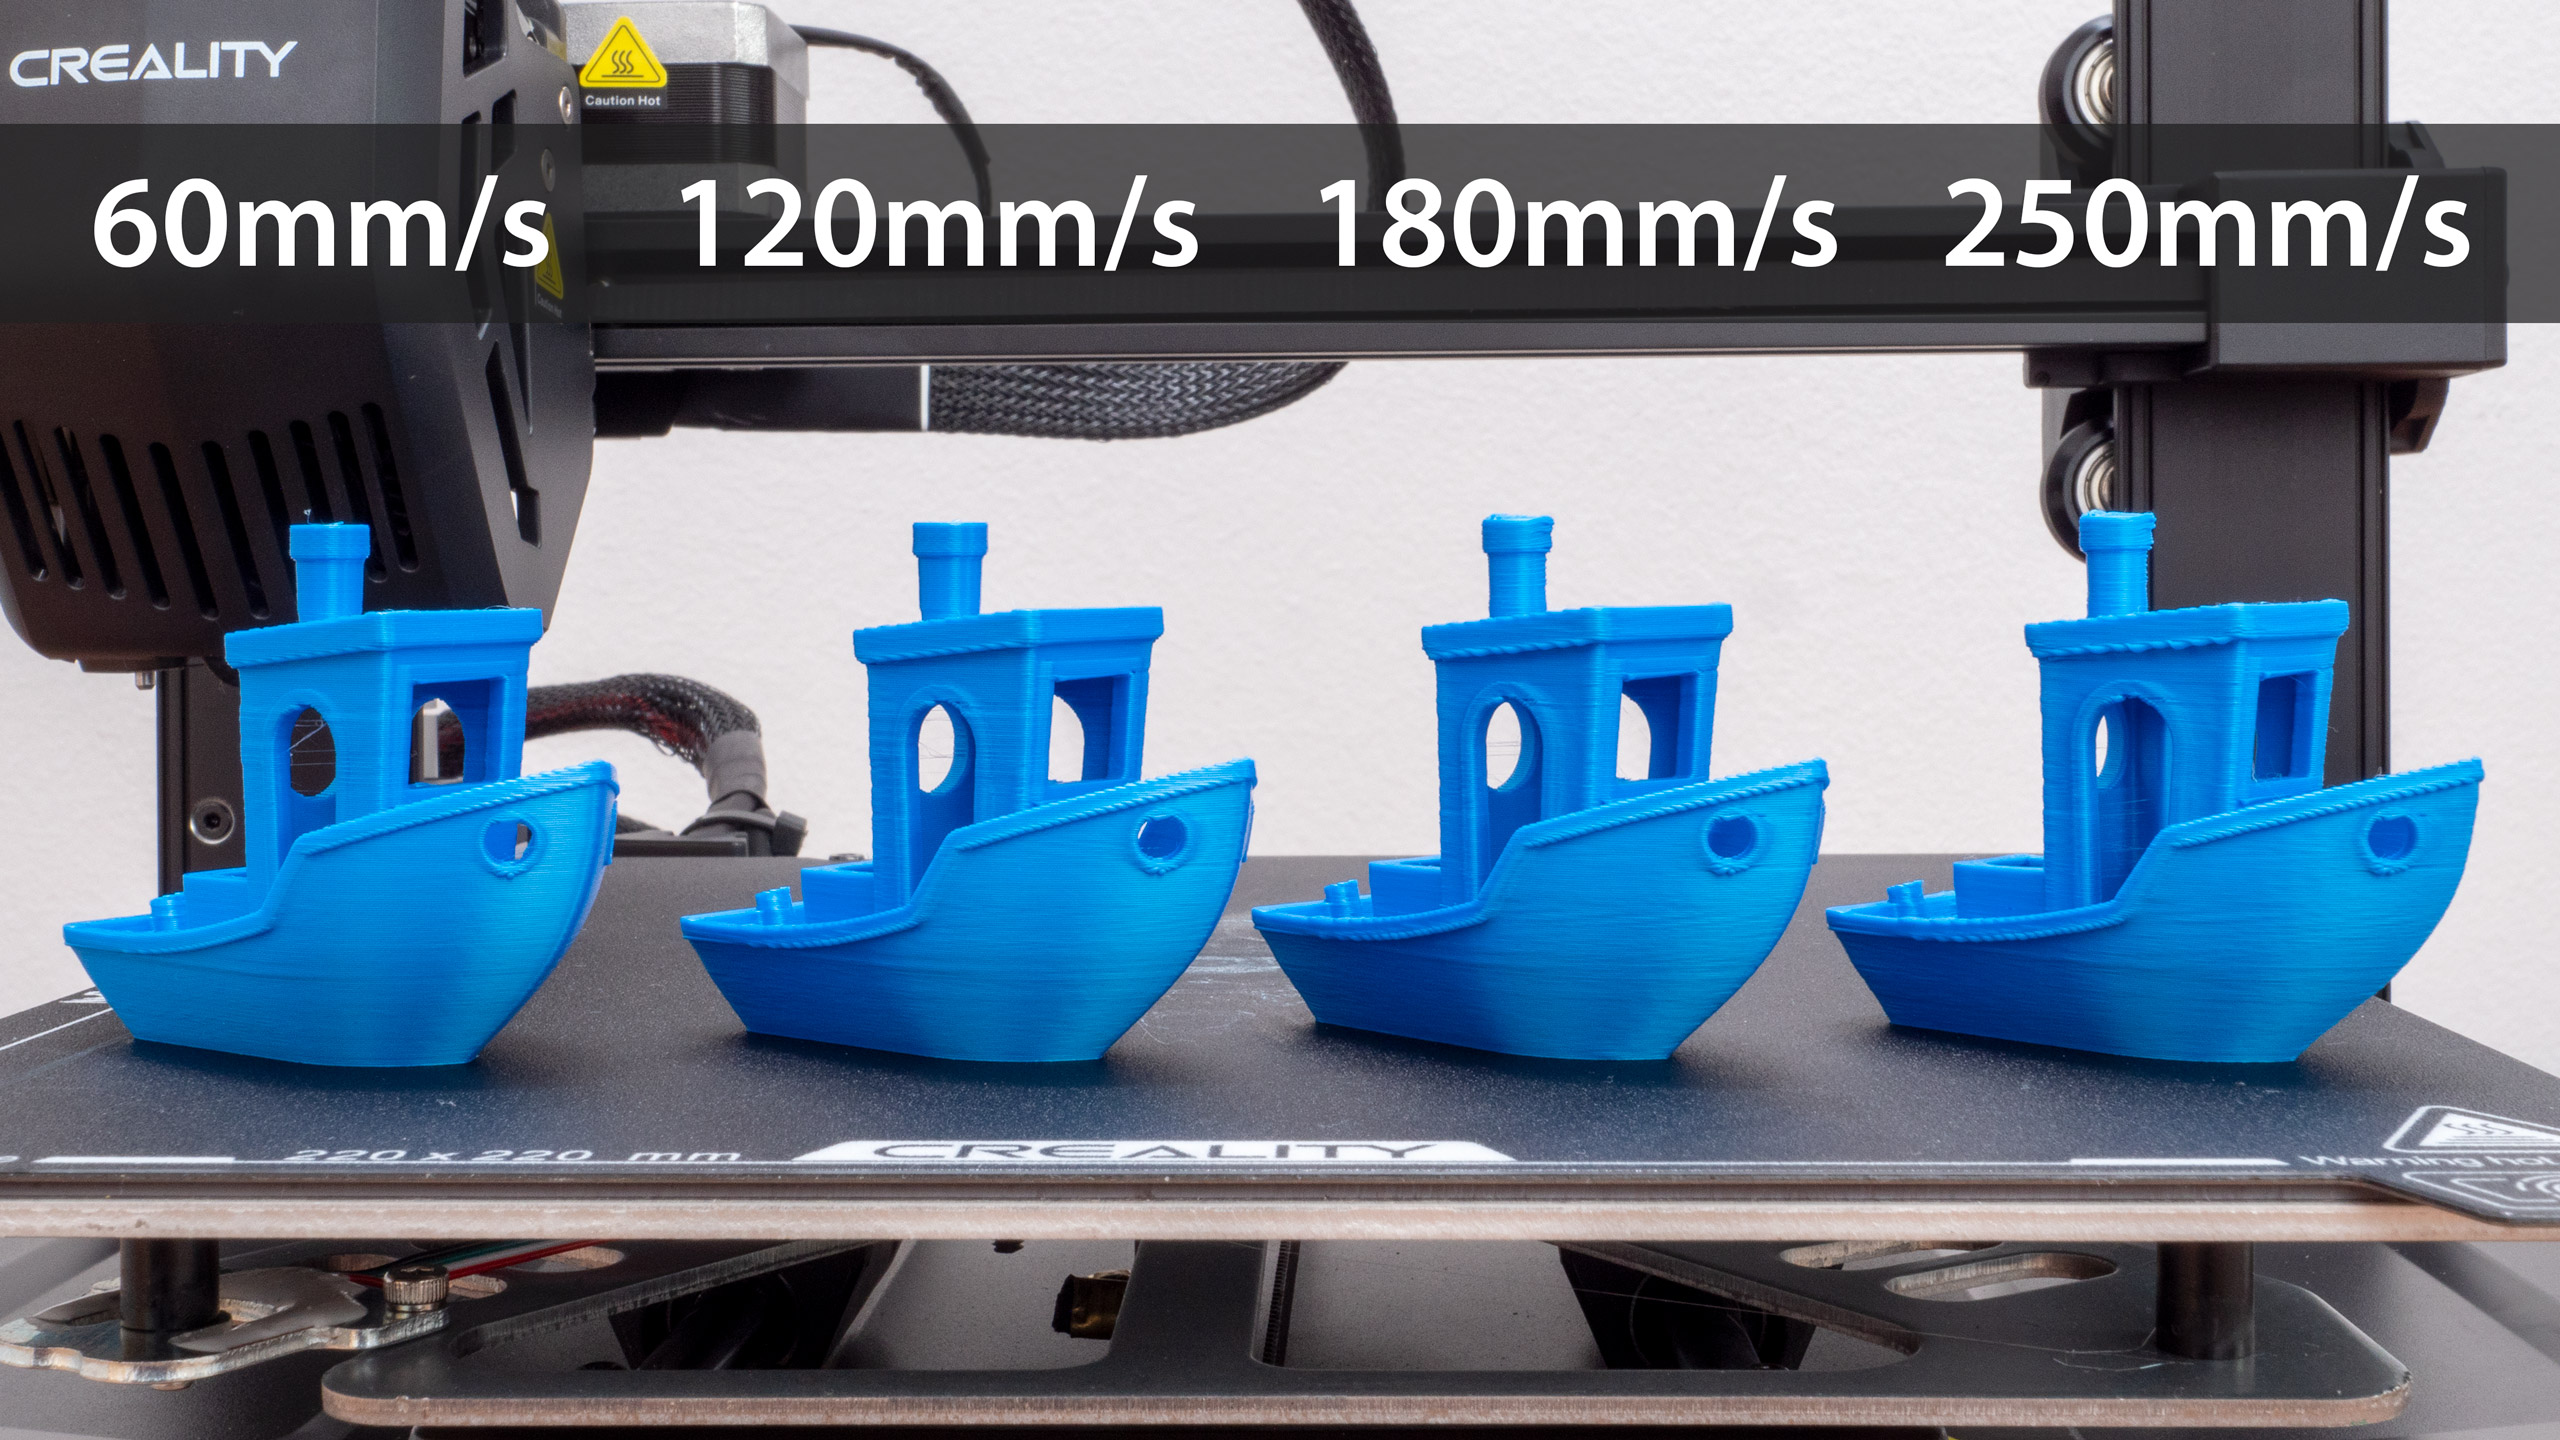
Again, the Ender 3 V3 SE didn’t disappoint. At 120mm/s it felt like there wasn’t any print quality loss. At 180 mm/s printing speed, which Crealty recommends as a typical printing speed, there is a little bit of quality loss, but still it’s supper fine. Even at the fastest speed, at 250mm/s, the 3D printer provided decent results.
The biggest problem is the starting point of each new layer or the Z seam. On the images above we can notice that even at the speeds of 60mm/s the Z seam is significantly present, and its accuracy increases as the speed increases.
Calibration Cube
Next, I 3D printed another classic print, the Calibration Cube which is also great for checking the 3D printer performance.
The 60mm/s print is awesome, whereas the on the 180mm/s print we can notice a drop in the printing quality.
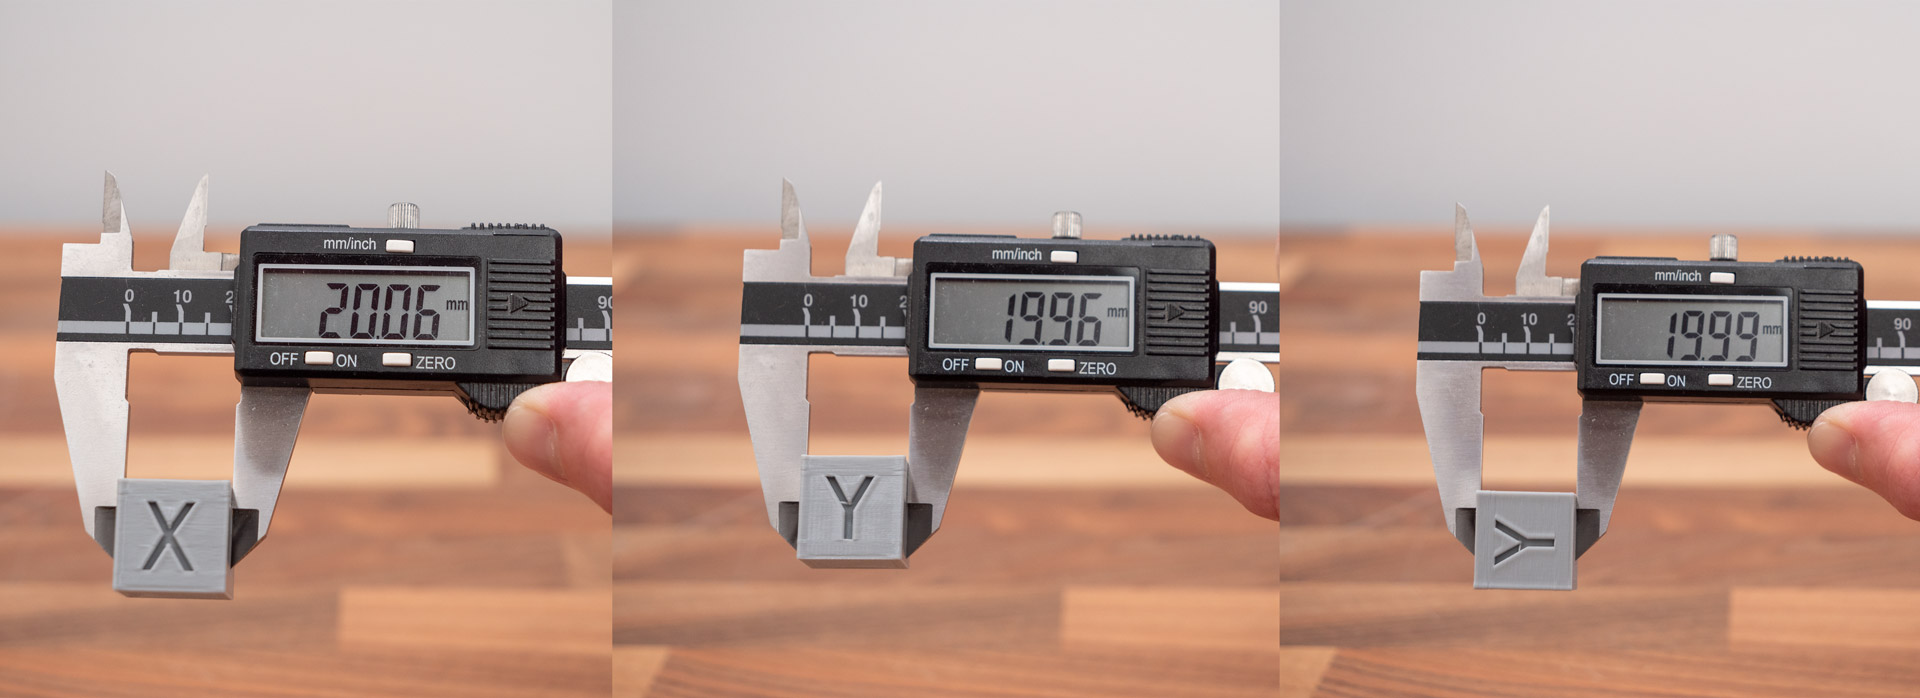
The dimensional accuracy of the cube was great too, only around 0.1mm difference between the X and the Y axis.
More 3D Prints
Here are some more 3D prints that I made with the Creality Ender 3 V3 SE 3D Printer.
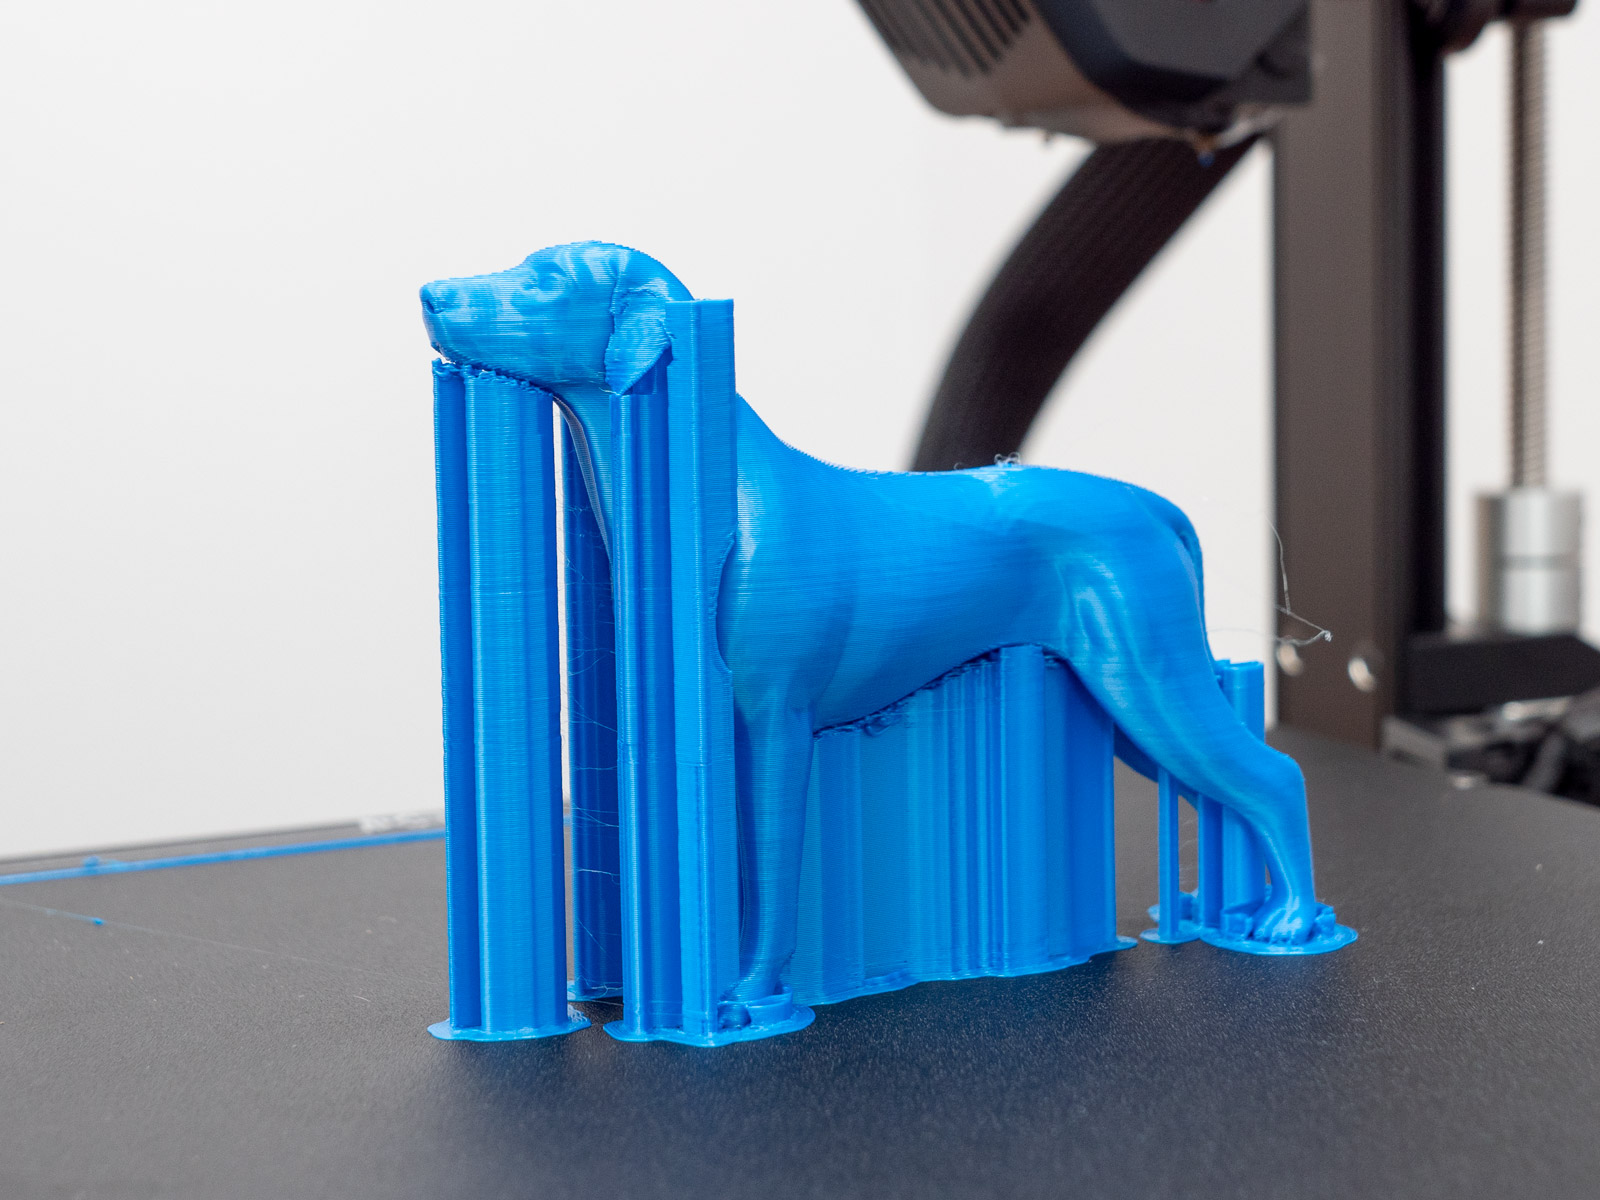
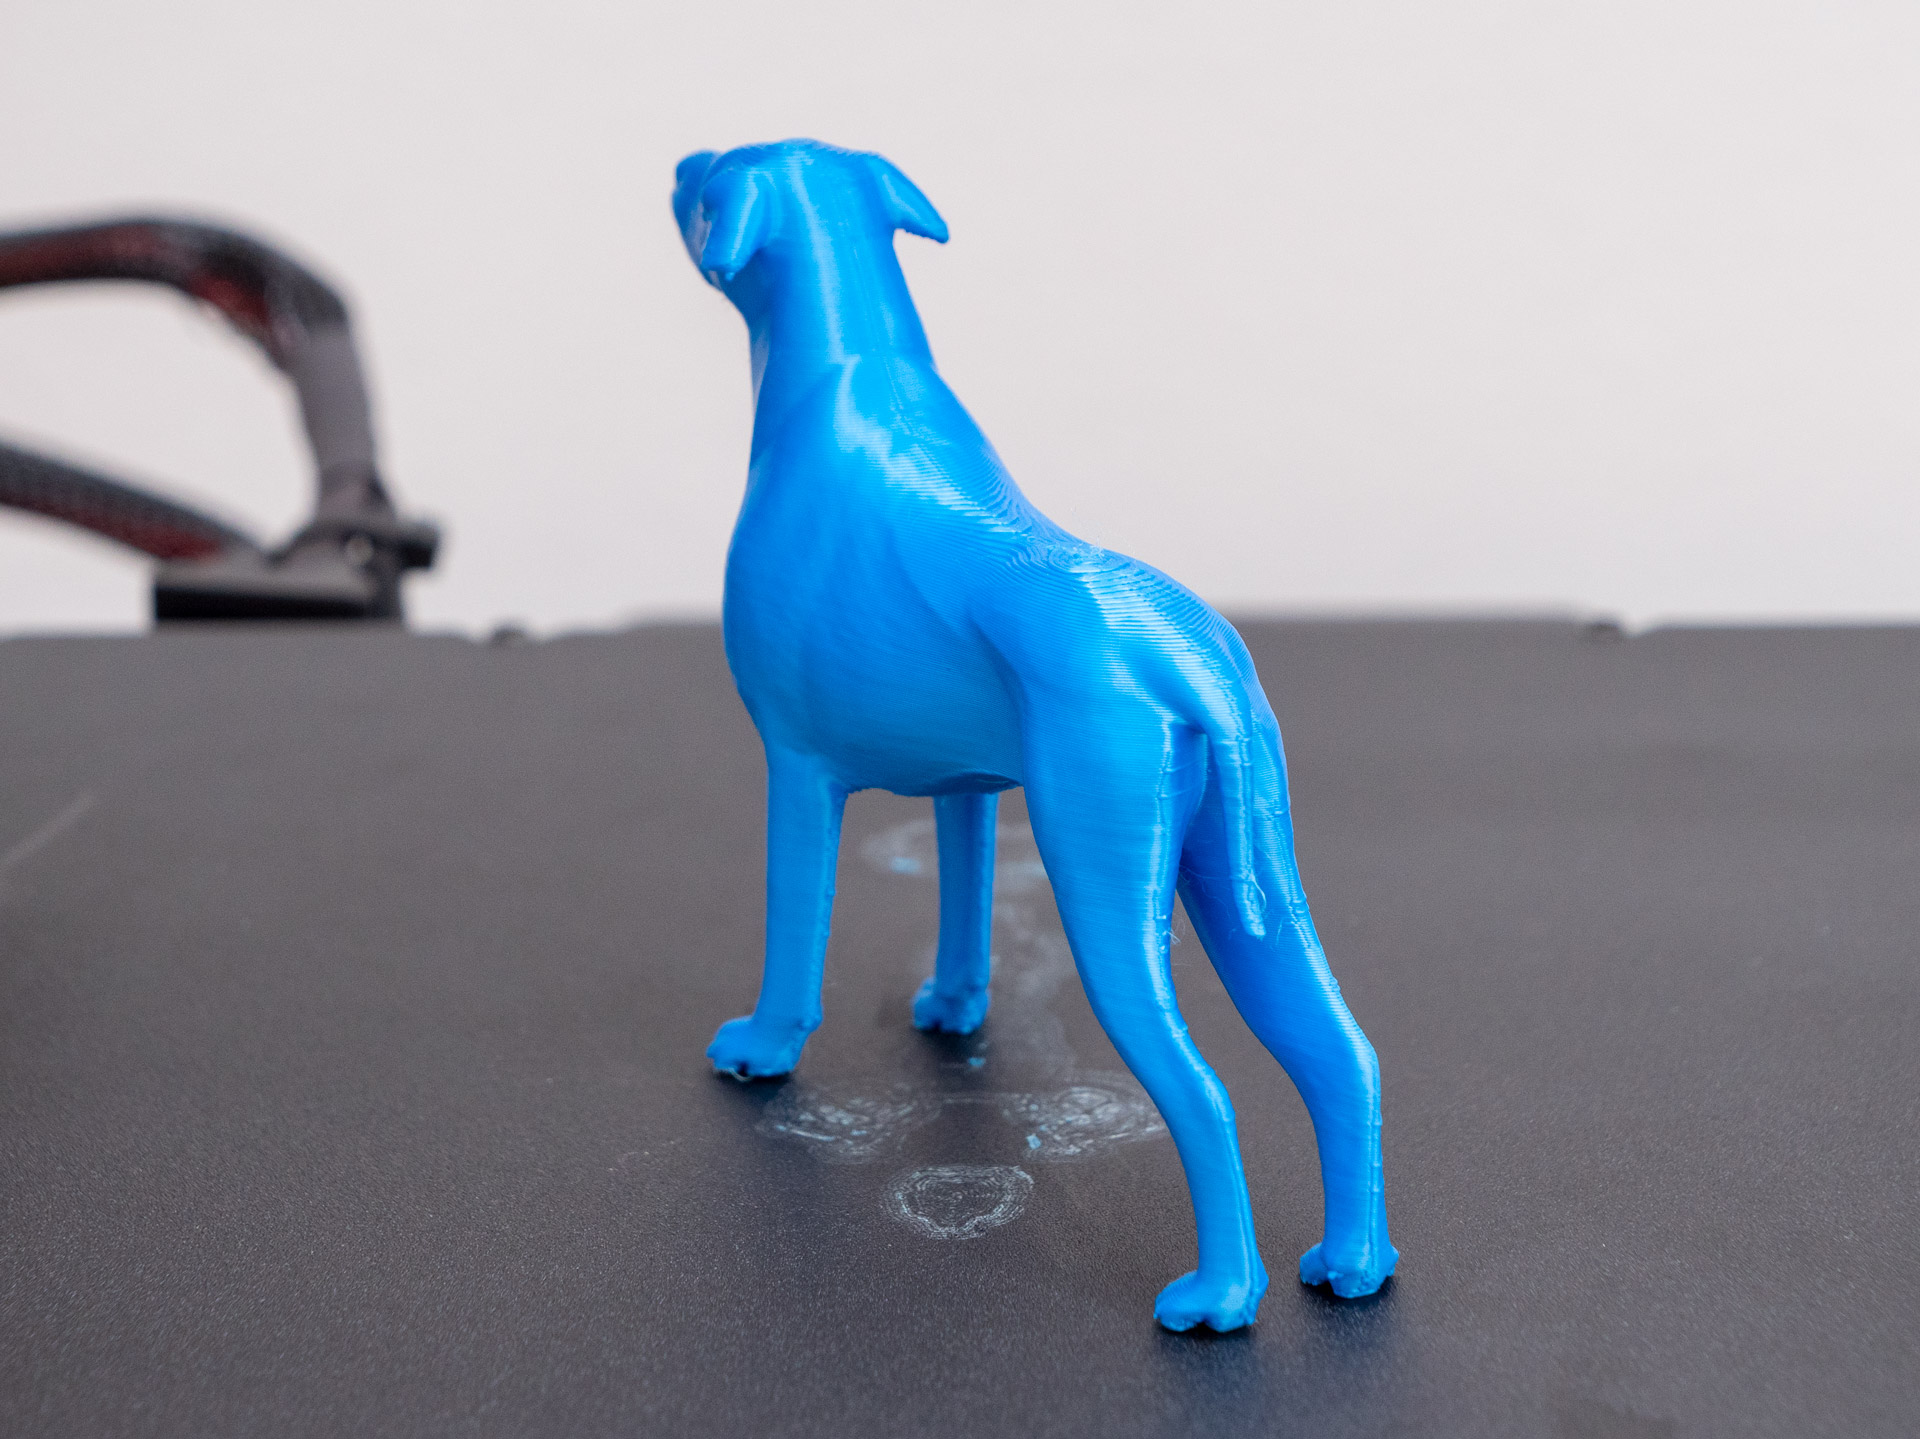
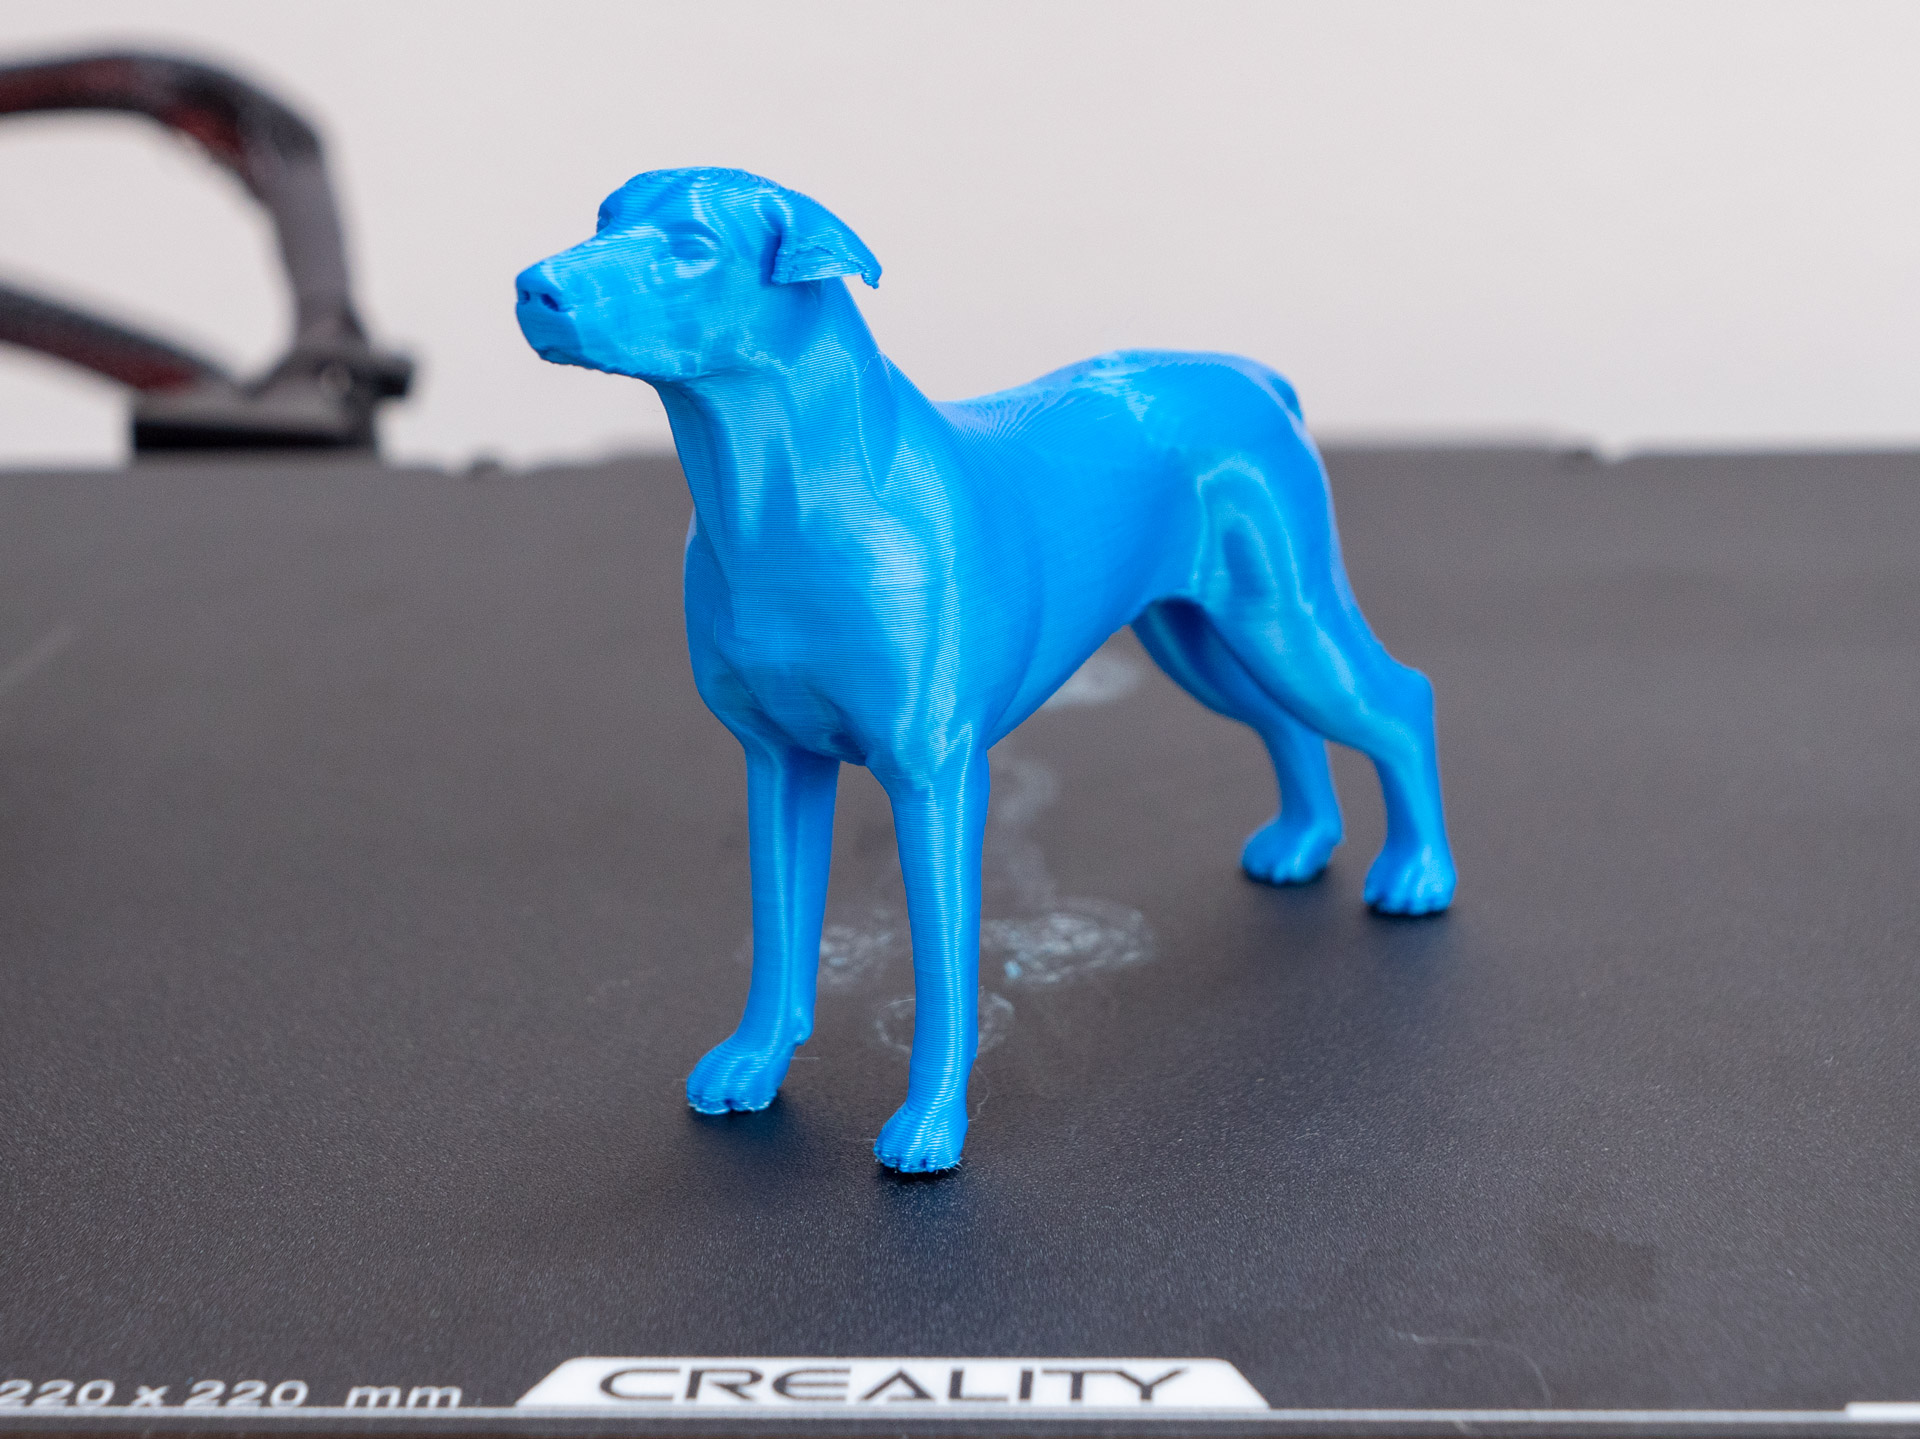
This 3D print of a dog came out pretty amazing in this blue PLA. The supports were really easy to remove.
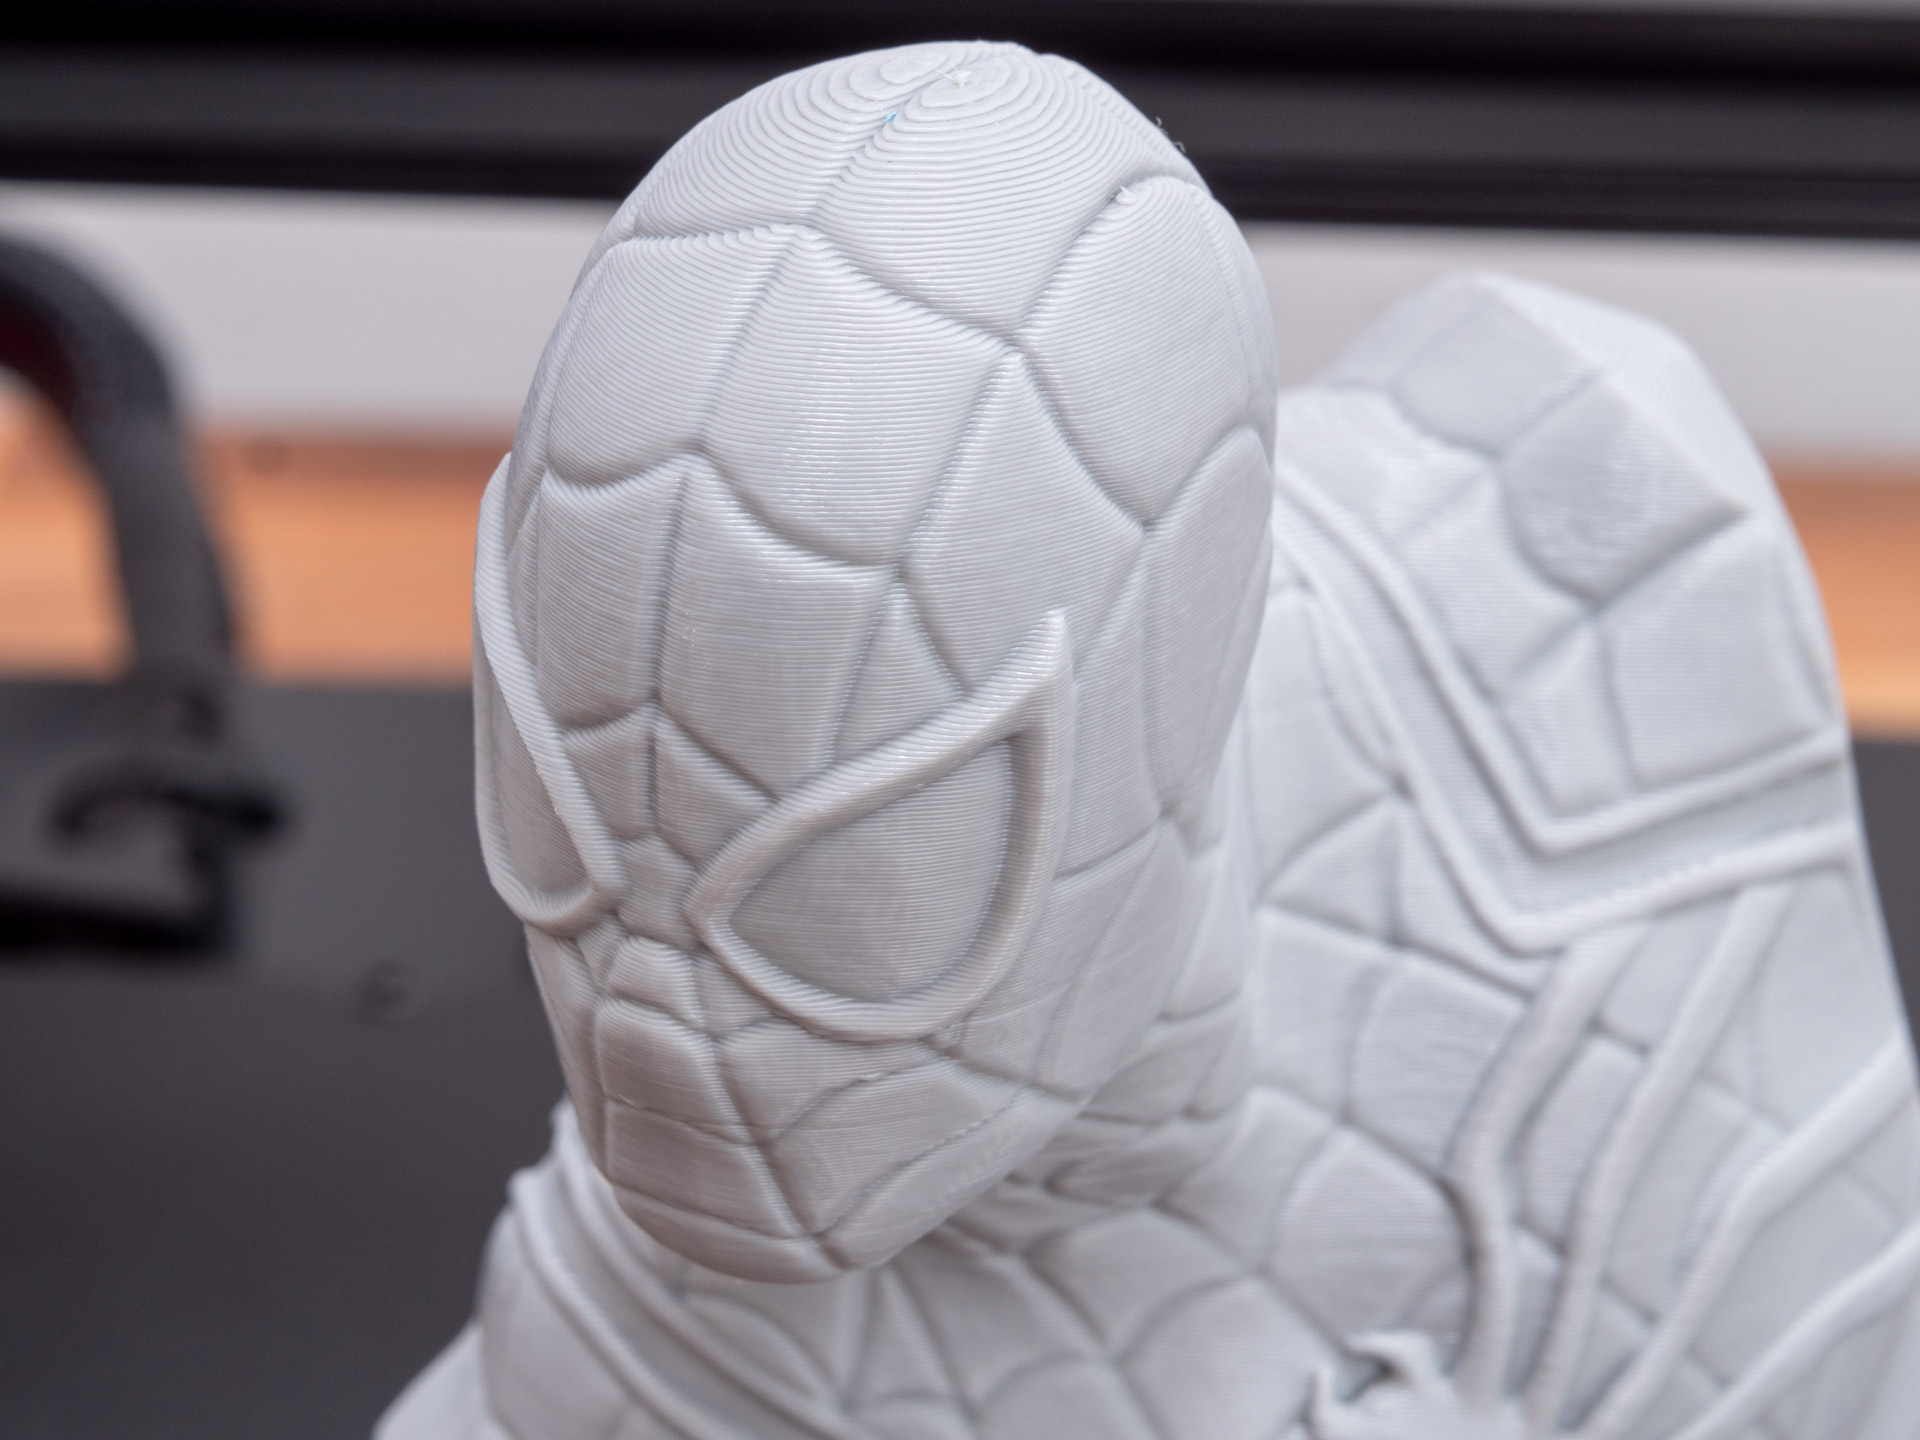
I couldn’t help but print some of the bust models by Eastman. I went for the Spider-man bust.
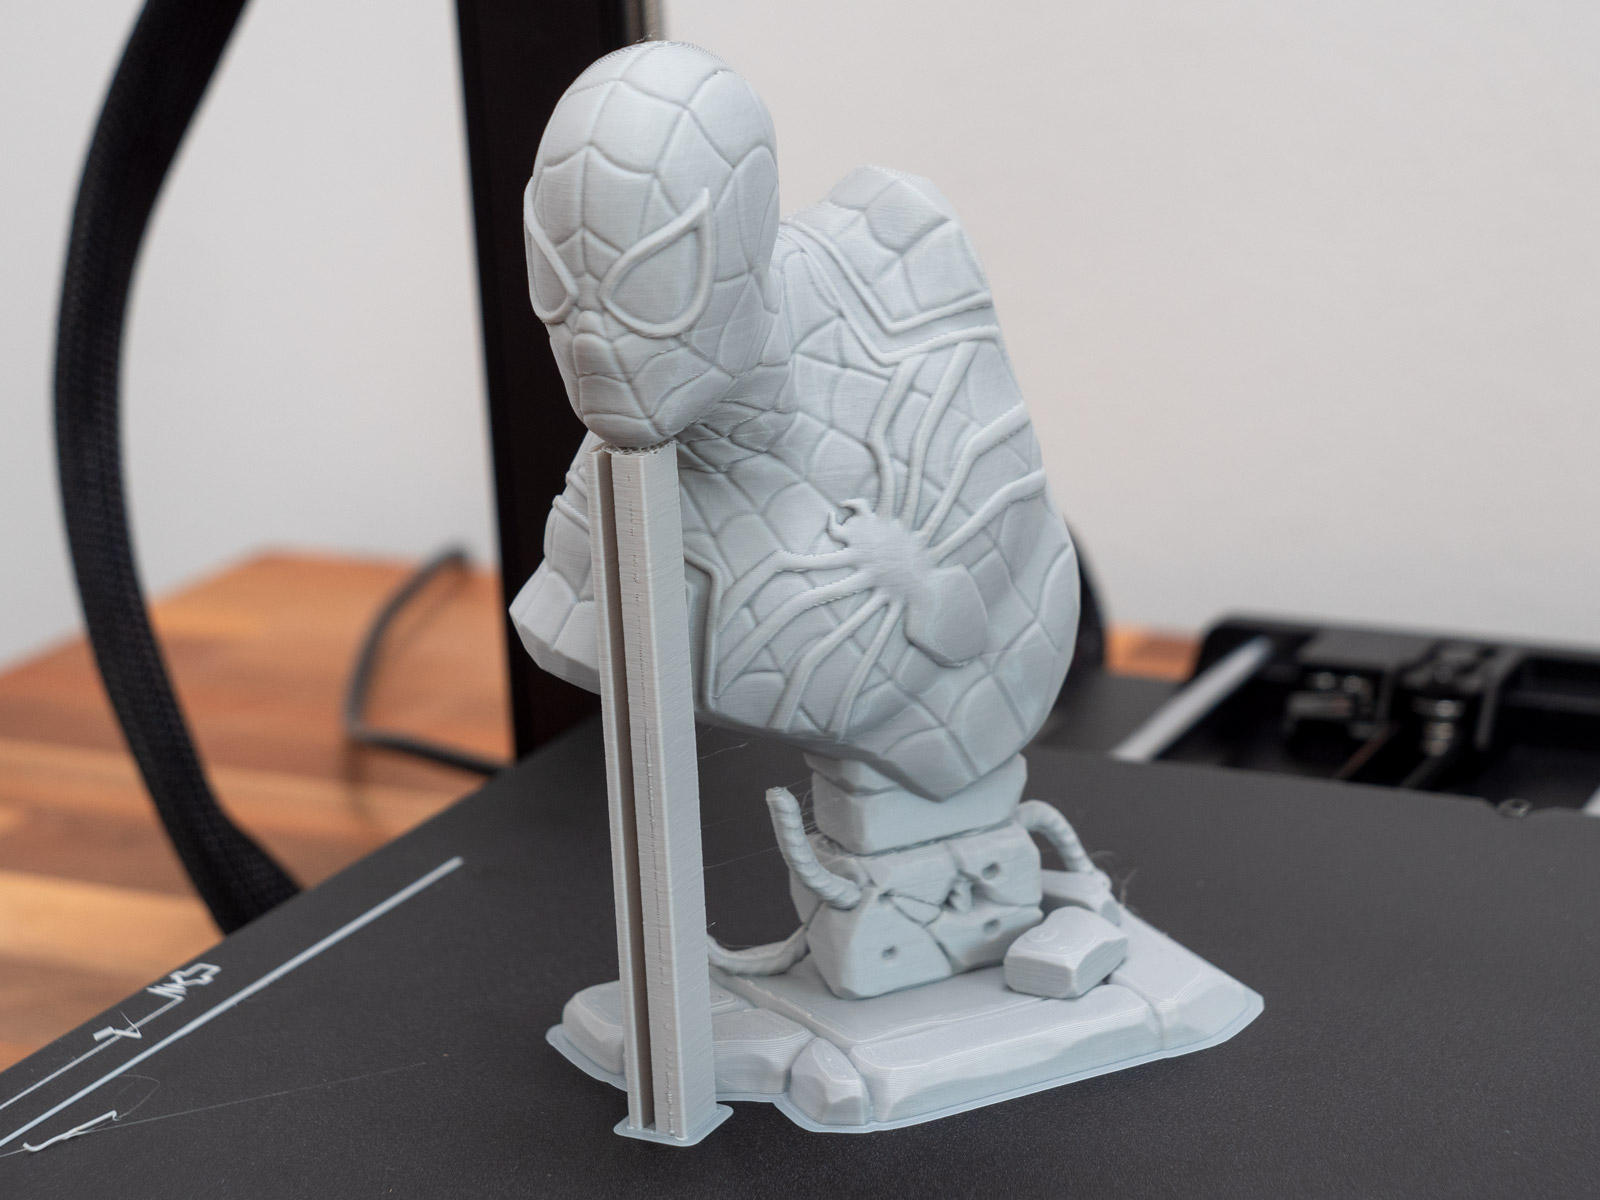
It came out fantastic, with that single support under the chin that I manually added using the Creality Print slicer. Just take a look at the details.
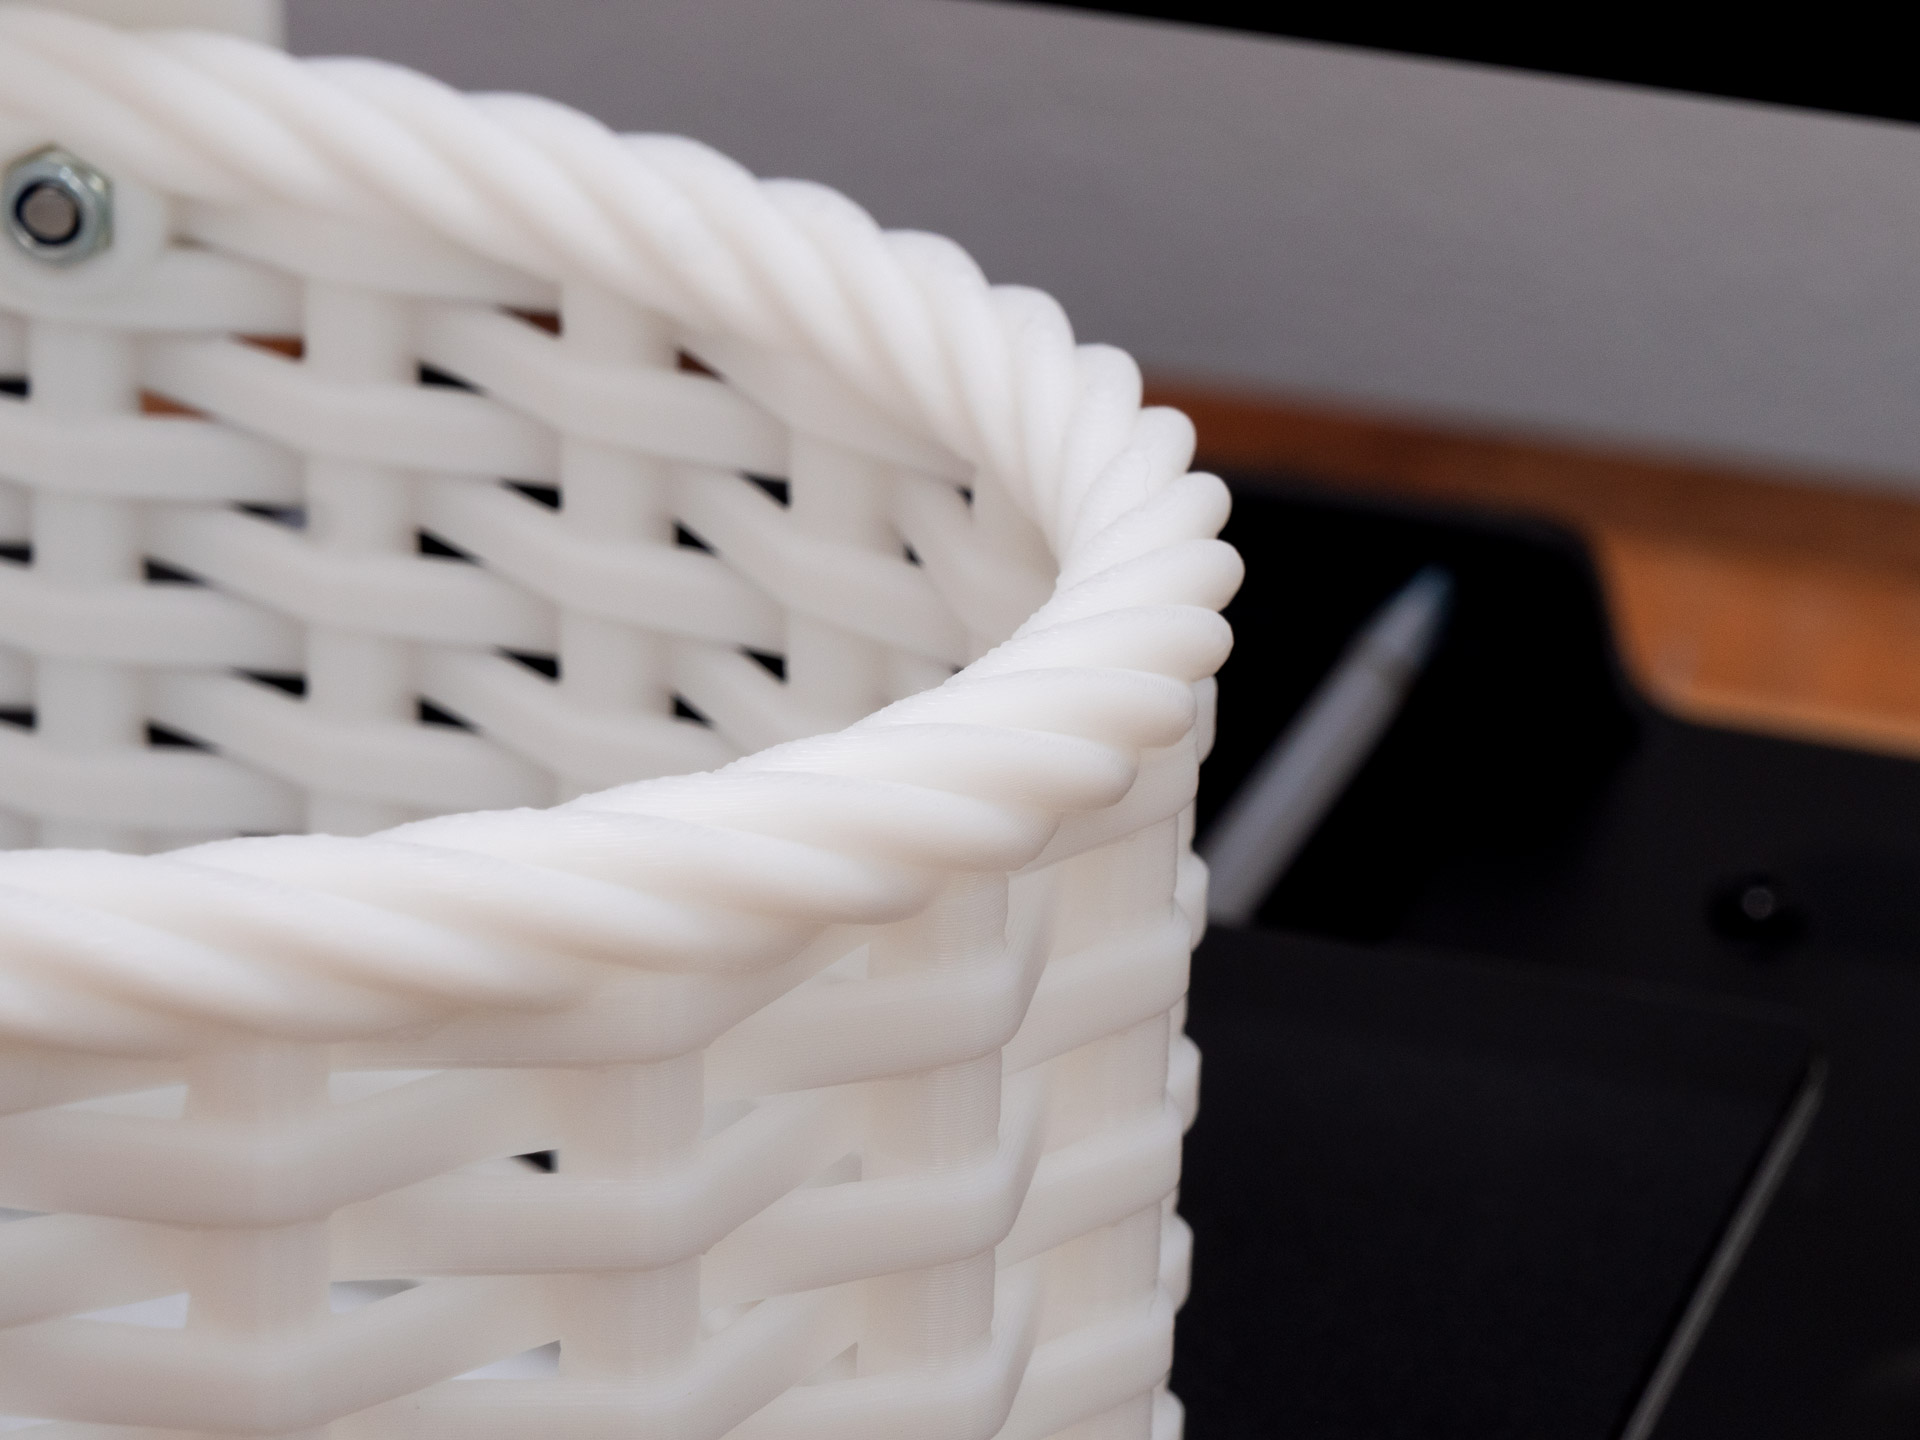
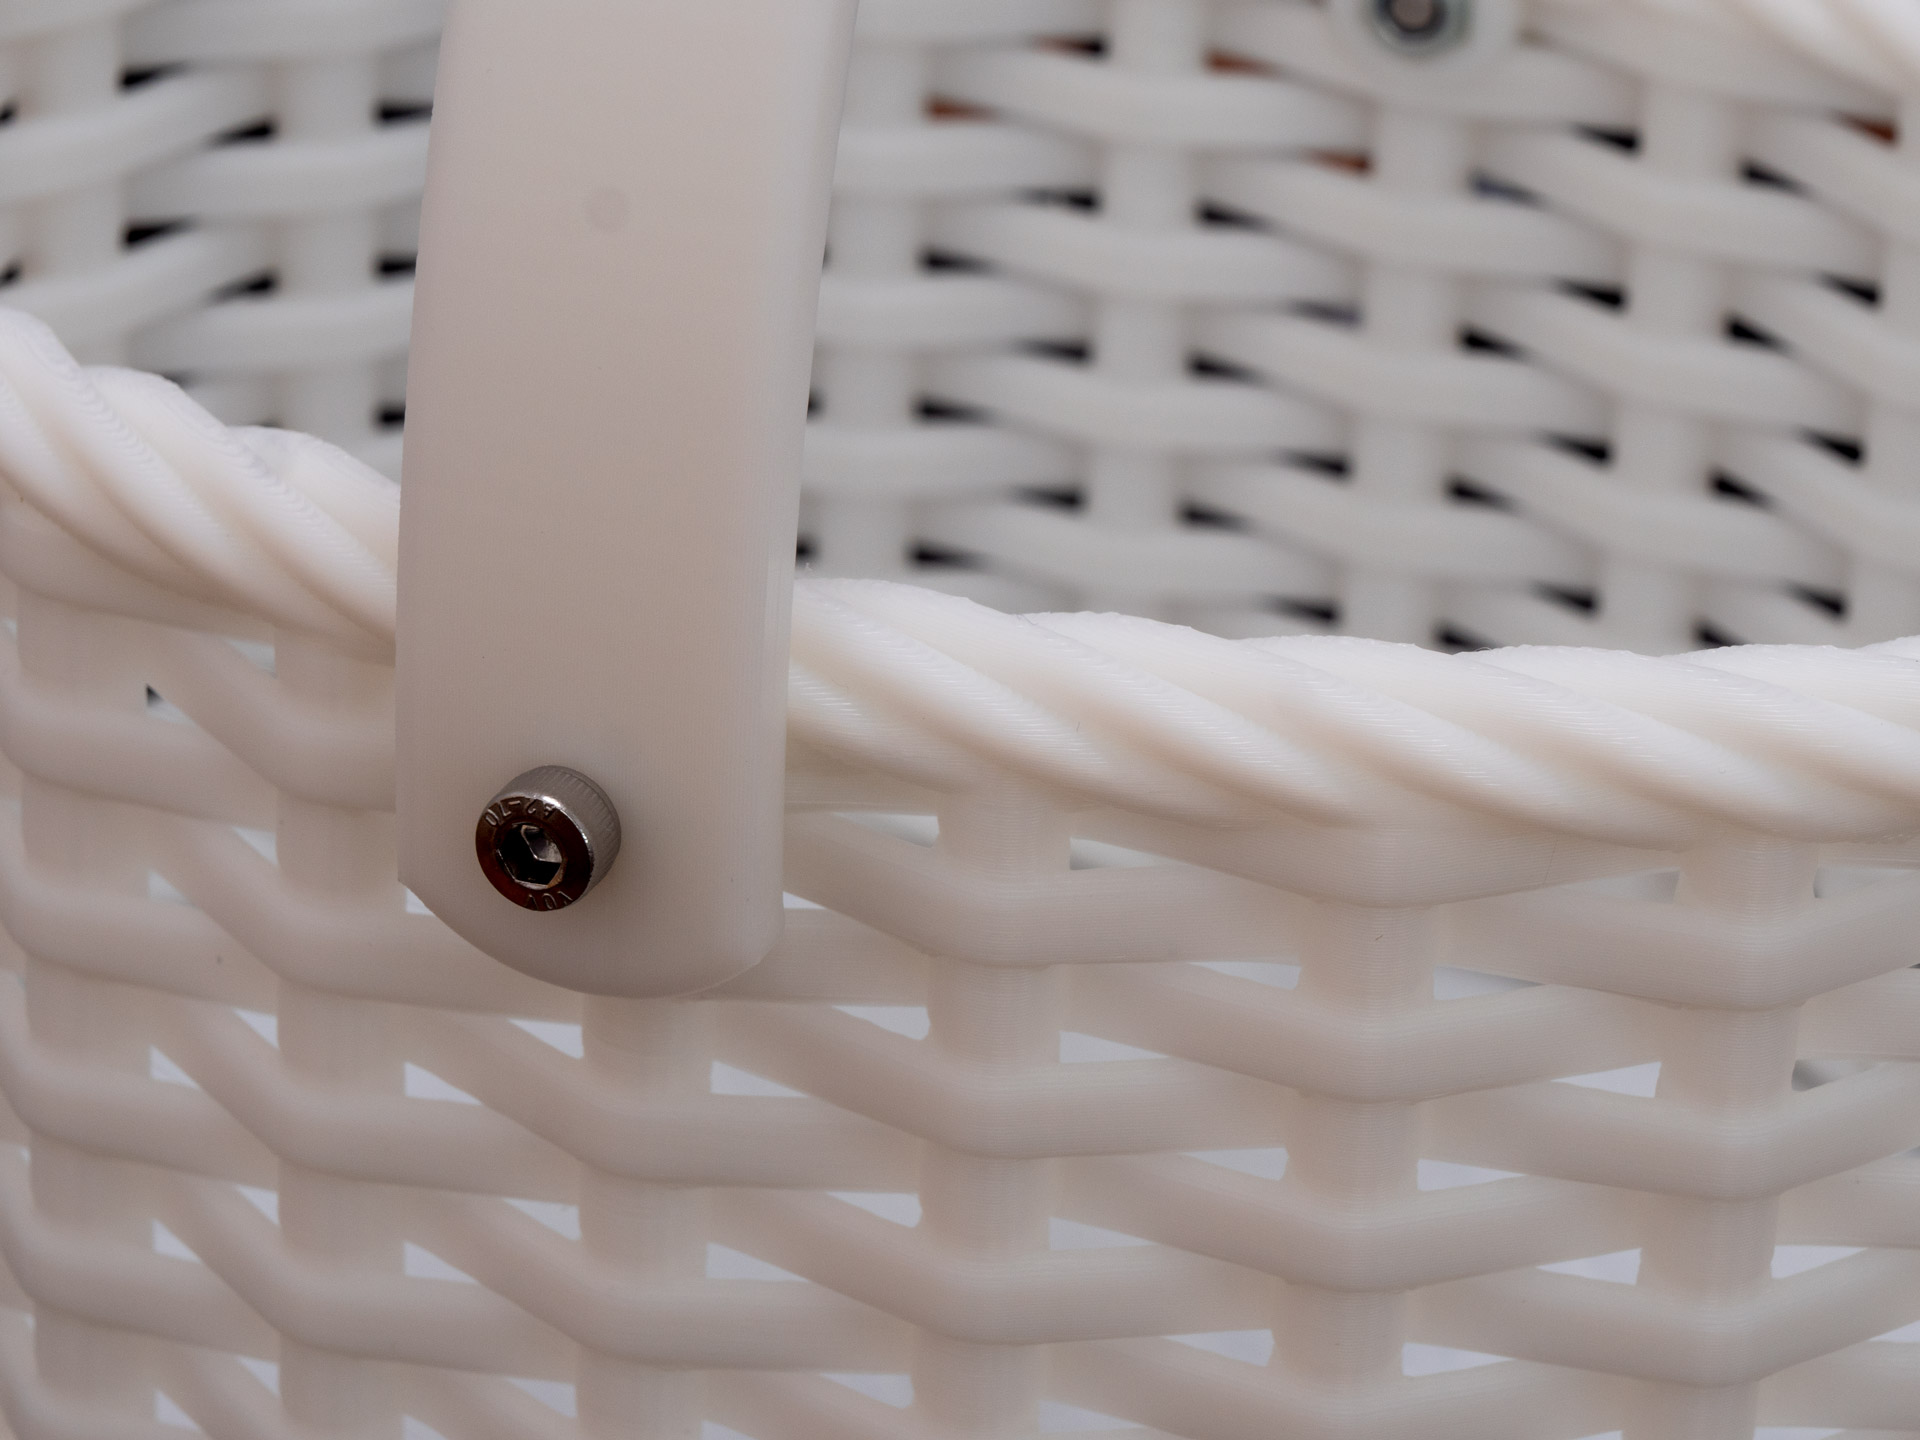
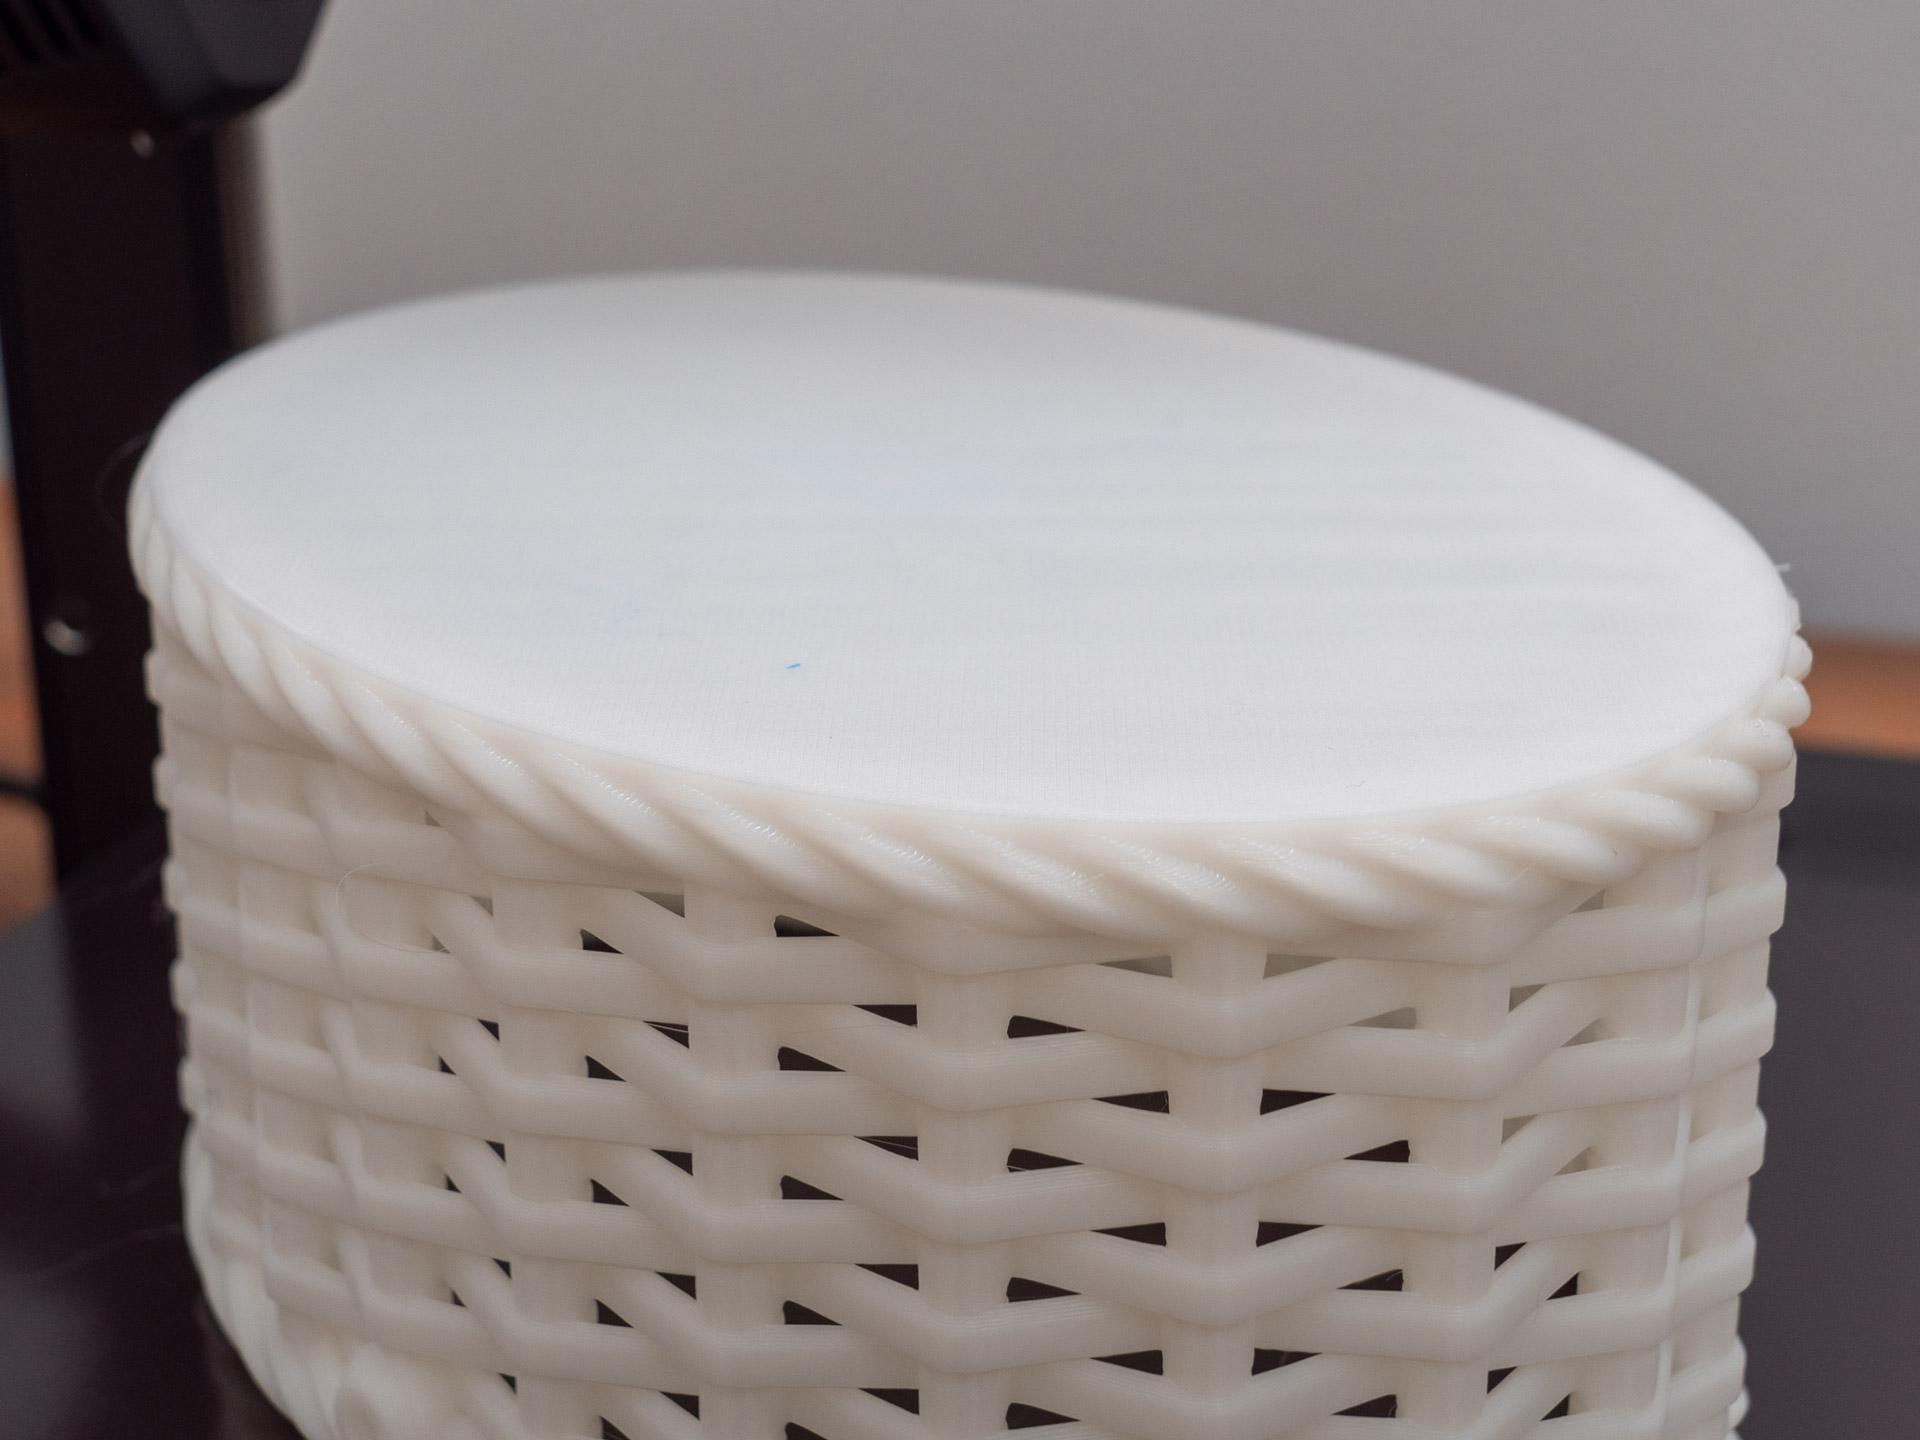
Here’s an amazing Woven Basket 3D model that I printed scaled to 180mm. It took 10 hours for the basket and 1 hour for the handle at 180mm/s speed,3 wall lines and 0 infill.
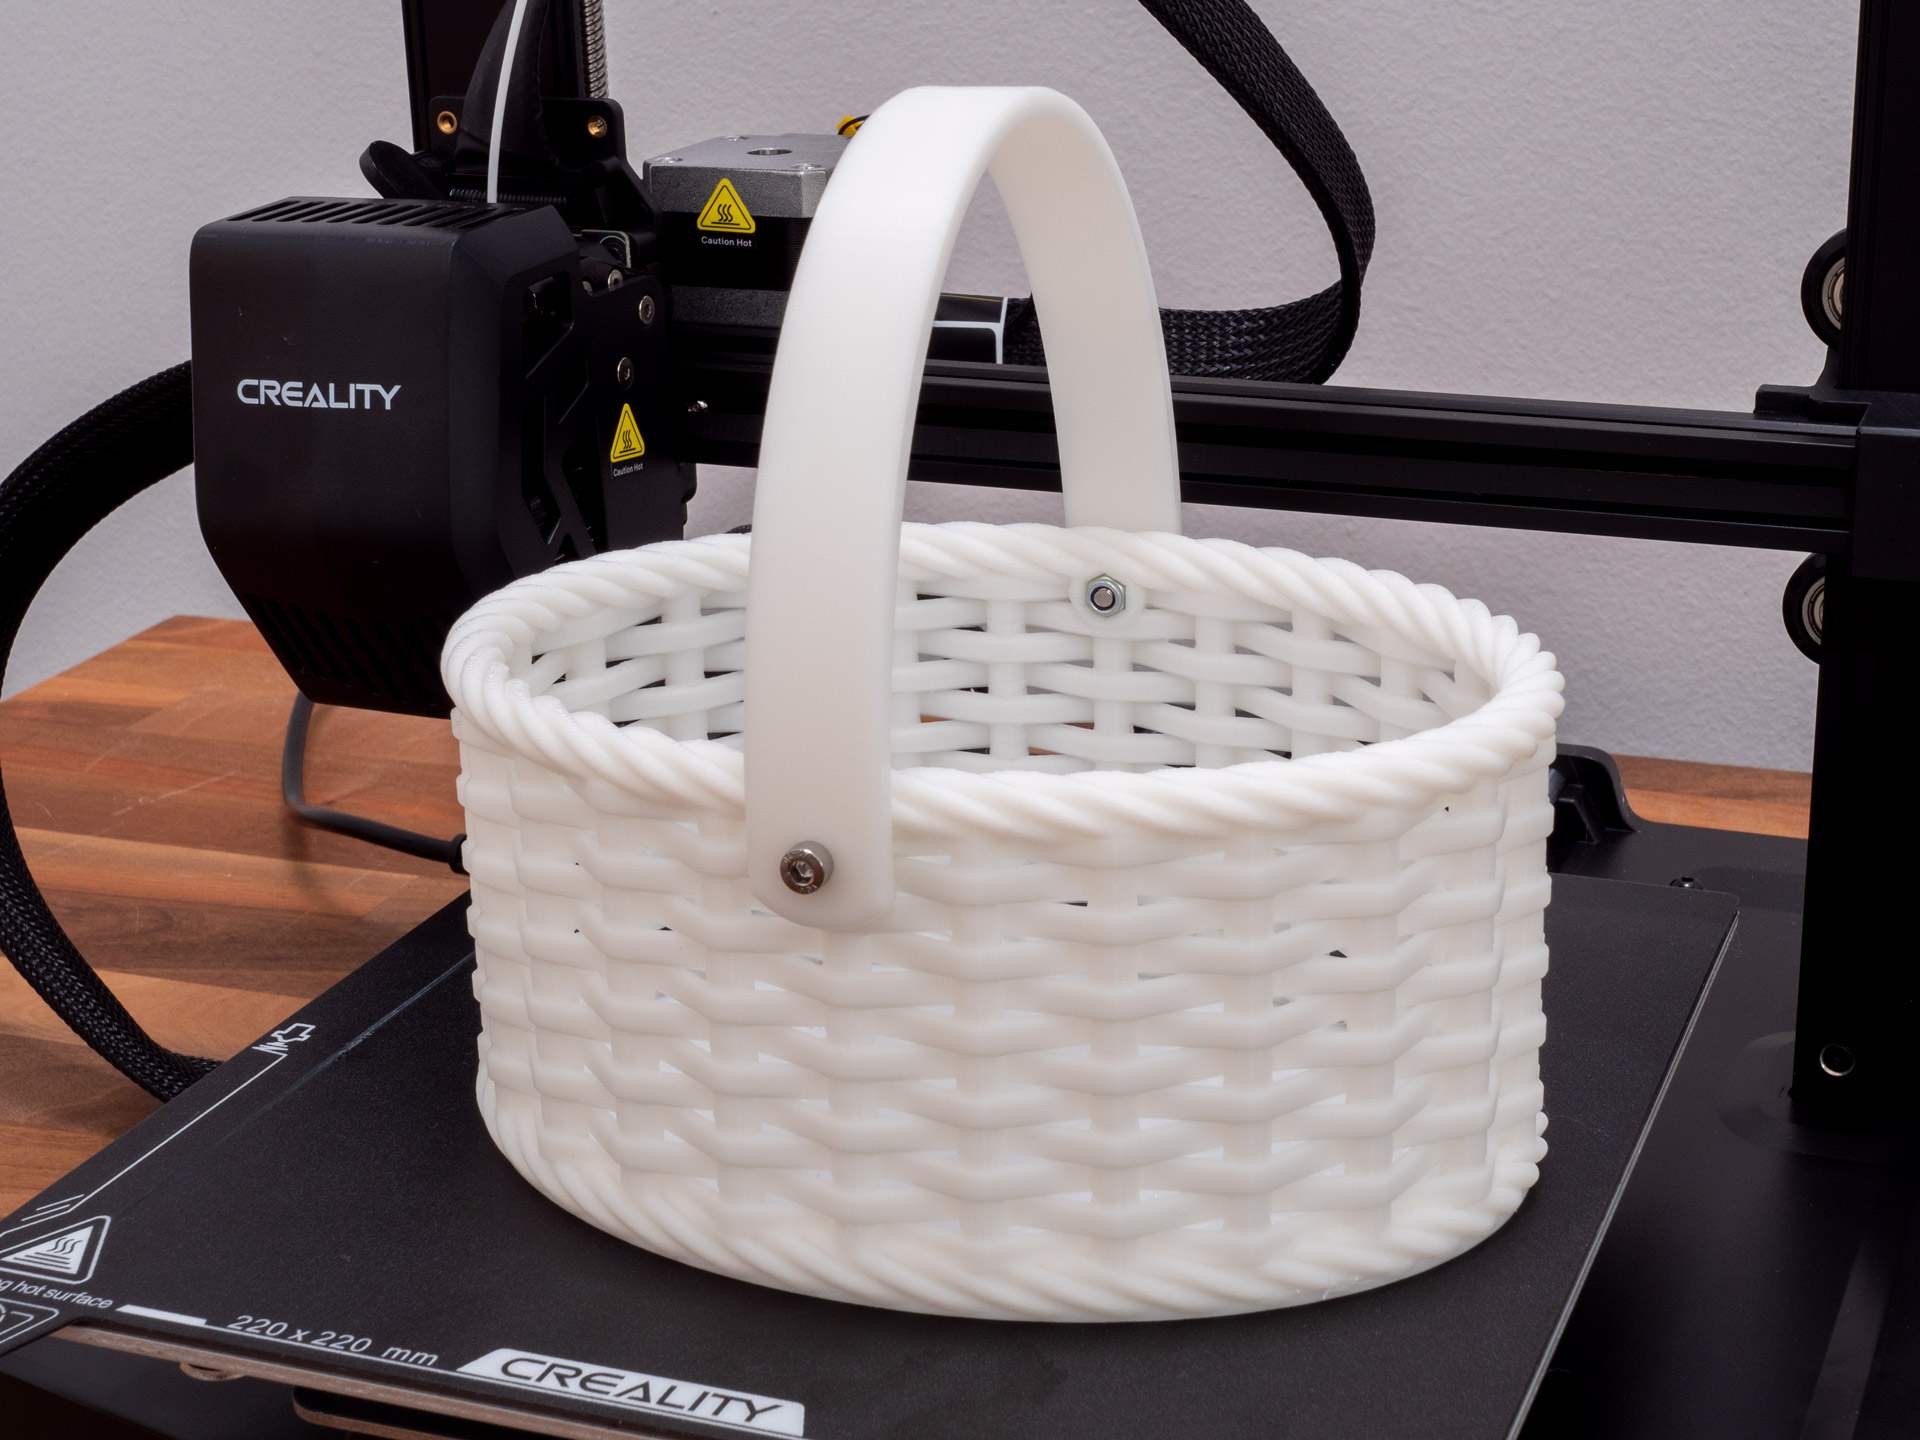
Again, excellent results. It looks like it’s a injection molding in this Creality White Hyper PLA Filament.
Here we can notice the perfect first layer we can get with the Creality Ender 3 V3 SE 3D Printer.
Conclusion – Is the Creality Ender 3 V3 SE Worth Buying?
The Creality Ender 3 V3 SE is absolutely worth buying. Premium features like the incredibly precise auto bed leveling, direct extruder with increased printing speeds of up to 250mm/s and a modern LED interface make the printer stand out in the ocean of budget 3D printers.
I was simply blown away by the print quality and how easy it was to setup the 3D printer. So, whether you are new to the 3D printing world, or you are enthusiast on a tight budget, I would recommend the Creality Ender 3 V3 SE to anyone. It’s no-brainer for that price point.