The Creality CR-10 V3 is a 2020 successor of the ultra popular CR-10 which was released back in 2017. The CR-10 has been a workhorse for many 3D printing enthusiasts, including me, so the new CR-10 V3 has to offer something really valuable so people can go for it.
In this review, we will take a look at the Creality CR-10 V3 new features, see what has improved compared to the original CR-10 and whether is worth you money.
Also, I will make an unboxing and show you the process of assembling the printer, which is fairly quick and easy. At the end I will show you the printing quality of the CR-10 V3 with several test prints that I made with it.
Check price at Amazon / Banggood
Disclosure: These are affiliate links. As an Amazon Associate I earn from qualifying purchases.
CR-10 V3 Features
Let’s taka e look at the major new features of the CR-10 V3.
Sturdy Frame
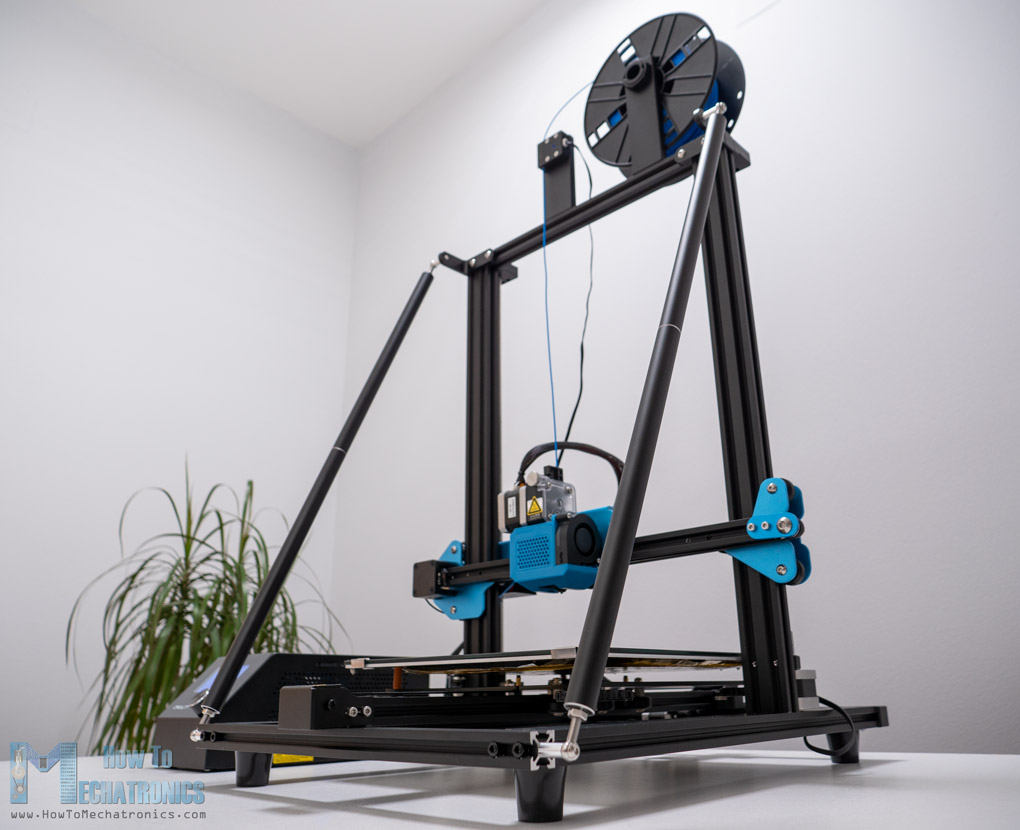
The Creality CR-10 V3 comes with the same large printing volume of 300x300x400mm like the original CR-10 but now with an improved frame design. The huge vertical frame is now supported with two metal rods that connect the top of the frame to the base. This forms, what Creality calls it, a “golden triangle” which makes the entire frame significantly more rigid and stable.
Direct Drive
Another big change is the print head which is now a Titan Direct Drive. Having a direct drive extruder provides some benefits, like easier loading of the filament, faster filament retraction, better handling of flexible filaments and overall better or more consistent extrusion.
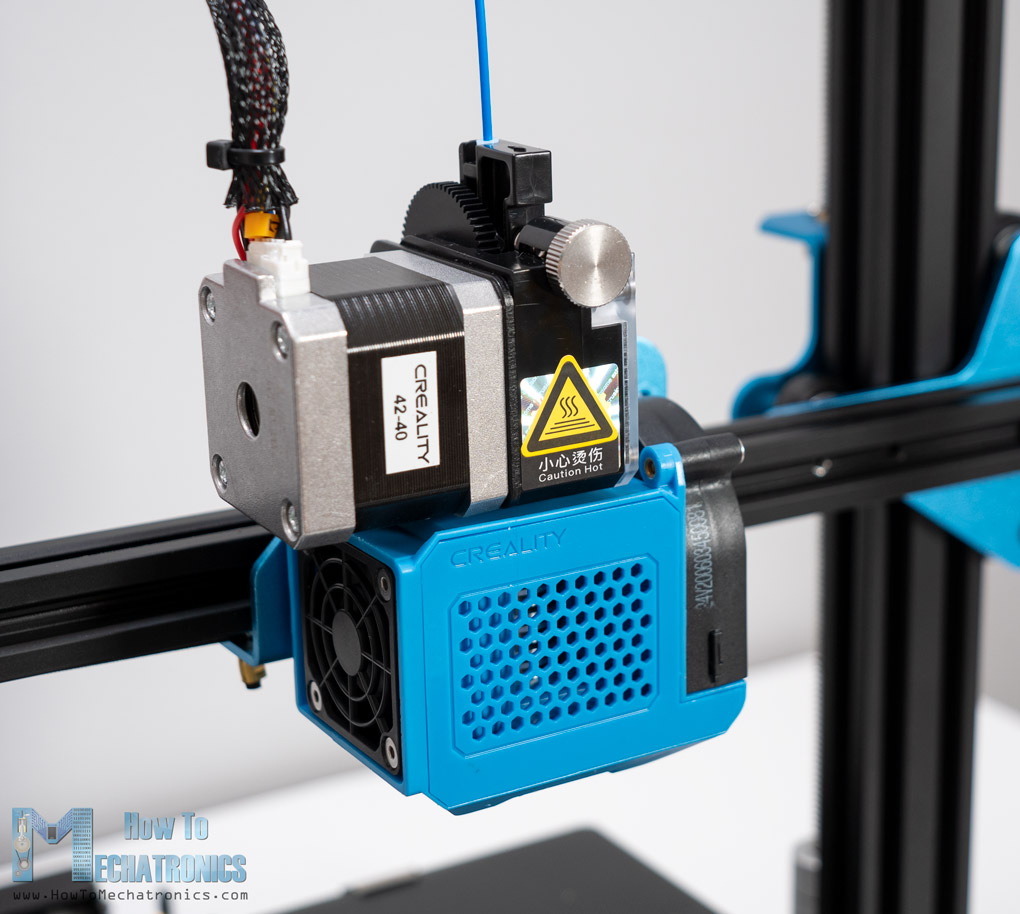
Of course, it’s not that the Direct Drives are superior over Bowden Drives, they also have some cons. For example, the added mass to the gantry, because of the motor location, can cause more vibrations and backlash when printing, especially at faster speeds.
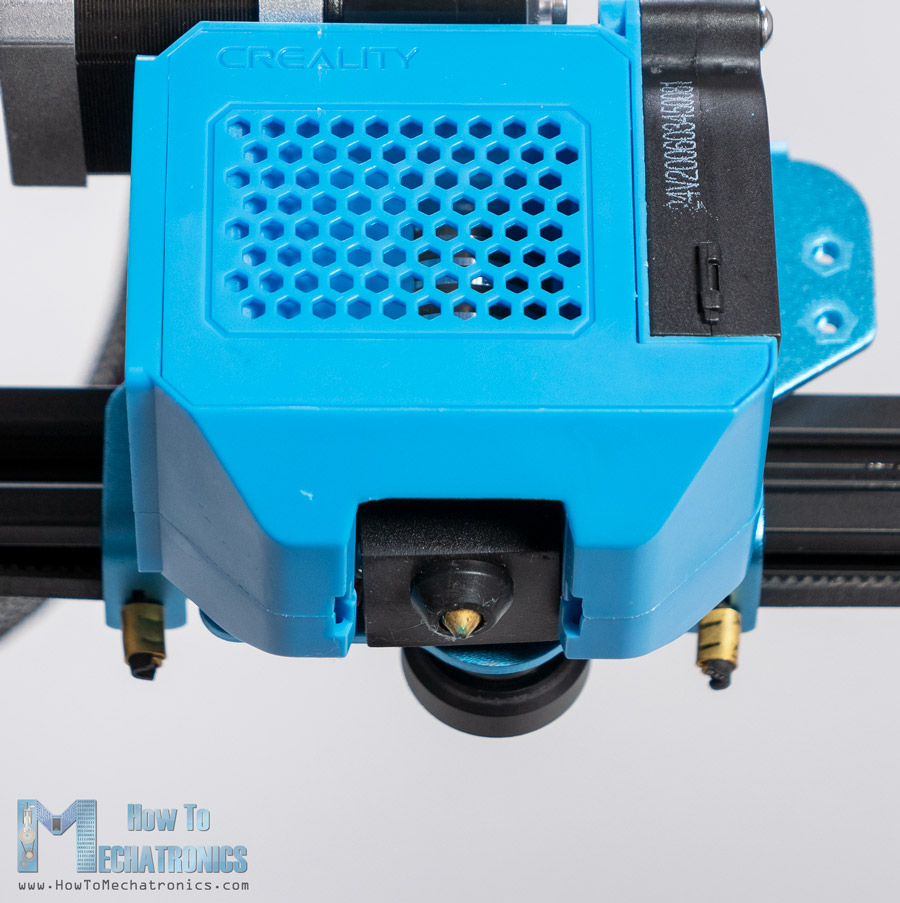
Additionally, the new print head has a dual cooling setup. One fan is for cooling the hot end, but at the same time cools the filament from one of the vent ducts, and another fan for the main cooling of the filament.
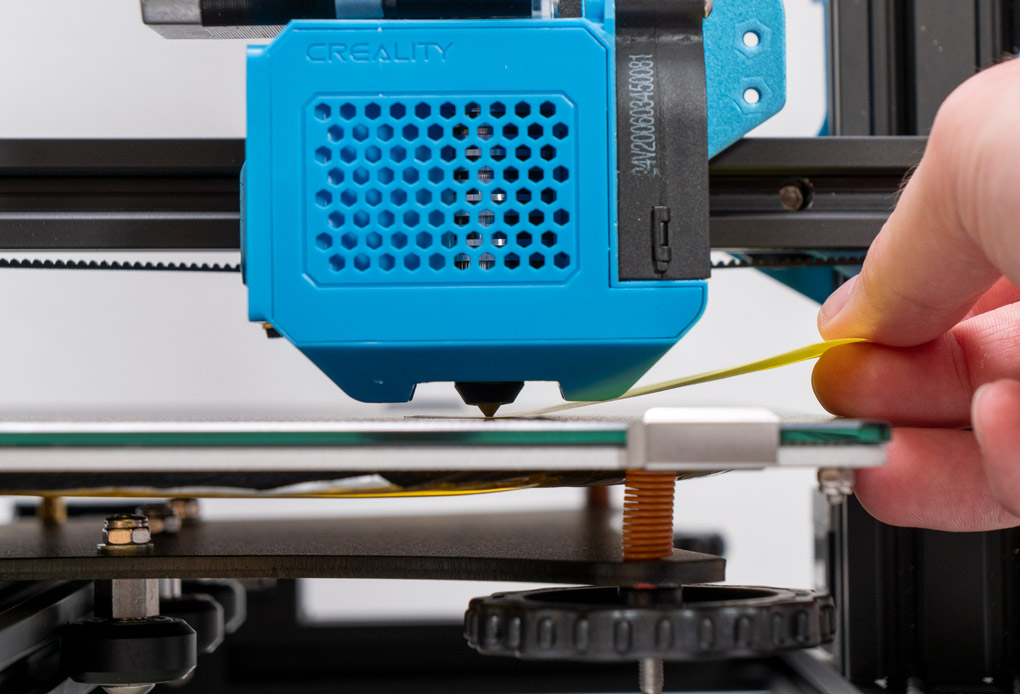
Improved Print Bed
The print bed is another improvement, which is now a special ceramic coated glass. When warmed up, the filaments sticks quite good to the print bed, so there is no need to use any kind of glue or tape. Once cooled down, the prints just pop out easily on its own.
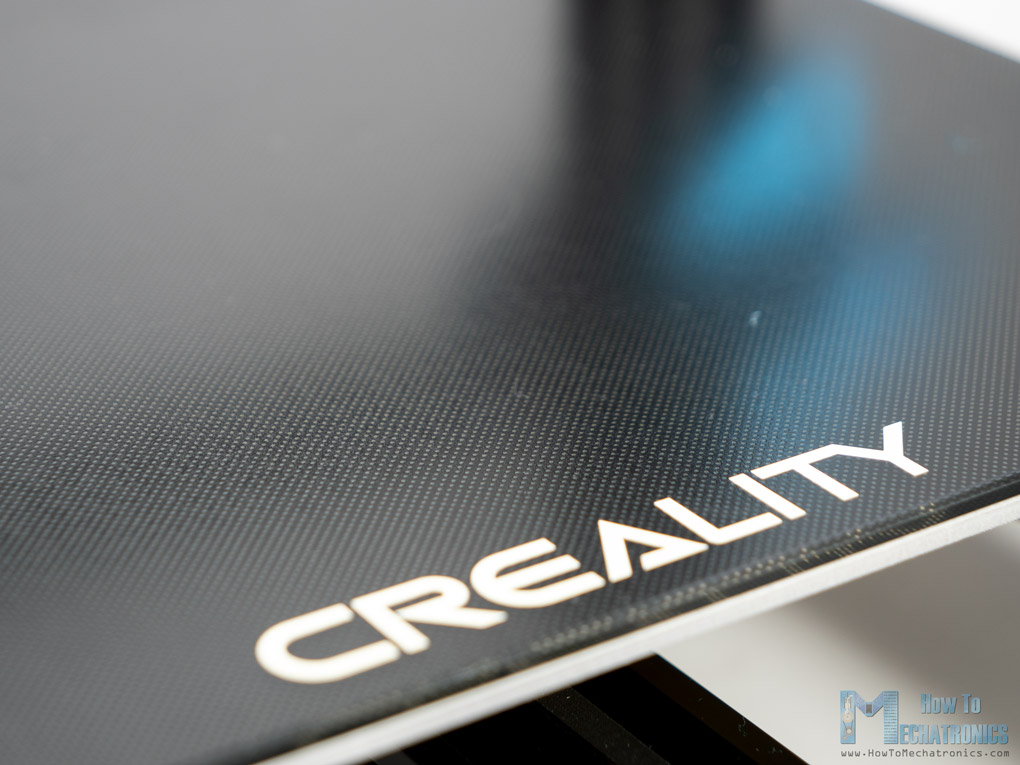
Though, it’s worth nothing that this surface can be easily damaged when using sharp objects like, for example, a spatula. Also, the print nozzle can easily scratch the surface so you should be careful when leveling your print bed.
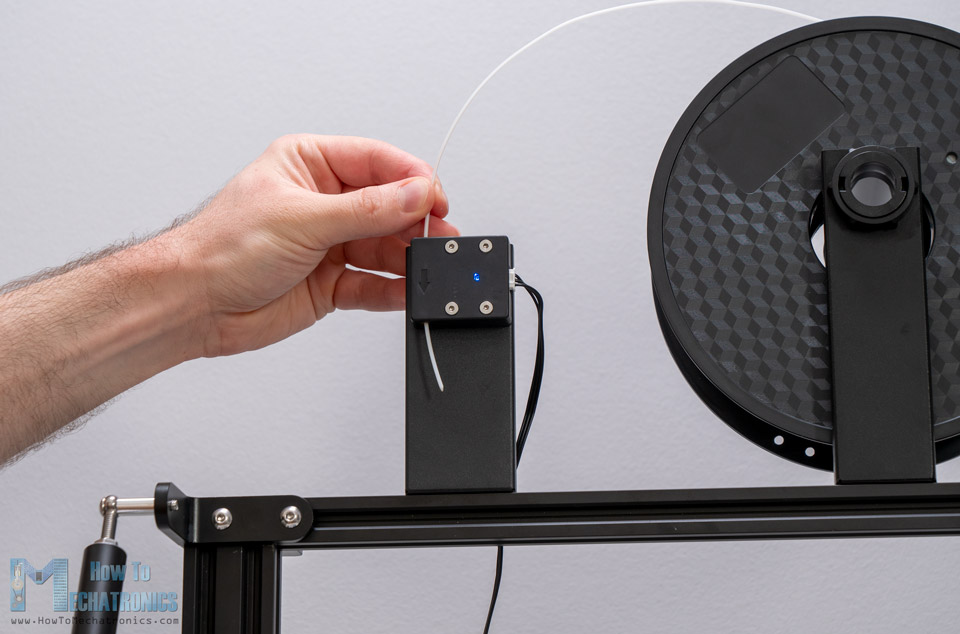
Filament Runout Sensor
The Creality CR-10 V3 comes with a filament runout sensor which is placed at the top of the printer frame. This feature is very handy, especially when printing large parts. The printer will pause when the filament will runout and you can continue the print after inserting a new filament.
Also, it features resume after power loss function. This means if the power is lost for some reason, the 3D printer can continue the same print when power is back.
Powerful Control Box
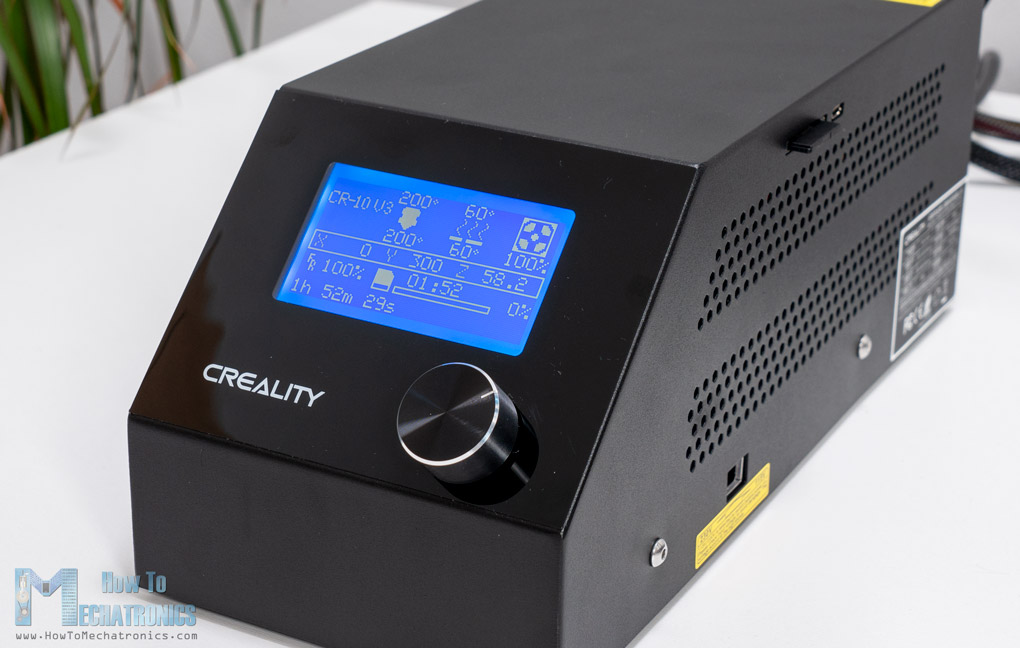
Next up, is the upgraded control box. Visually and in terms of control and interface it’s almost the same as the original CR-10. It has a knob and a monochrome display for controlling it which is actually a bit disappointing considering it’s 2020. However, the real change comes from the inside. There is a new 24V / 350W Mean Well power supply. This helps reaching desired print temperatures faster, as well as, allowing printing with wider range of materials.
Silent Stepper Drivers
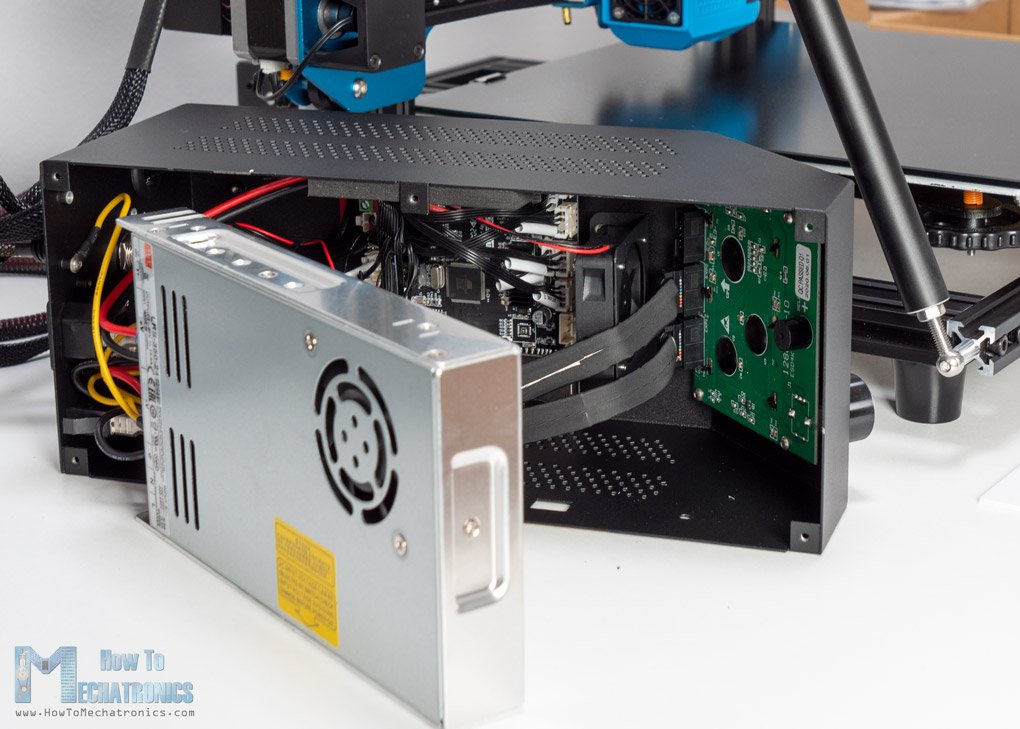
The CR-10 V3 is equipped with the latest version of the Creality motherboard which is now paired with new TMC 2208 ultra-silent stepper drivers. These stepper drivers are indeed silent and the stepper drivers are almost mute. All you can hear is the fans and some moving mechanical parts. Though, there are three fans in the control box, plus two fans on the print head. So, it can be a bit noisy in terms of fan noise, but overall the 3D printer is much more silent compared to the old CR-10. With the new stepper drivers, we should also get a smother and better print quality.
Creality CR-10 V3 Unboxing
The Creality CR-10 V3 comes well packed with foam cushions, keeping it safe during shipping.
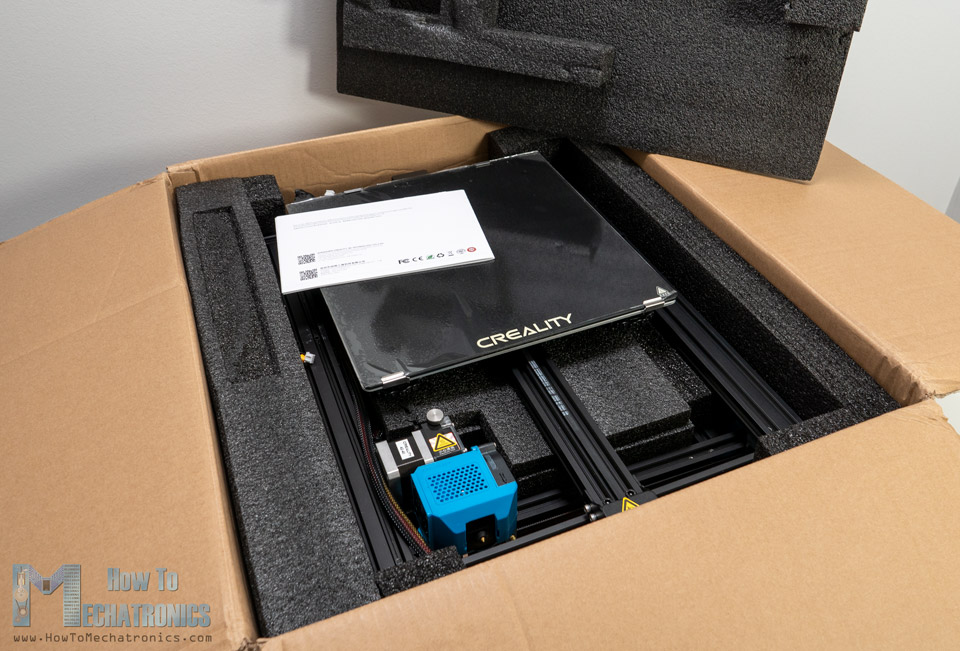
The 3D printer is like 80% preassembled so it takes around 30 minutes to an hour to fully assemble it.
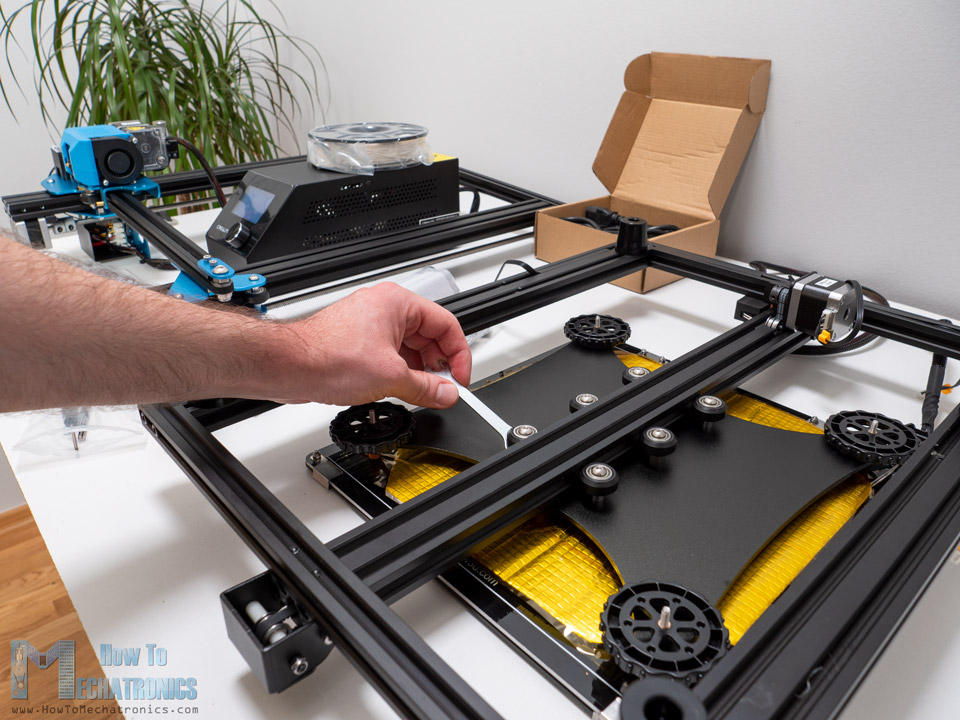
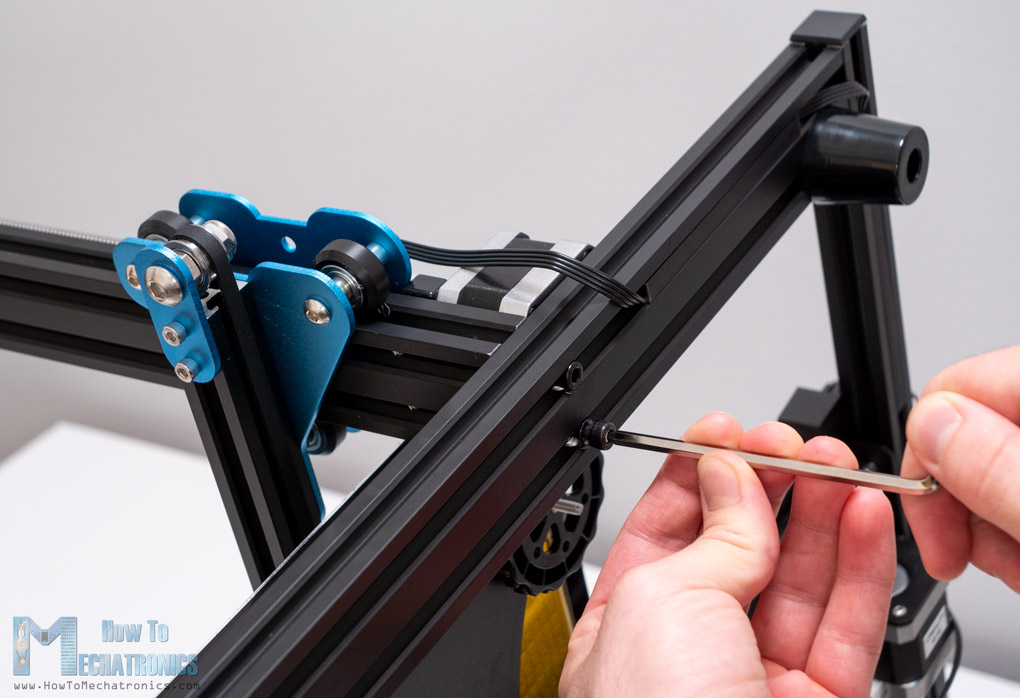
Before assembling, it’s always a good idea to check the Y-carriage bearing wheels. If needed, you can tighten them appropriately with the small wrench that comes in the box. Not just on this axis, but you should check all other bearing wheels. They should be tight, but neither too tight, nor slipping.
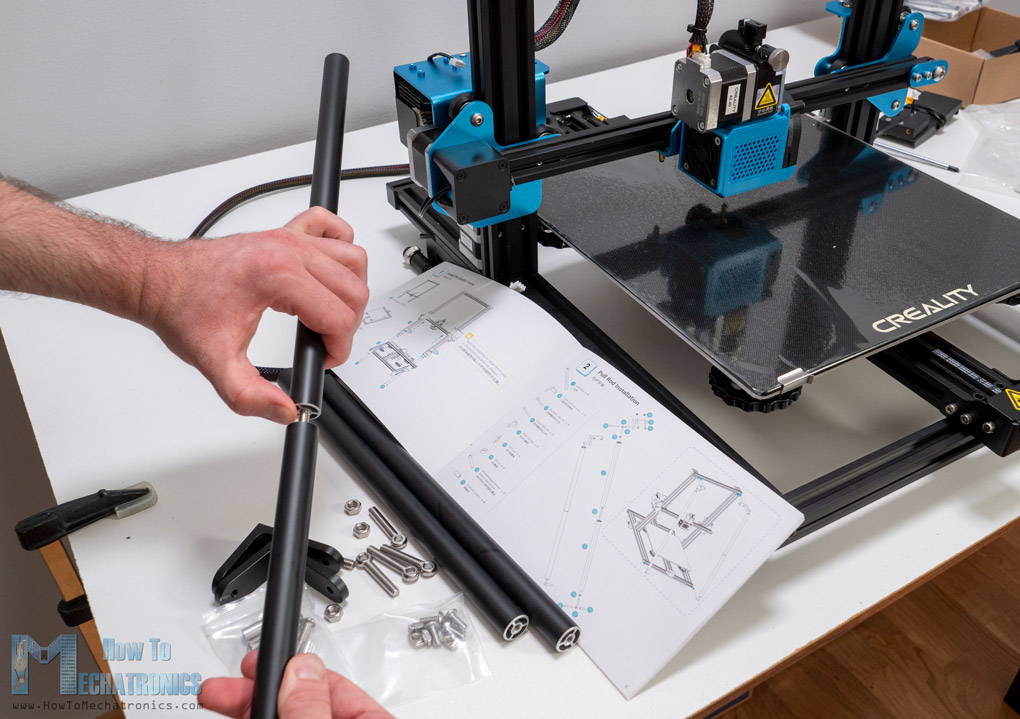
So, first we need to connect the base with the upper frame. The 3D Printer package includes all needed bolts as well as tools for assembling it.
There is also a user manual which explains each step.
Using the two supporting rods we connect the top of the frame to the bottom front of the base. This makes the 3D Printer very sturdy.
The spool holder and the filament runout sensor go on top of the frame.
Next, we need to attach the Z-axis limit switch in place and connect it with the appropriate Z connector.
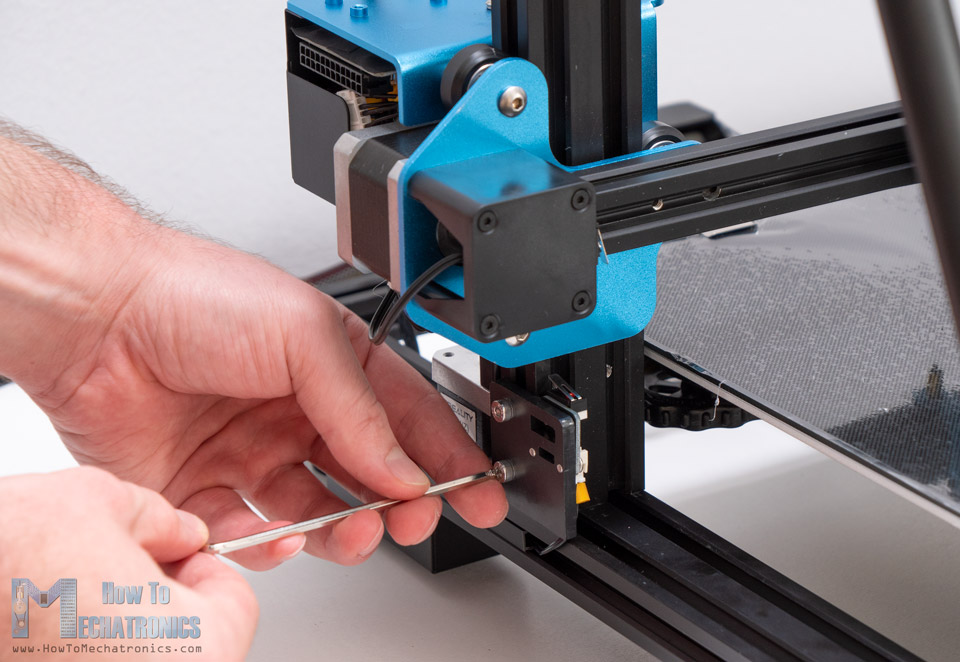
Then we can connect all the cables in place, and that’s easy because each one has a unique connect so you can’t connect anything wrong.
At this point t’s important to select the proper input voltage on the control box, either 230V or 115V, depending where you live.
Finally, we can power up the printer, level the printing bed and we are ready to rock!
Test Prints with the CR-10 V3
In this section we will take a look at some prints I made with the Creality CR-10 V3. Of course, the first test print was the 3DBenchy boat.

Initially I didn’t get good a print result, but after some tweaking in the slicing software the result came out almost perfect.
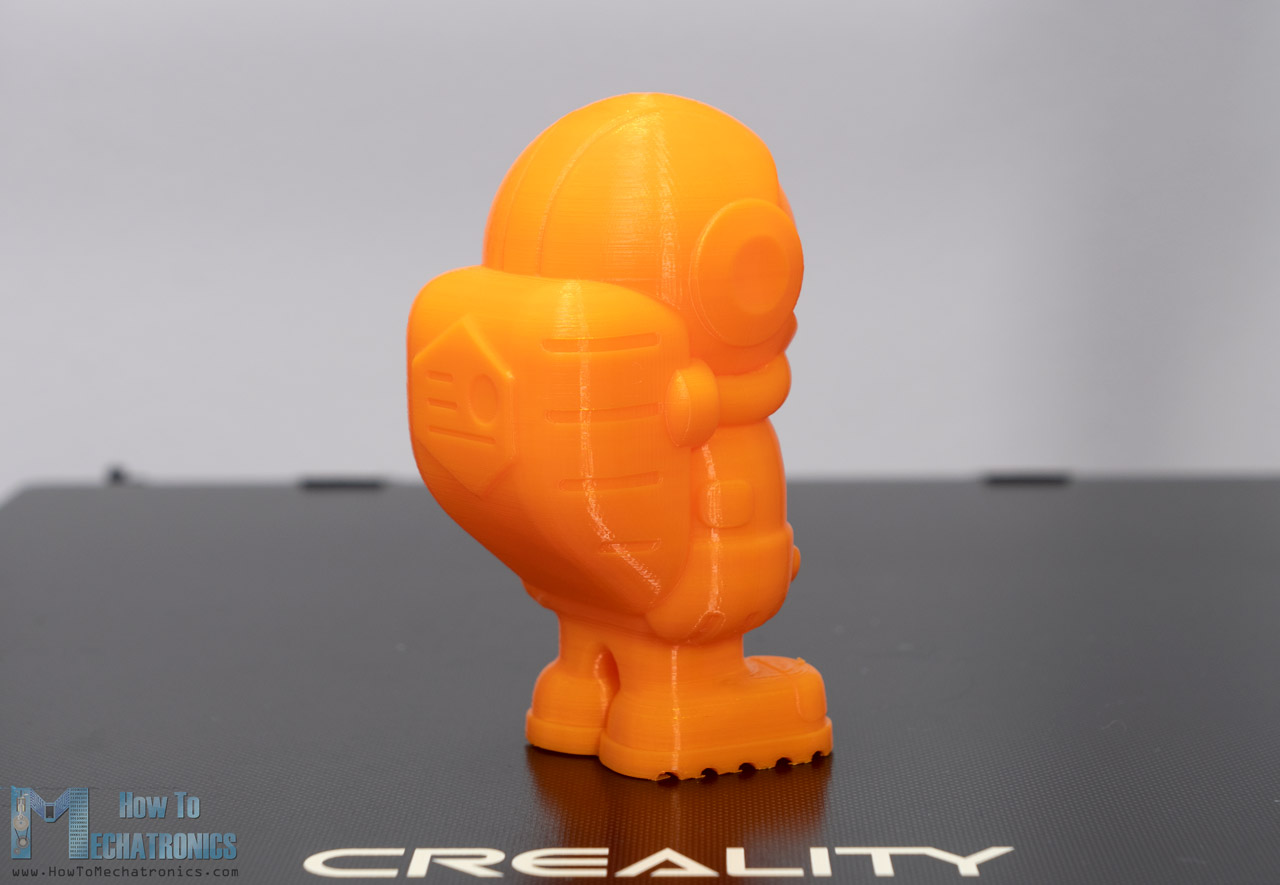
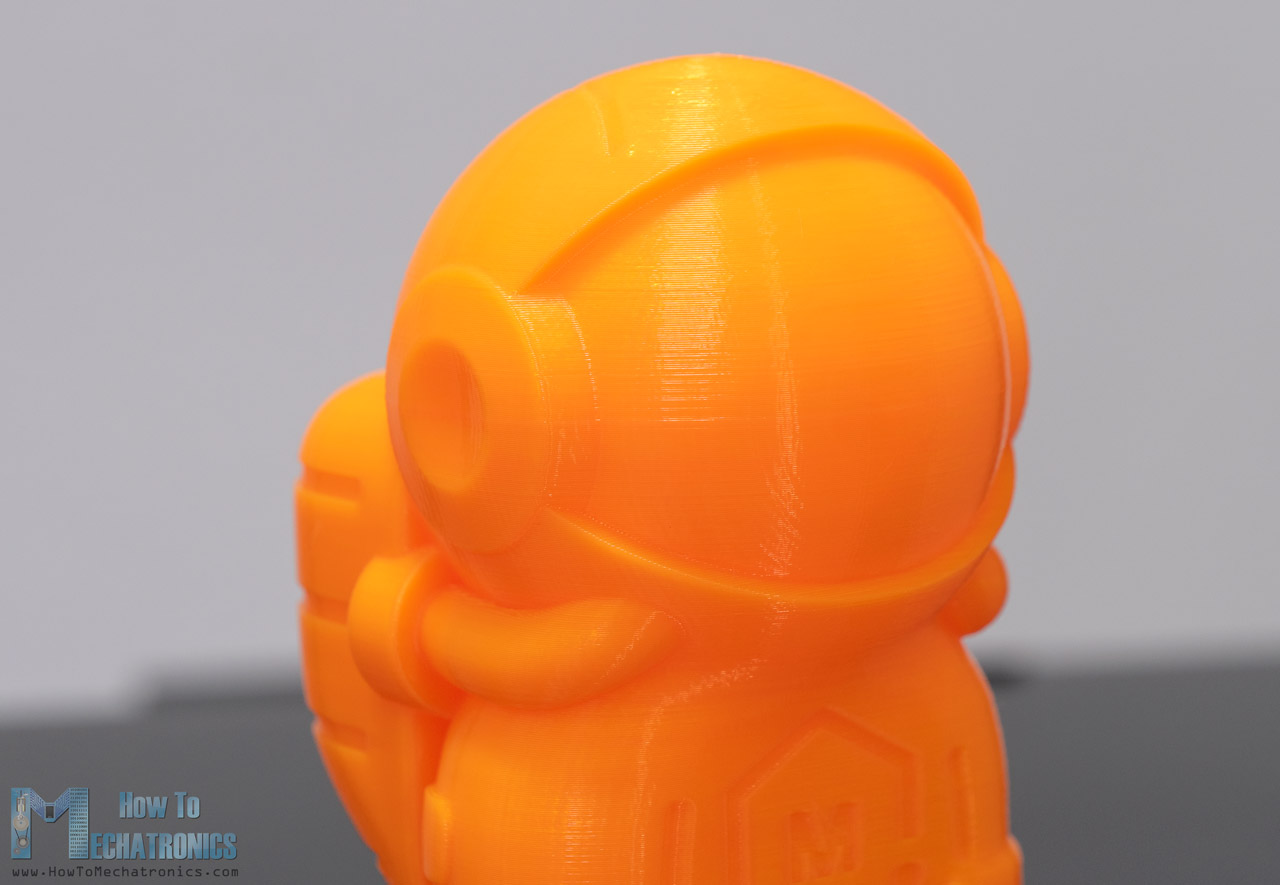
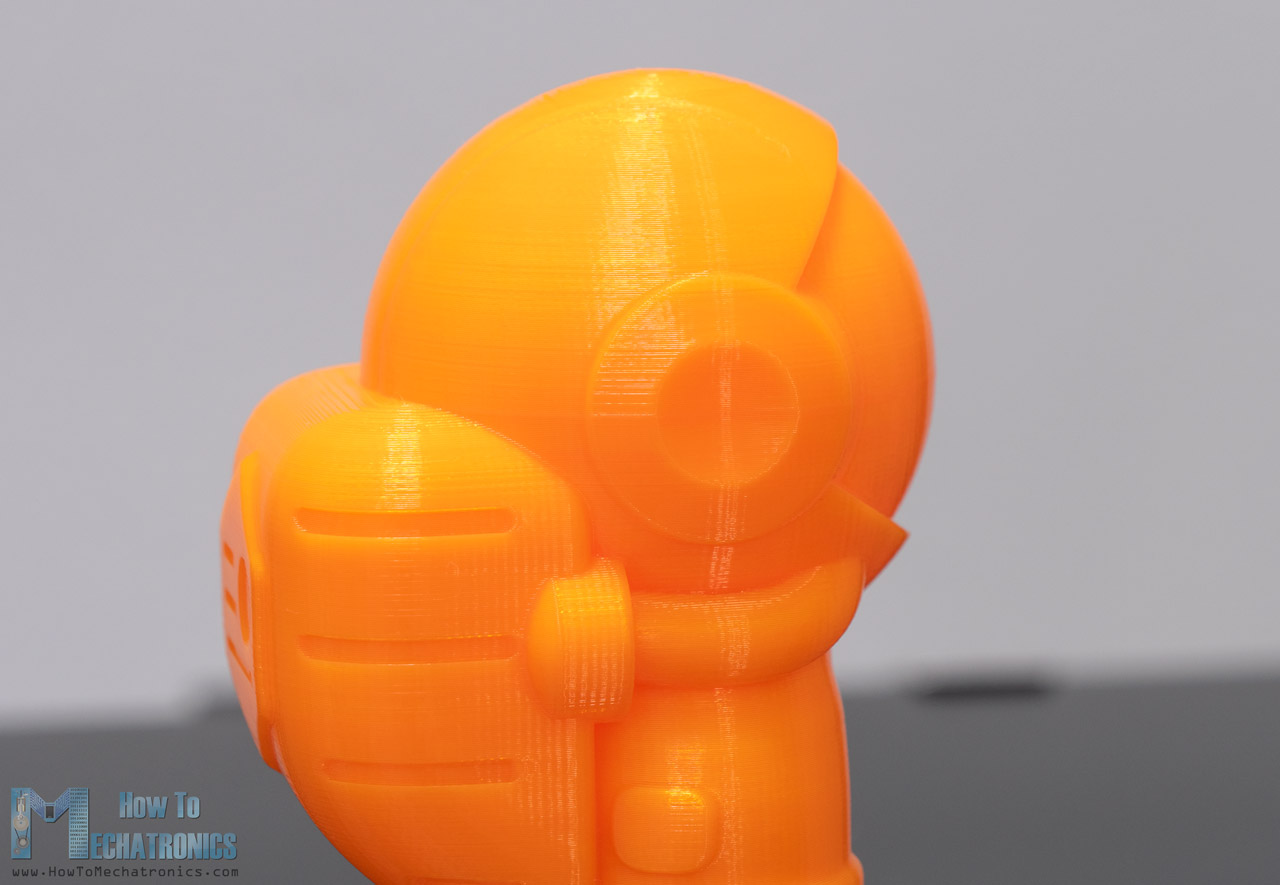
Then I 3D Printed the MatterHackers mascot: Phil A. Ment. It came out great with high level of details.
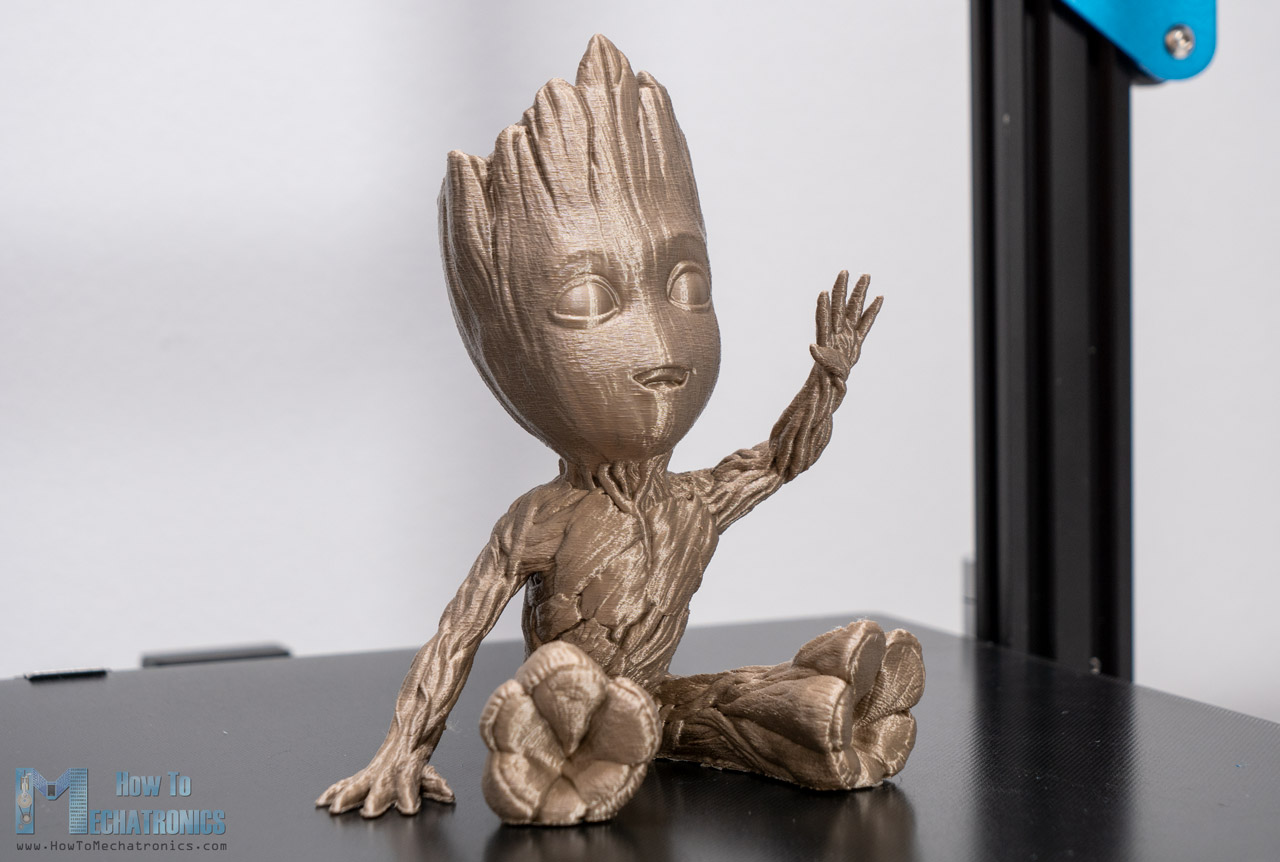
I 3D printed the Waving Groot 3D Model at 0.15mm layer and it came out beautifully.
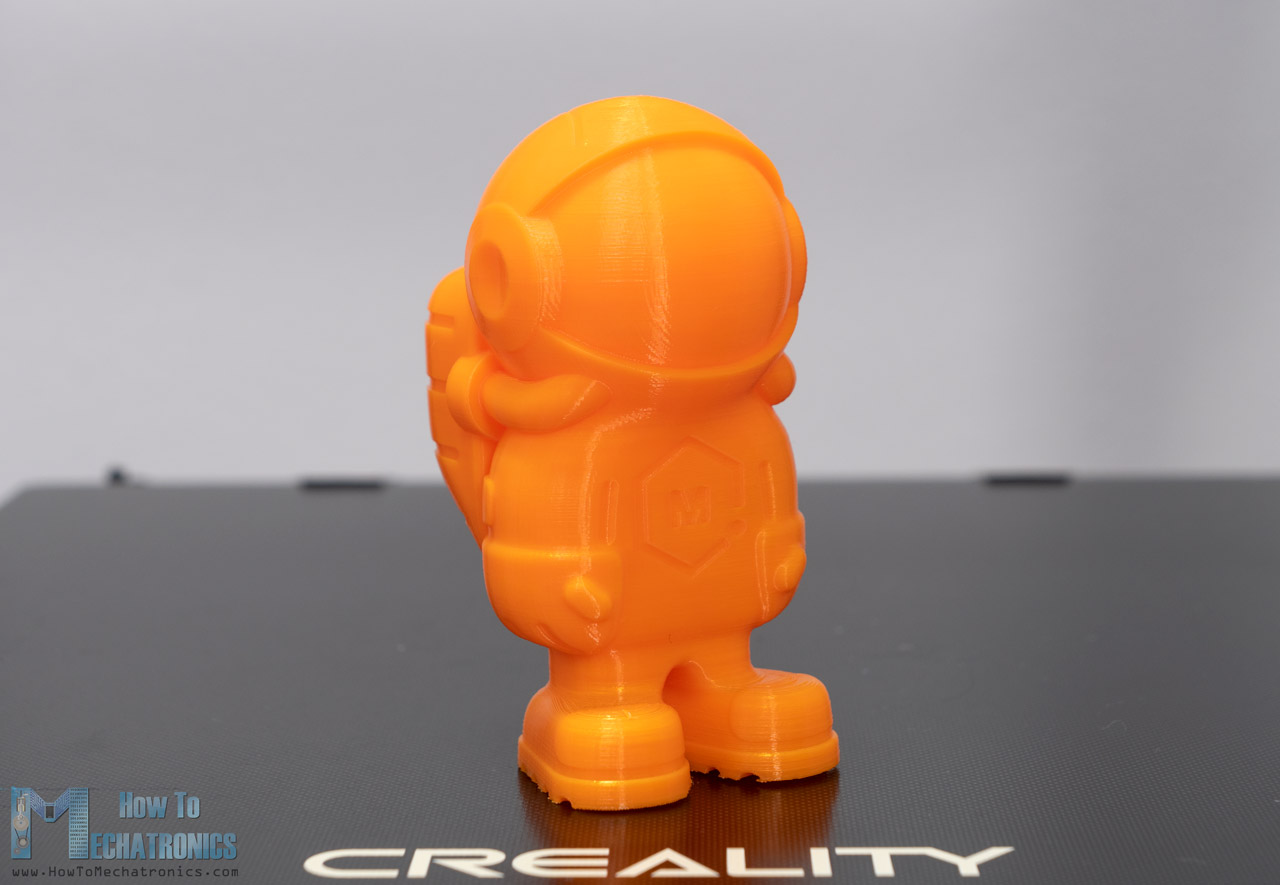
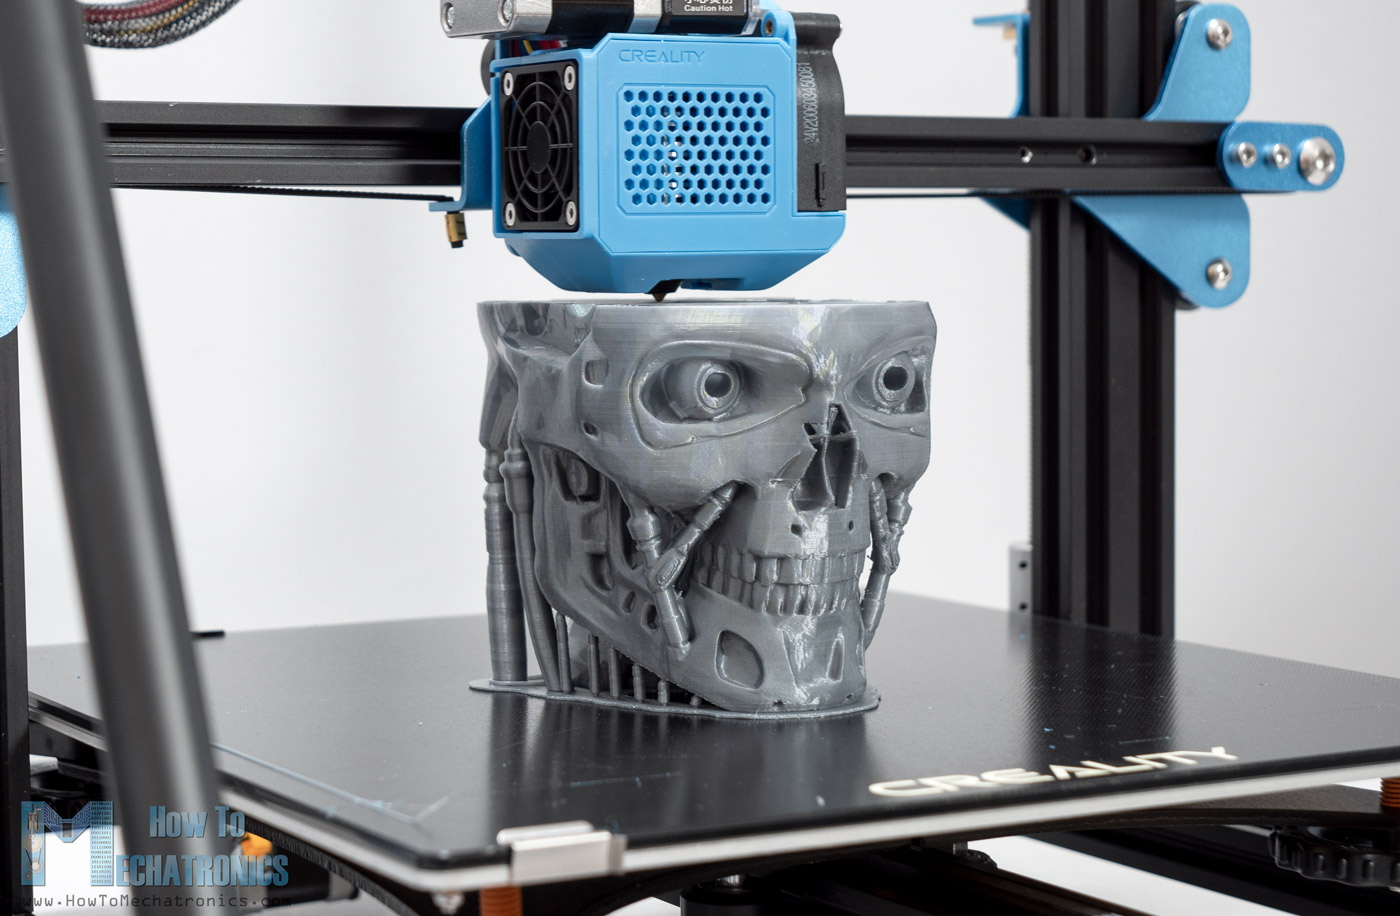
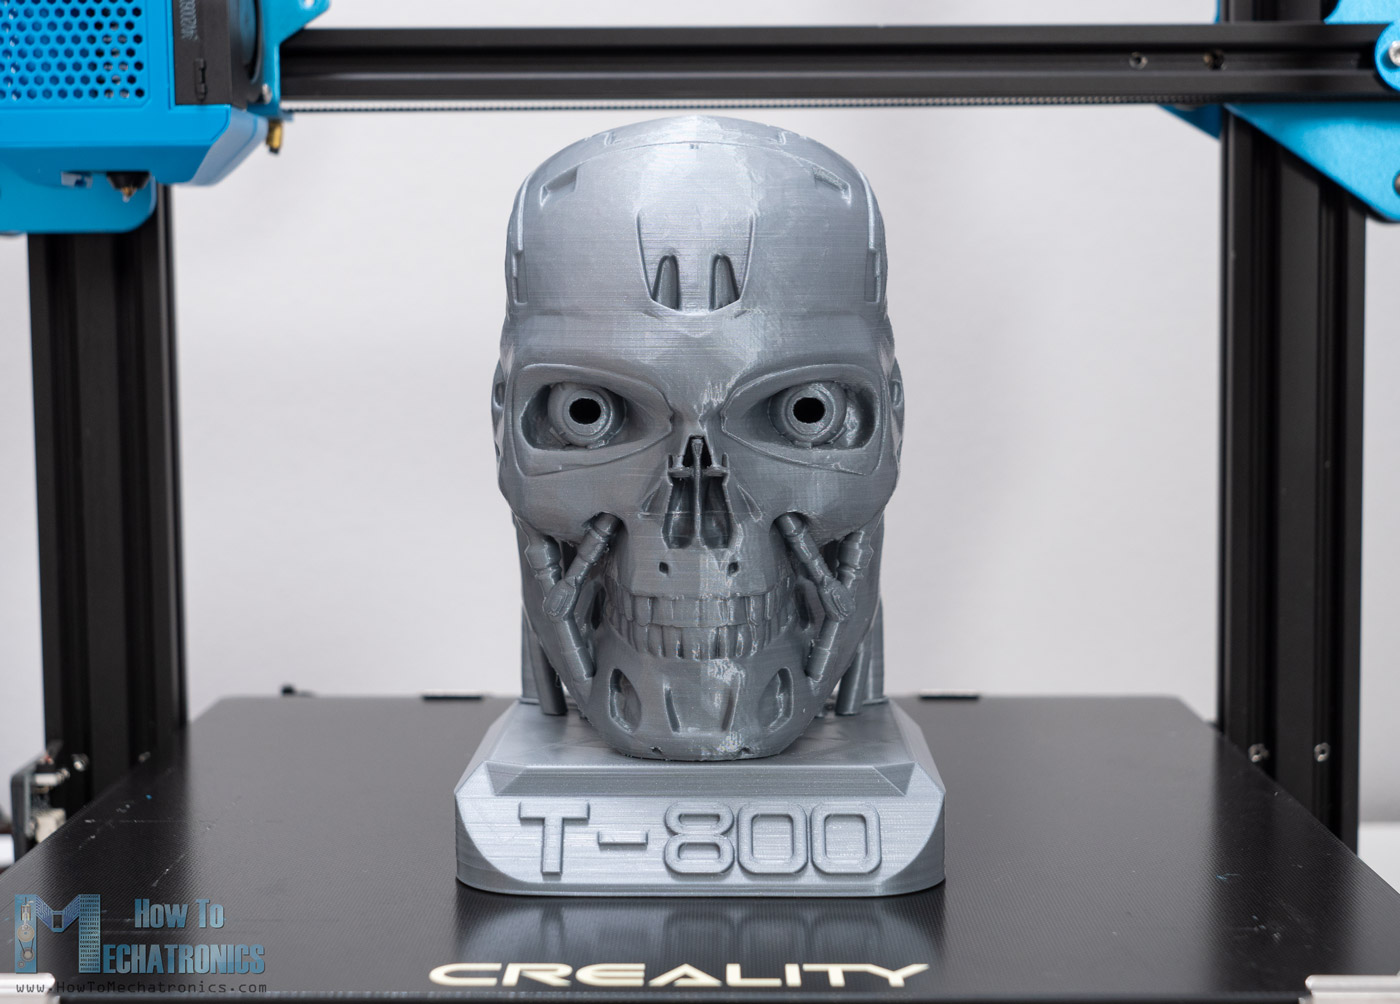
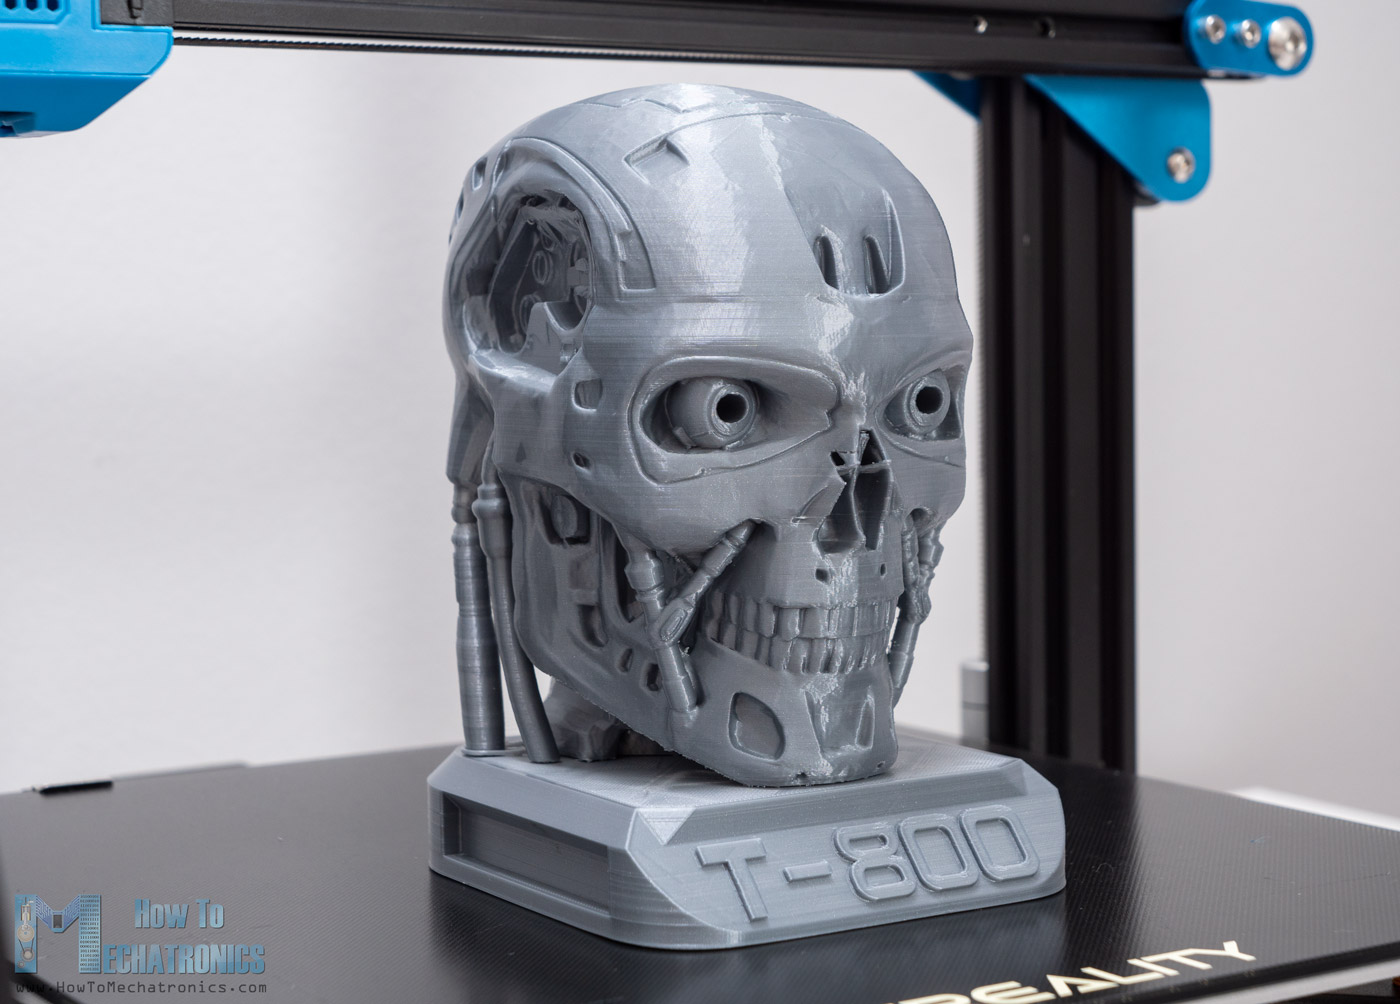
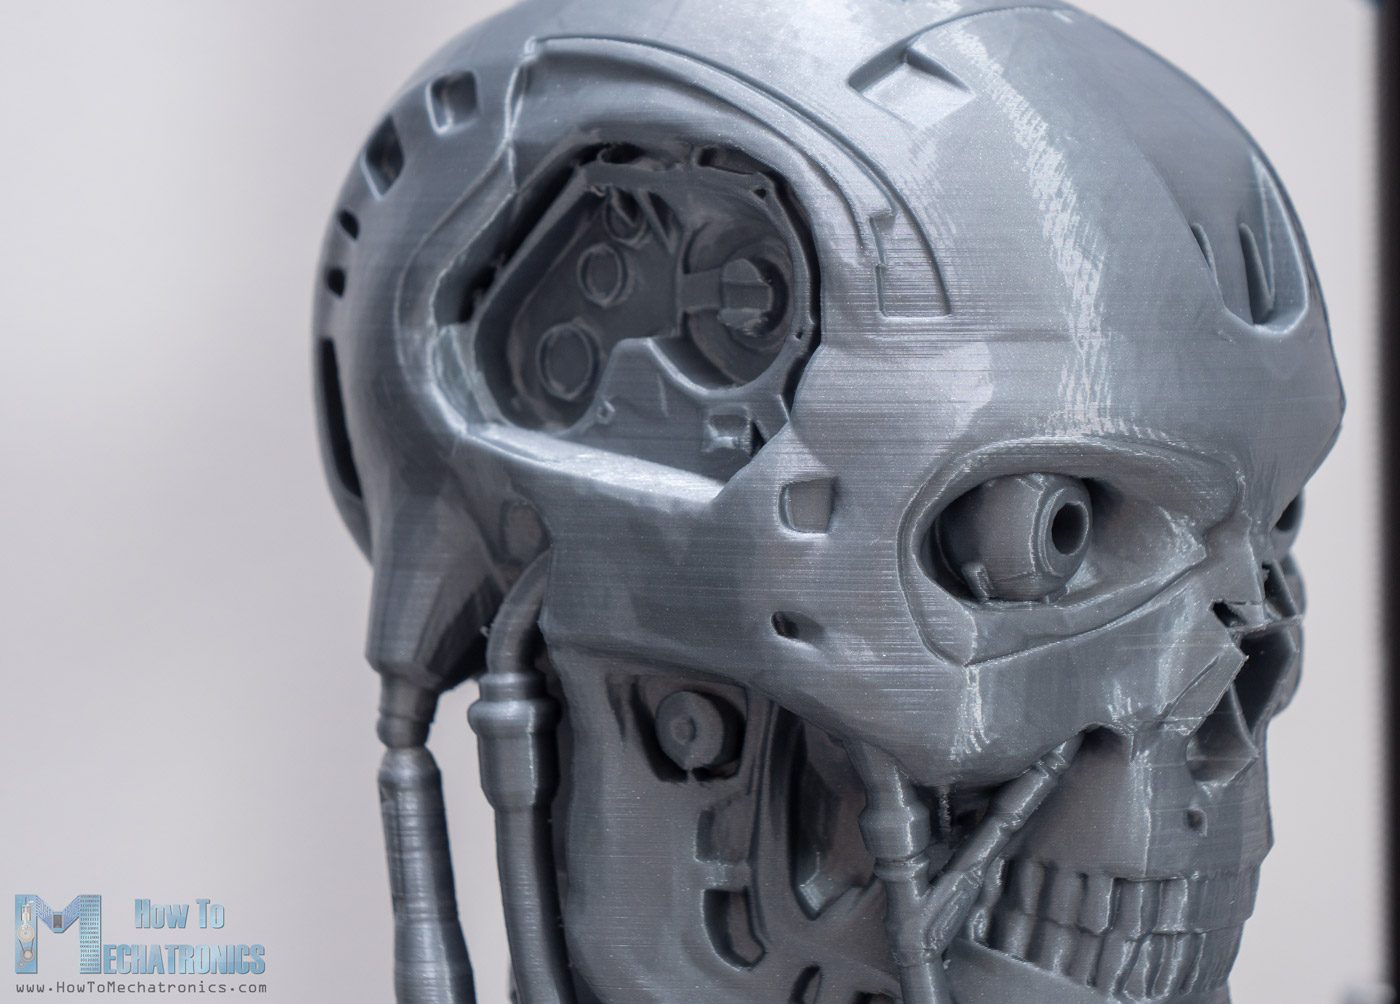
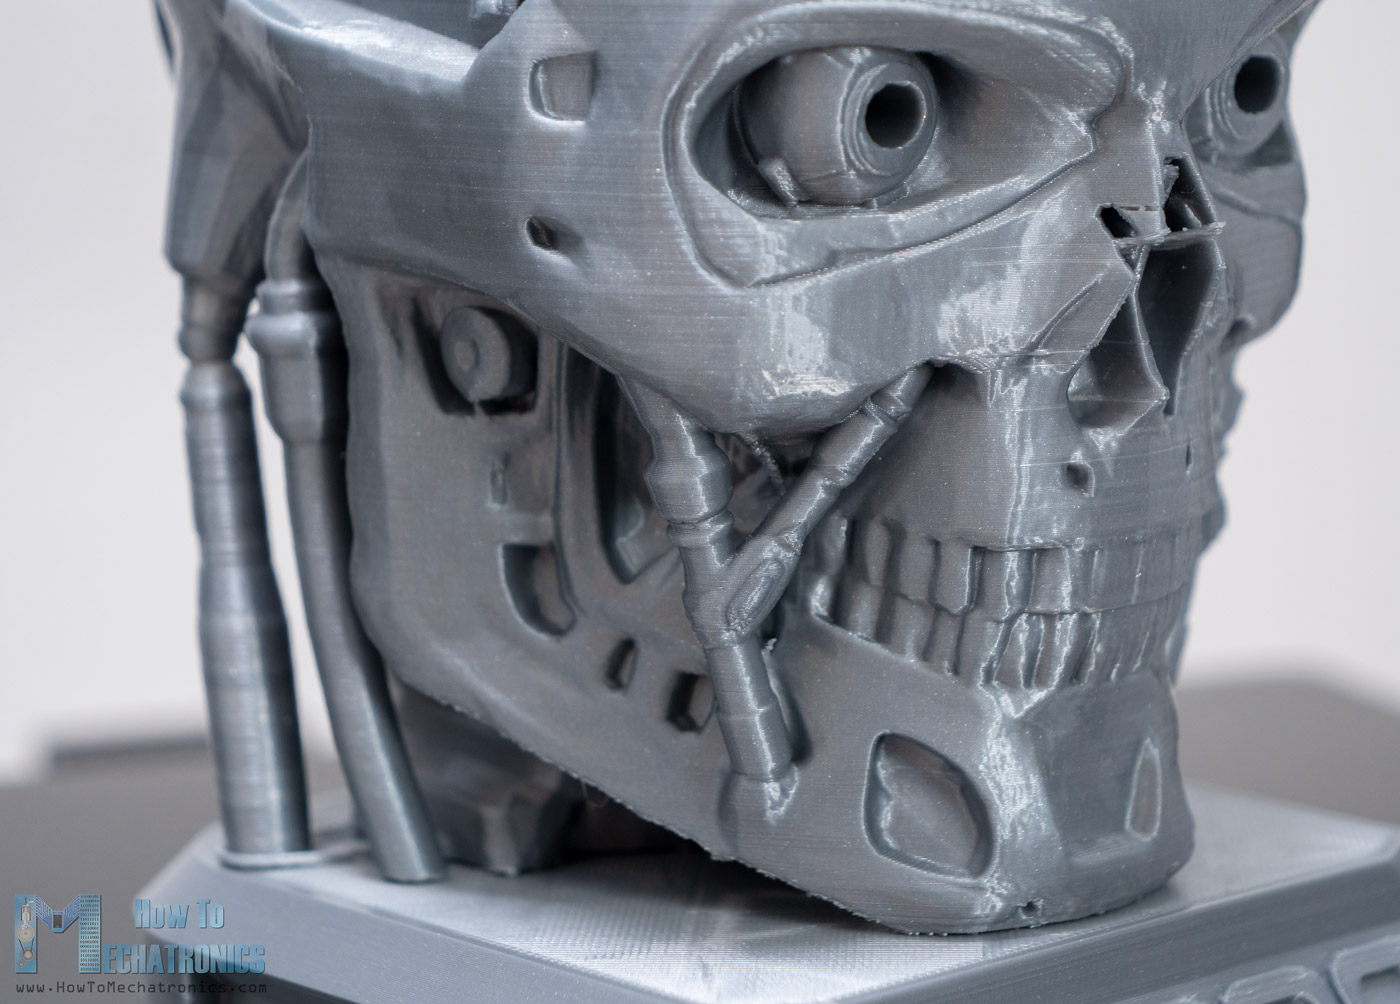
And probably my favorite 3D print, the Terminator T-800 3D Model. Just take a look how good, accurate and detailed the 3D print is. The CR-10 V3 did a really great job on this one, the model looks like it’s a cast metal rather than 3D printed plastic.
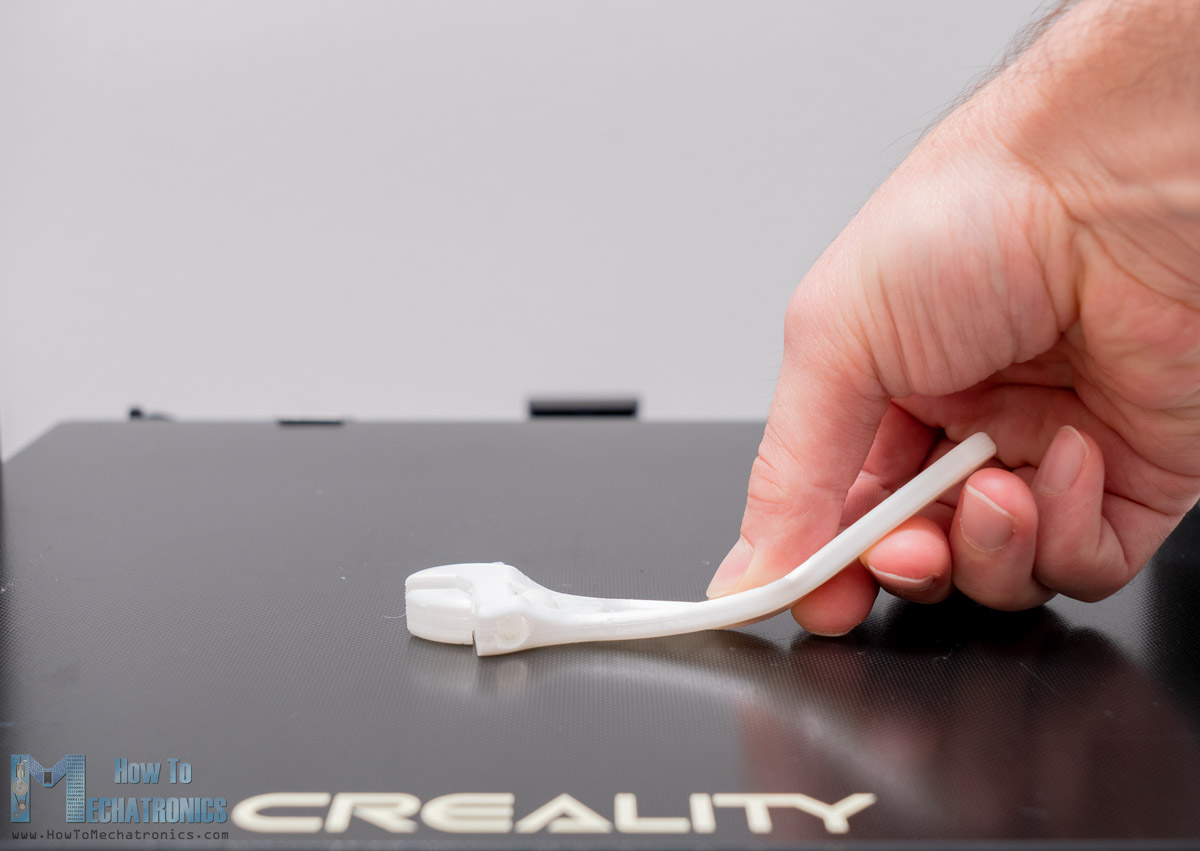
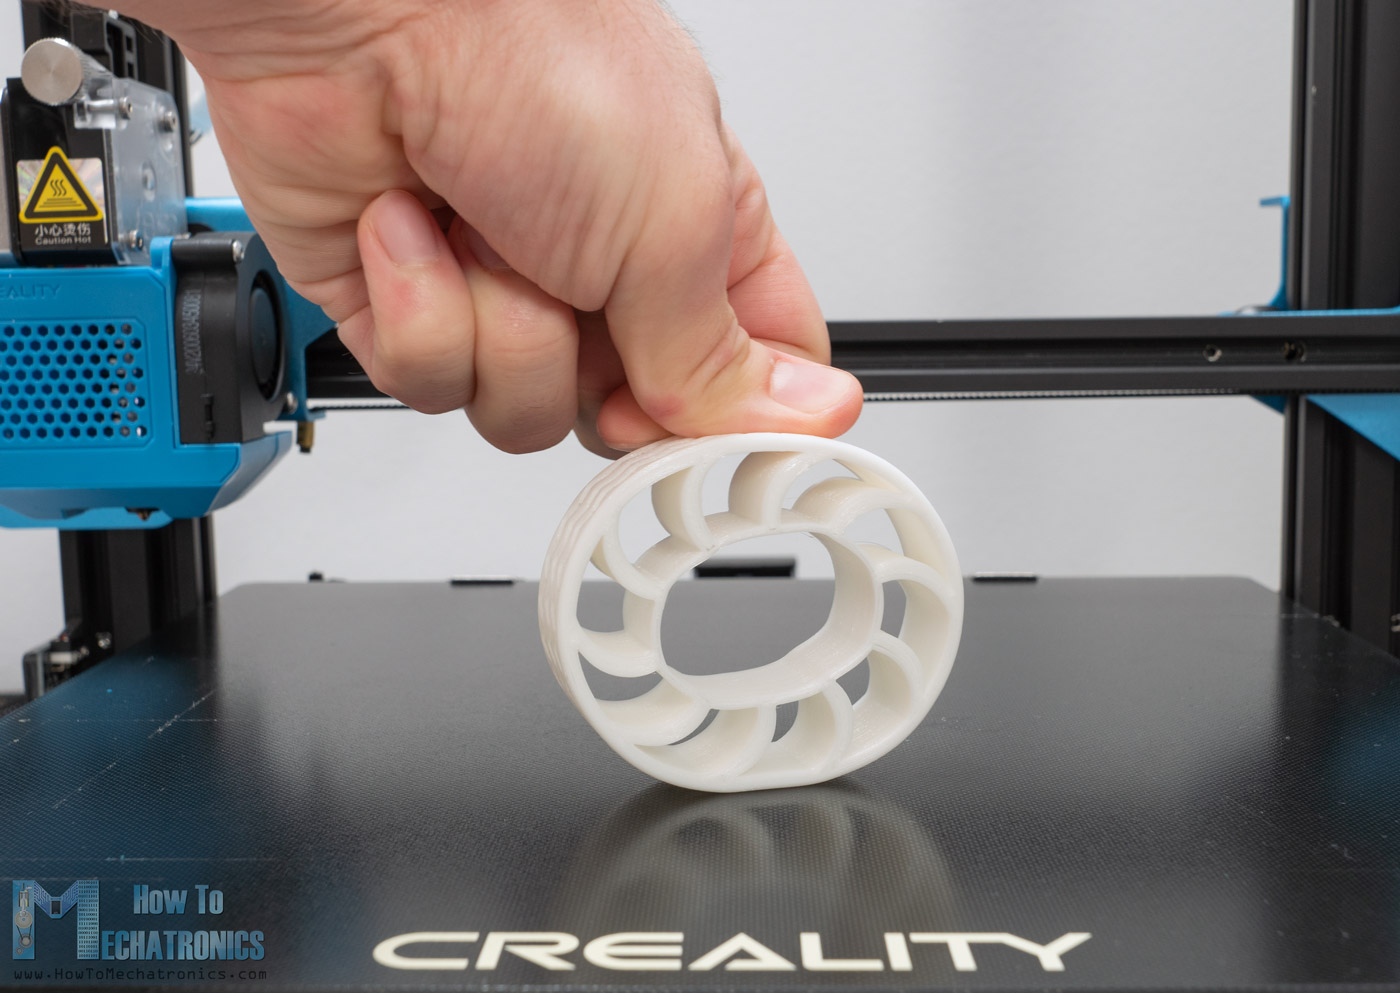
Finally, I tested the 3D printer with some flexible filament, which also handled it quit good. I printed this wrench model and this TPU wheel model.

Conclusion
So, after testing the Creality CR-10 V3 for a week, I can say that it definitely delivers. The Titan Direct Drive is great as it can print with high details and can easily handle flexible materials.
The printing bed heats up quickly and it ceramic coating does great job at sticking the parts. Though, the bed leveling is manual, but you have the option to get the optional BL-Touch leveling probe for automatics leveling.
The control box with it’s new branded power supply and the silent stepper drivers are also great. But here also comes it’s biggest weakness I think, and that’s the dated monochrome display and control knob style which are not so user-friendly, compared to touch displays.
So, to answer the some questions. Is the CR-10 V3 better than the original CR-10? Yes, it’s better. Is it worth your money? Yes, it’s worth it as you really get what you pay for. However, the original CR-10 is still good option if you are on a tighter budget.
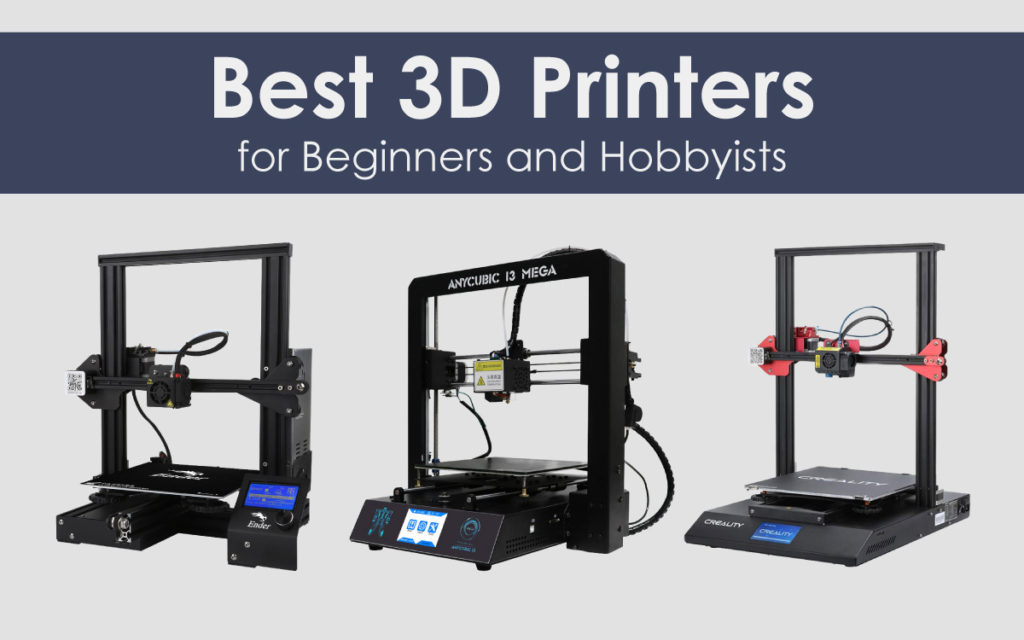
Additionally, you could also go with the CR-10 V2, which is basically the same 3D printer which instead of Direct Drive it has a Bowden extruder.
An alternative to consider which matches the specs and performance of the Creality CR-10 V3 is the Artillery Sidewinder X1.
Check out my Exclusive Coupons from Banggood
- Creality CR-10 V2…………… Coupon: BGCRV211 | Price: $369
- Creality CR-10 V3…………… Coupon: B6a98d0 | Price: $399
- Artillery Sidewinder X1…… Coupon: BG52699 | Price: $359
- Creality CR-10 …………….…. Coupon: BG95990e | Price: $319
Hi!
I have recently purchased a Creality CR-10 V3, and I am looking for slicer software that is compatible with my 3D printer and will work on a MacBook. Any recommendations?
Thanks
Well, I’m using Cura slicing software on Windows, but it should work and MacBook as well.