At a glance
9.5
/10
Pros
- Great print quality
- Impressive print speeds
- Fully automated bed leveling
- Big print volume
- Enclosed (ABS and ASA printing is a breeze)
- User-friendly design with great touch display
Cons
- Hard to reach spool holder
- Fairly loud (when printing PLA, with top cover removed)
The Creality K1 Max is an impressive 3D printer which provides great print quality at high speed and it’s packed full of features you wouldn’t even though about just few years ago. It has a LiDAR and a camera, and uses a form of AI to prevent failed prints and assist with bed leveling and first layer perfection.
The K1 Max has a nice and sleek enclosed design, providing well controlled environment and makes 3D printing ABS and ASA materials a breeze. The large and responsive 4.3 inches touch screen, in combination with the network operation, deliver great user-experience.
Creality K1 Max Design and Features
This flagship 3D printer by Creality is a Core XY 3D Printer which enables it to reach high printing speeds of up to 600mm/s.
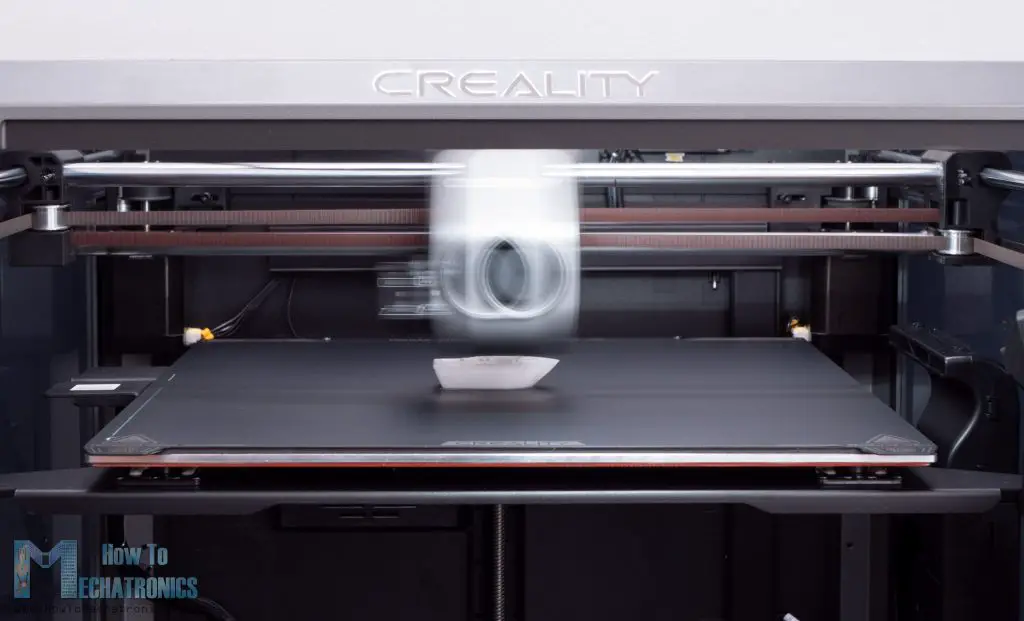
On this type of 3D printer, only the print head moves along the X and Y axes. The build plate moves just along the Z-axis, slowly descends layer by layer. That means, no moving mass from the build plate and the print itself, but only the print head, which eventually means that the printer can reach higher printing speeds.
The K1 Max is packed with ton of features so let’s take a closer look at then now.
Main features:
- Fast printing speed of 600mm/s and 20000mm/s² acceleration
- Fully automated bed leveling
- Enclosed
- Ceramic hot end and volcano-style nozzle
- Connect via Wi-Fi, LAN, Creality Cloud, USB
- 4.3 inches touchscreen
- AI Camera
- Filament run-out sensor
- Build Volume of 300x300x300mm
Fast printing
The fast printing speed is the main feature of the K1 Max. Creality advertises that it can reach speeds of 600mm/s and 20000mm/s² acceleration, though, the stock settings of the Creality slicer are limiting the print speed to 300mm/s and 12000mm/s² on average. In order to get the 600mm/s printing speeds, you will need to play around a bit and change the settings of the slicer.
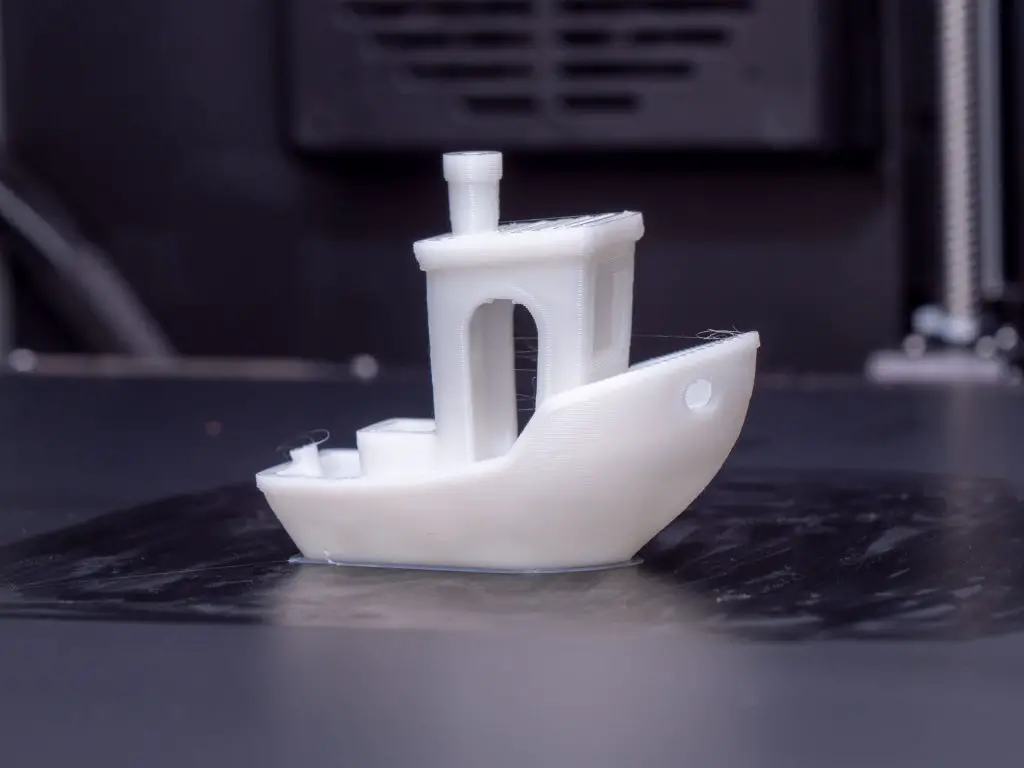
The K1 Max comes with a presliced 3D Benchy file that shows how fast it can print. The 3D Benchy is printed in only 16 minutes and it looks really well if you print if with the white Hyper filament that comes with the 3D printer.
On the other hand, if you try to slice the 3D Benchy with the stock “fast printing” profile in the Creality slicer, you will get printing time of around 35 minutes.
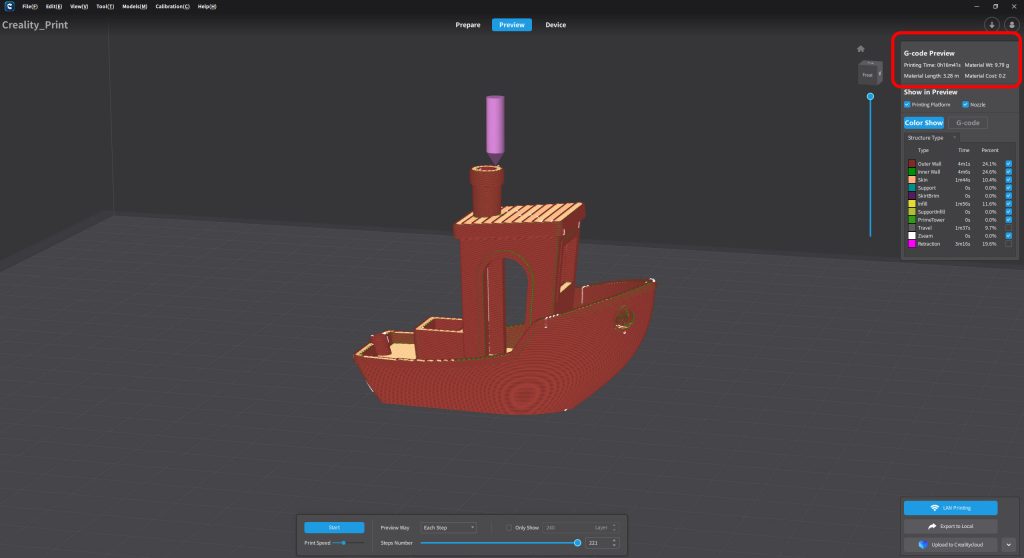
To get the 3D Benchy printed in 16 minutes, you will need to uncheck the “Enable Acceleration Control” and “Set Overhanging Wall Speed Grading, as well as set the “Minimum Layer Time to 0.
Fully automated bed leveling
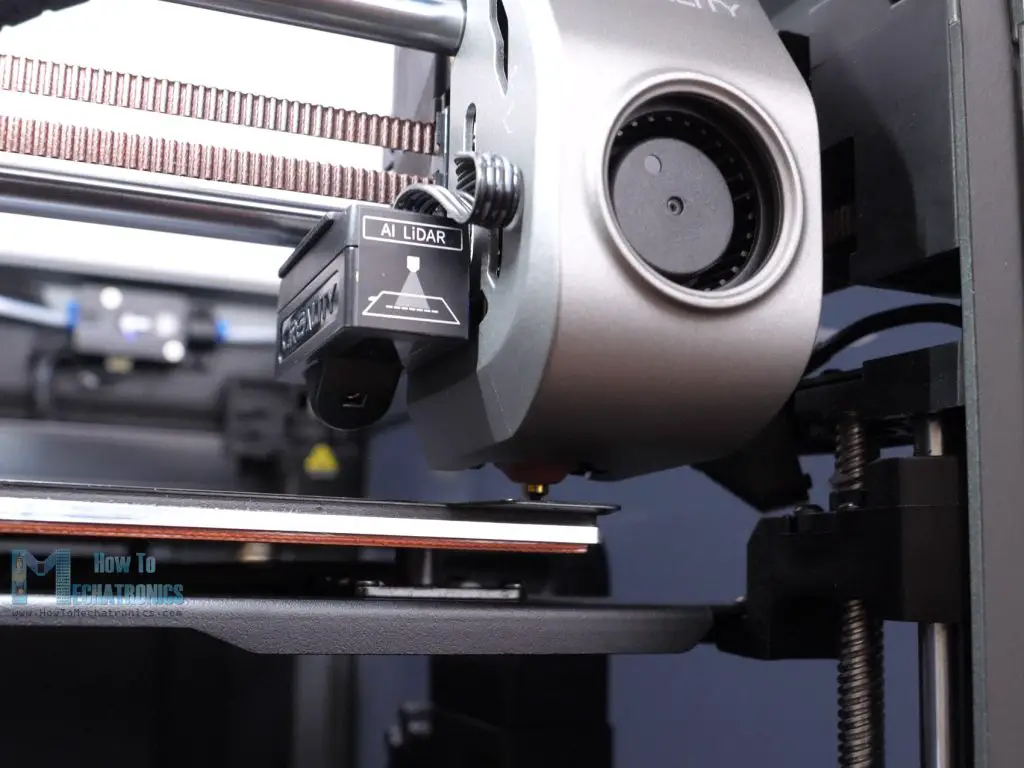
Printing with the K1 Max is a breeze, as it features fully automated bed leveling. There are embedded strain sensors on the print bed which help in the process. The nozzle gently touches the bed at various locations which the strain sensors detect, and set the Z-offset automatically. With this the 3D Printer compensates for any slight unevenness in the bed.
The K1 Max also uses its LiDAR scanning system for AI leveling, or it can detect if there is something wrong with the first layer and pause the print.
On top of this, the Creality K1 Max comes with a flexible magnetic PEI build plate with a smooth surface. It sticks very well on all prints. Creality also provides a glue stick in case you have a problem with the prints not sticking, but I didn’t have any problem with it.
Enclosed
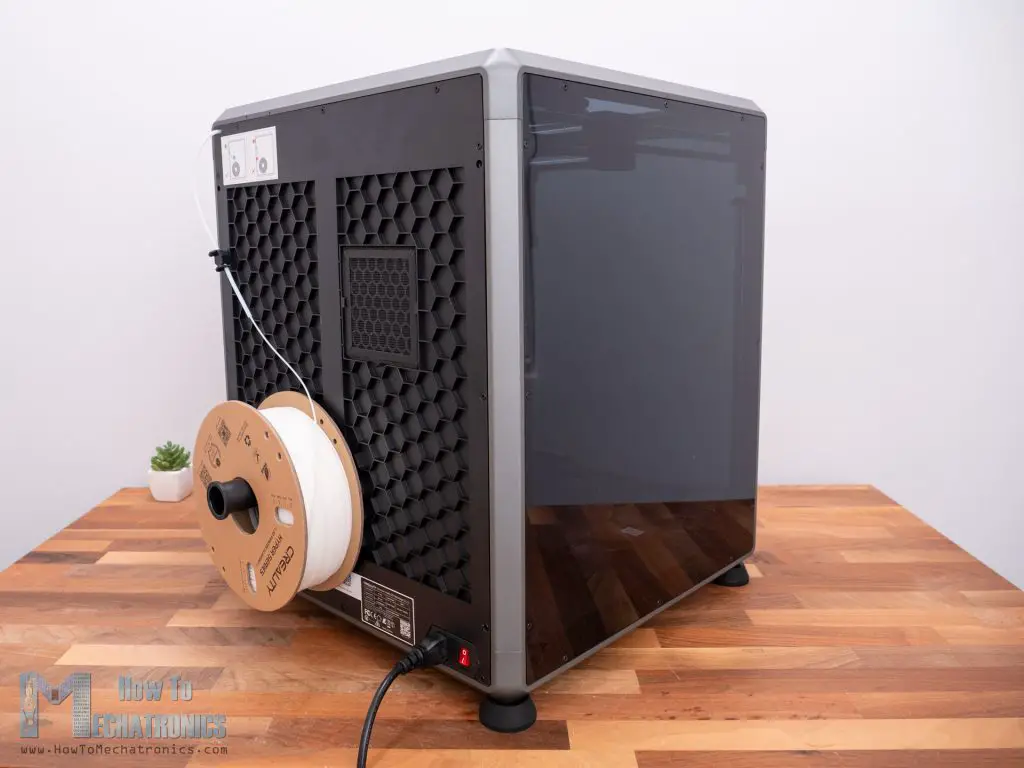
The K1 Max is fully enclosed 3D printer which makes printing ABS and ASA so easy. The enclosed chamber can easily reach 50 degrees Celsius. Though, when printing PLA it is recommended to remove the top glass lid because it would be too hot.
There is also a carbon filter on the back side of the printer but I’m not quite sure about its functionality as the printer is not like 100% sealed. There are small gaps on the door through which fumes and smell can still escape.
Ceramic hot end and volcano-style nozzle
The K1 Max comes with a ceramic hot end that enables fast heating. It can reach 200°C in just 40 seconds. The nozzle is 0.4mm hardened steel and can reach temperatures of up to 300°C. It’s a regular volcano-style nozzle that can be easily replaced with 0.6mm or 0.8mm nozzle or a diamond-tip nozzle.
The dual-gear direct extruder, ensures strong extrusion force and a maximum flow of 32mm³/s.
Connect via Wi-Fi, LAN, Creality Cloud, USB
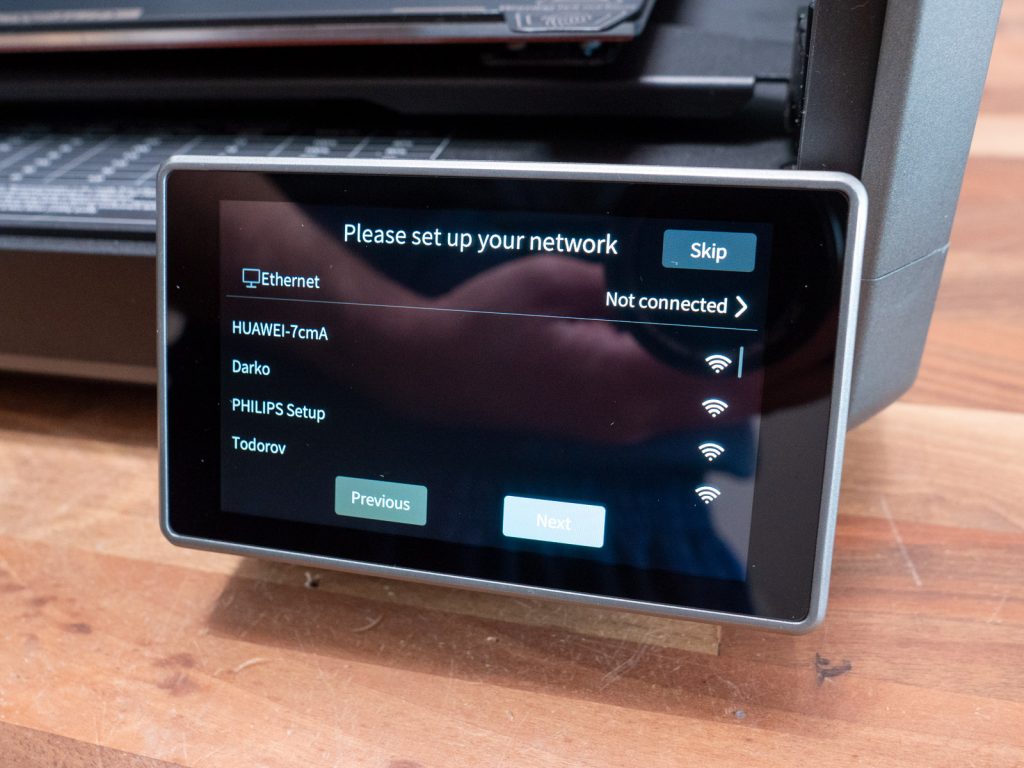
There are multiple ways to communication with the Creality K1 Max, via Wi-Fi, LAN, Creality Cloud or USB, and that’s really handy.
I connected my PC with the K1 Max via Wi-Fi. The printer connects to your home router and the you can control it through any of your home devices, even from your smart phone.
Touch Screen
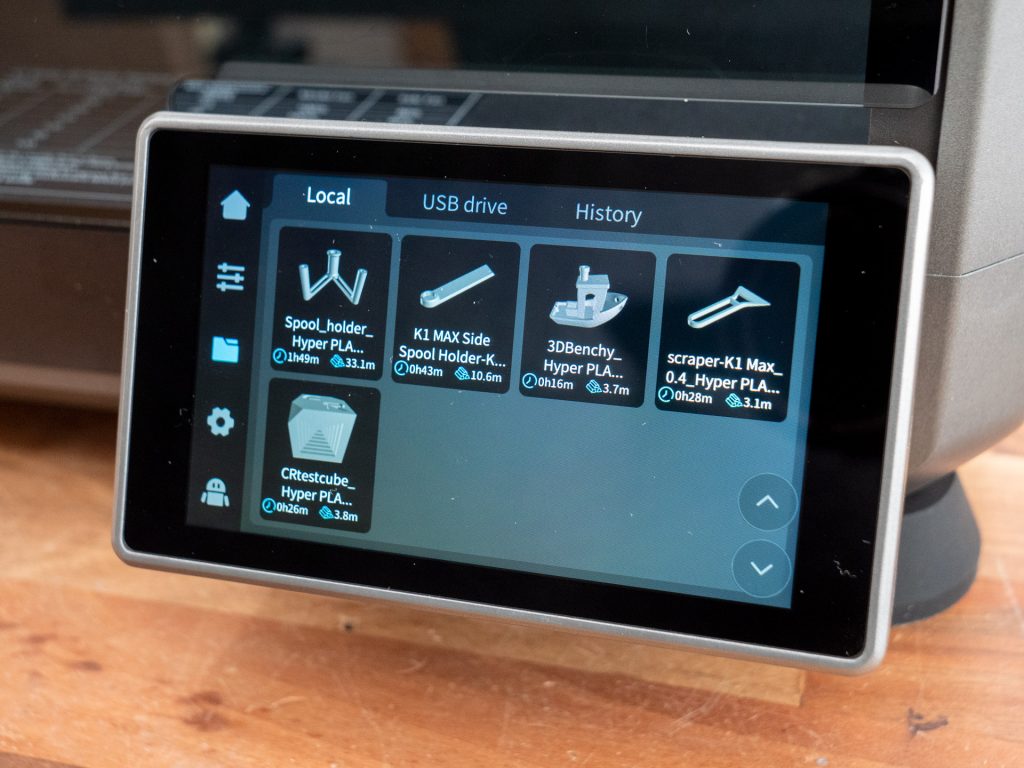
The K1 Max comes with a 4.3 inches touch screen which is really responsive and with nice graphics. Navigating through the menus is fast and easy.
You even get a nice looking thumbnails of the 3D models, which make it easy to select jobs.
AI Camera
Yep, that’s right. The K1 max comes with a built-in camera which is not only used for monitoring your prints, but also uses sort of AI to watch over spaghetti failure, foreign objects, debris, etc. It will alert you if something goes wrong.
As a bonus, you also get a time-lapse video for each print.
Unboxing and Set Up
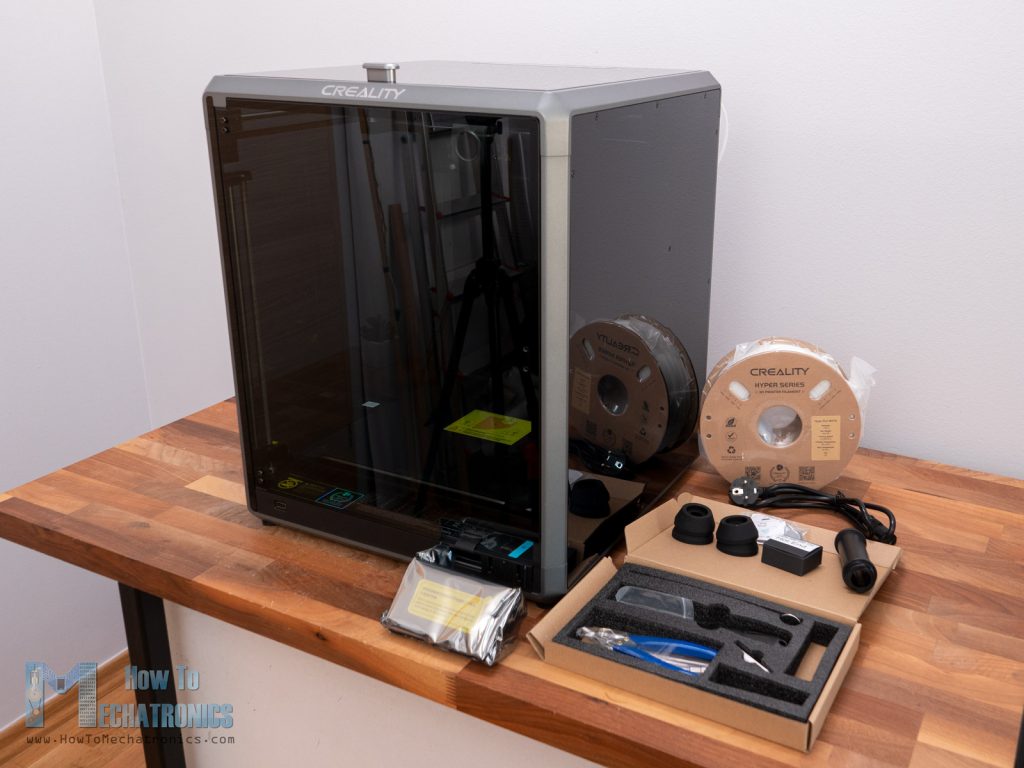
The printer comes almost fully assembled in a large wooden crate. Everything needed for setting up the printer, as well as maintenance tools and accessories comes well packed within the printer in soft foam.
It takes around 20 minutes to get the K1 Max ready to print. All you need to do is screw on the door handle, the filament holder, and attach the screen in place.
Most important though, is to remove the 3 screws that hold the build plate in place during transportation.
You can check Creality unboxing and setup video on their YouTube channelhttps://www.youtube.com/watch?v=ajtbz10ftdQ if you have a need for it.
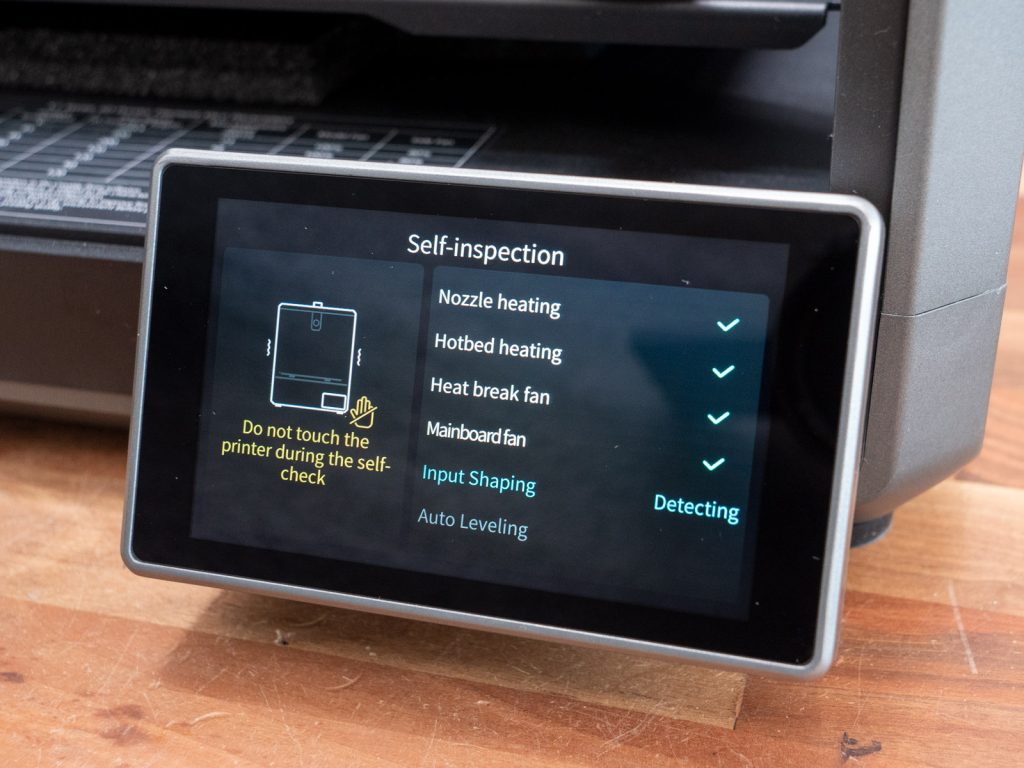
Once you power the K1 Max, the screen guides you through the setup process. In the final step, it does a self inspection together with input shaping and auto levelling the bed.
And so we are ready to use the machine.
Software
The printer comes with a copy of Creality Print, a slicer that Creality has been working on for some time. The slicer has ideal profiles for any Creality 3D printer and I found it has a good user experience.
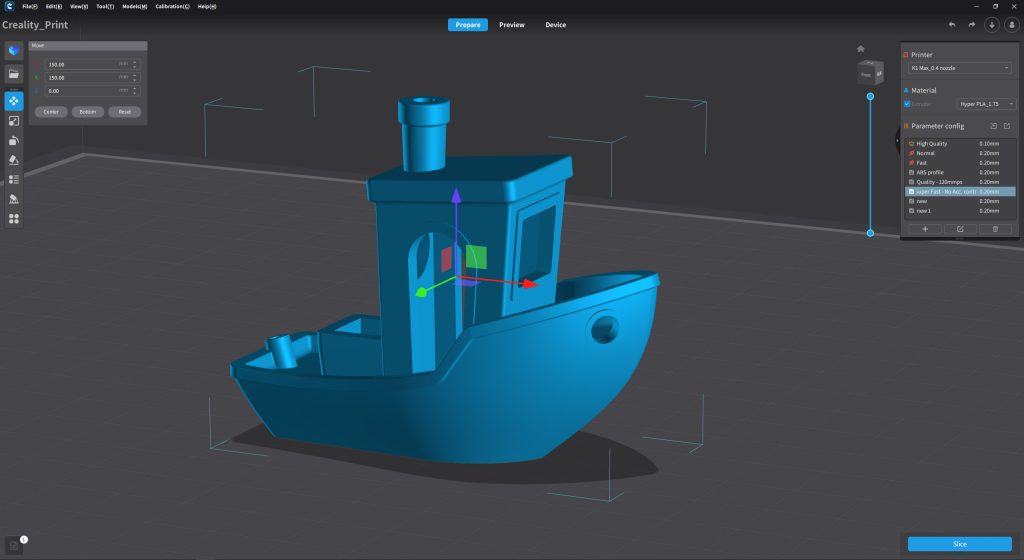
Of course, we could also use Cura or PrusaSlicer, but we will have to make our own profiles to get the most of out the 3D printer.
The user experience of printing with the K1 Max and the Creality Print is a great. Once you slice your 3D model, if you are connected the printer via Wi-Fi or LAN, you can simply send the G-code to the internal storage of the printer. First you click on LAN Printing, then confirm generated file, and send the G-code of the file to the printer. Then you can simply click on Start printing, and the printer will start printing your part.
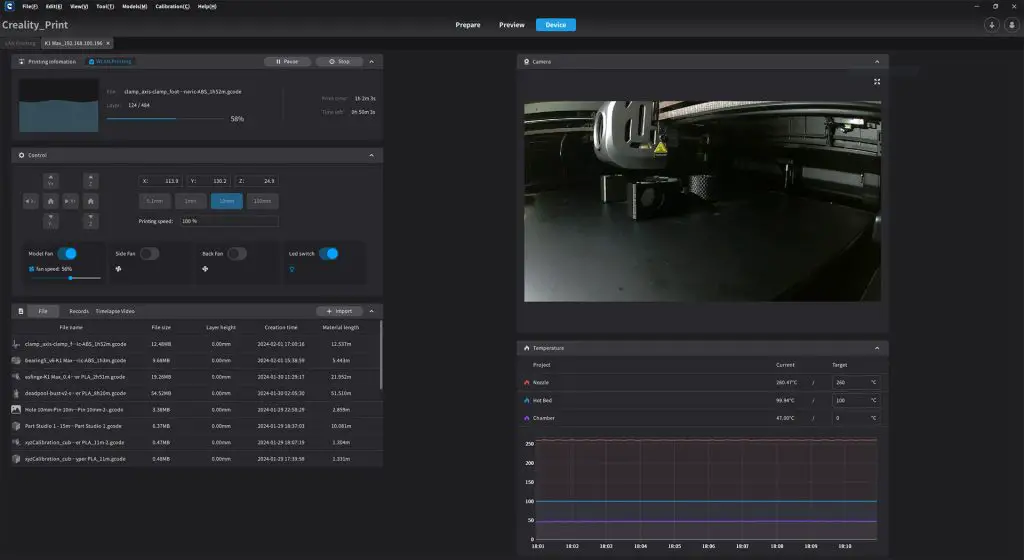
Here you can monitor all aspects of your 3D printer as well as get a live preview window of what’s going on via the built-in camera.
Print Quality Tests with Creality K1 Max
All right, this is the most important part of this whole review, to see the print quality and speed the Creality K1 Max 3D printer offers. I did quite some printing tests and here are the results.
3D Benchy
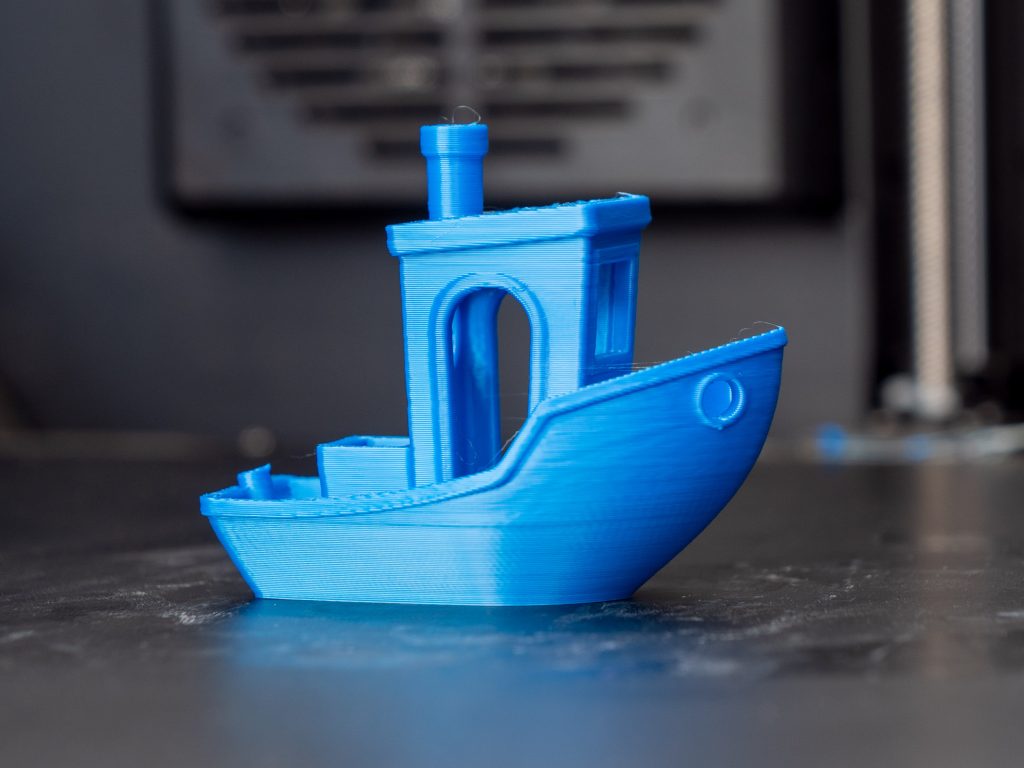
Here are the classic 3D Benchy print results that I got.
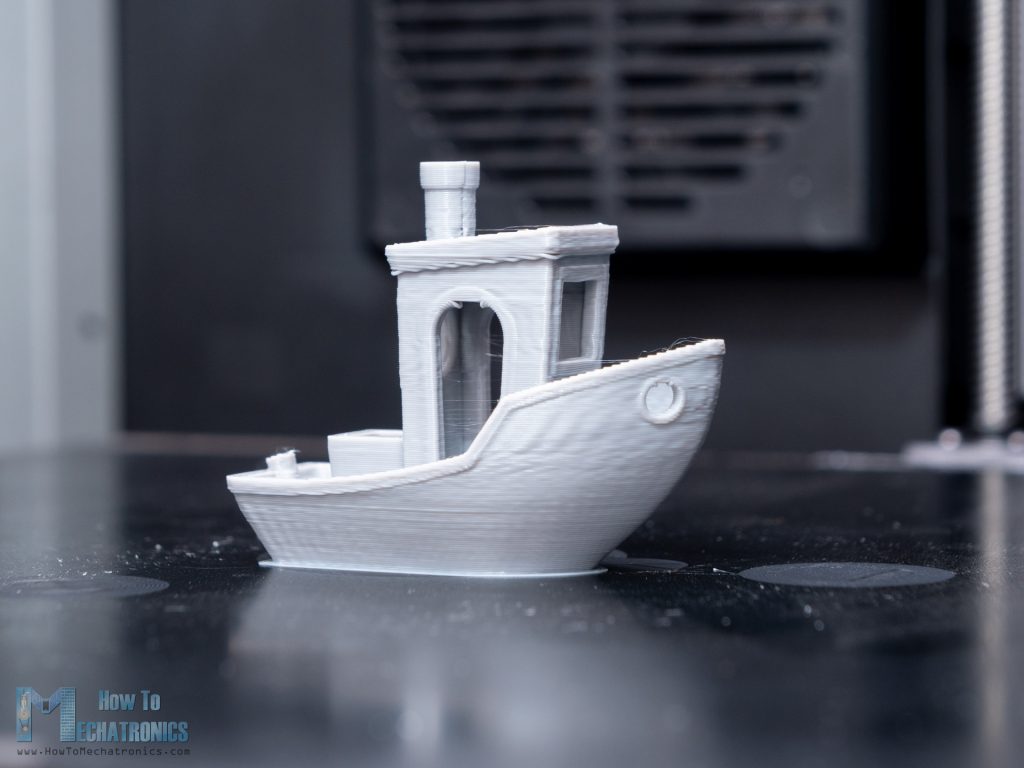
As I already mentioned, in the 3D printer internal memory there is a sliced files of the 3D Benchy that the K1 Max manages to print it at maximum speed within just 16 minutes. Printed in the white Creality Hyper PLA that comes with the printer, the Benchy looks pretty incredible, considering how fast it was printed.
However, the shiny white color actually makes the print looks much nicer, as it’s hard to notice details. Here’s the same 16-minutes Benchy with the Creality Hyper filament in gray color.
Here we can notice more details with this color, and see some imperfections. Still, it’s really great, considering that this is just a 16 minutes print, whereas a 3D printers from just couple of years ago, at normal printing speed of 60mm/s took around 1h30m to print this 3D Benchy.
Here’s the 3D Benchy at normal printing speeds on the Creality K1 Max, at 300mm/s, which took 34 minutes to print.
Now this 3D Benchy is almost perfect. This shows that the Creality K1 Max has really great print quality, even at high speeds.
Though, please note that although set at 300mm/s, the printer doesn’t really achieve that speed for this particular print, as it’s a small print, and it doesn’t have enough room to accelerate to that speed.
With the same settings, except changing the printing speed to 180mm/s we get the same print time of 34 minutes. When going down to 120mm/s we get print time of 36 minutes. At 80mm/s we get print time of 42 minutes. So, other settings like the printer Acceleration Control and Overhanging Wall Speed Grading settings play bigger role when for getting faster prints.
Calibration Cube
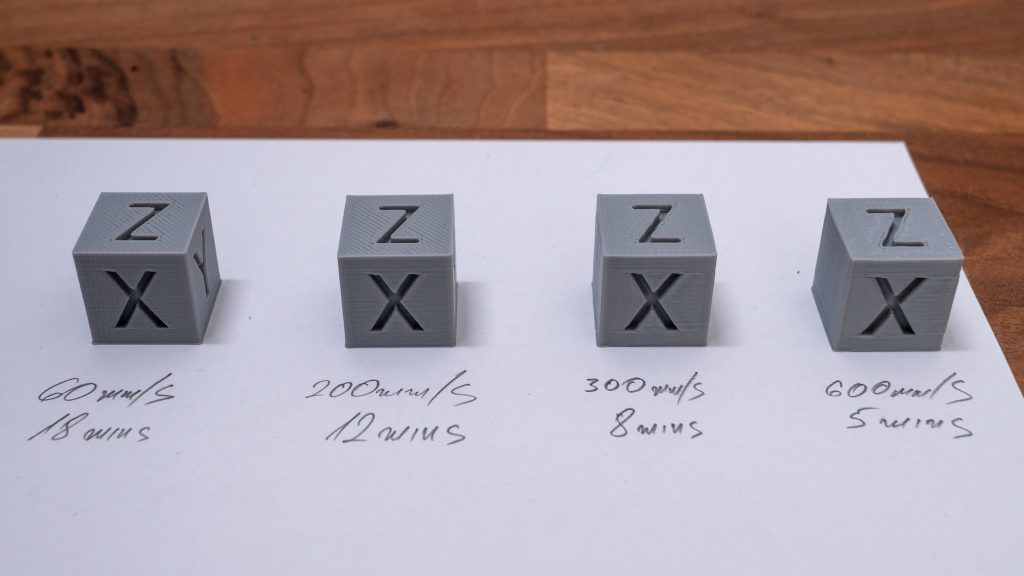
Next, I printed the popular Calibration Cube at four different print speeds.
To achieve these print times I also played with the Acceleration Control and Overhanging Wall Speed Grading settings.
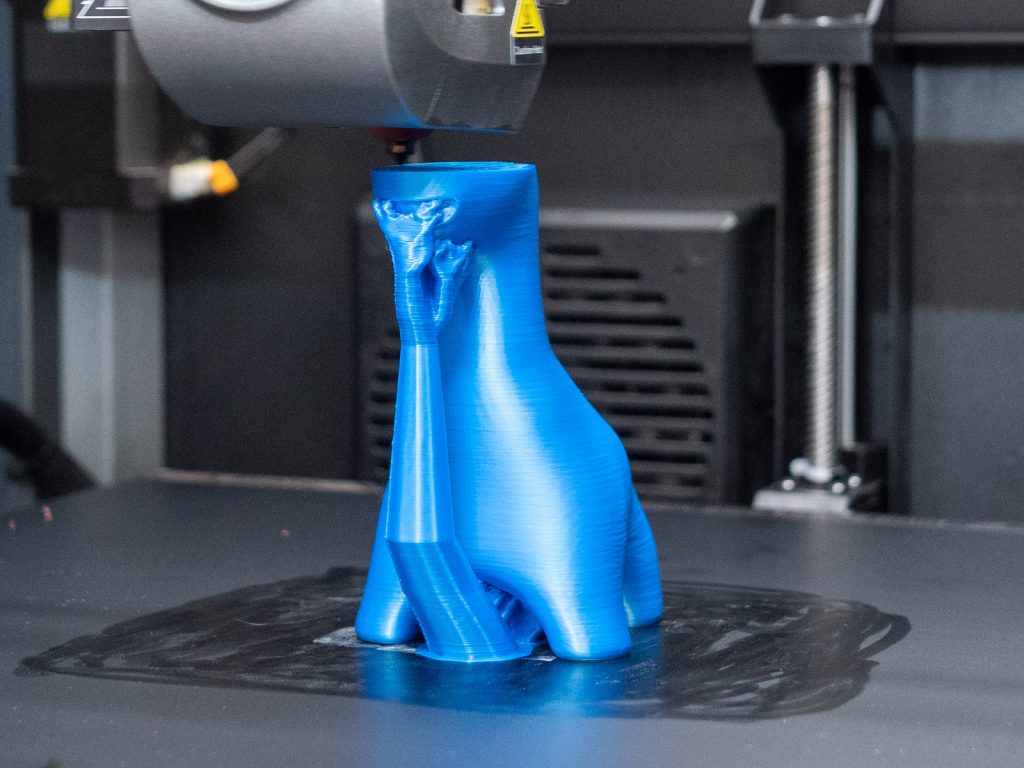
Smiling Dinosaur
This is a cute smiling dinosaur which has nice smooth surfaces, so it’s great for testing the print quality of the K1 Max.
I printed it in four different speeds and here are the results.
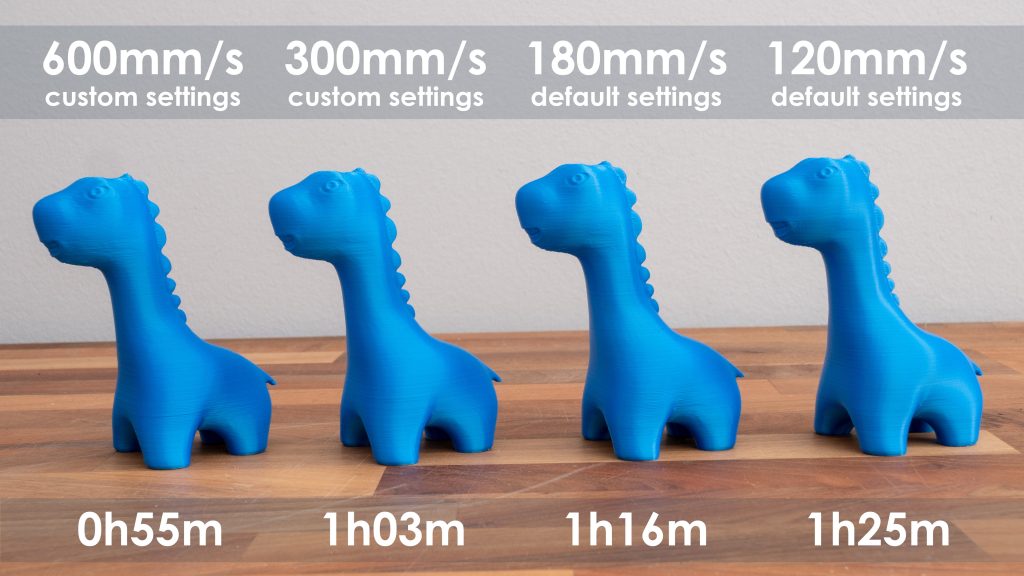
To get the fastest 3D printing speeds, I did some tests with custom settings at 600mm/s and 300mm/s and the results were very decent.
180mm/s and default settings is the sweet spot I think considering both the print quality and print time. The 120mm/s print speed provided the best print quality.
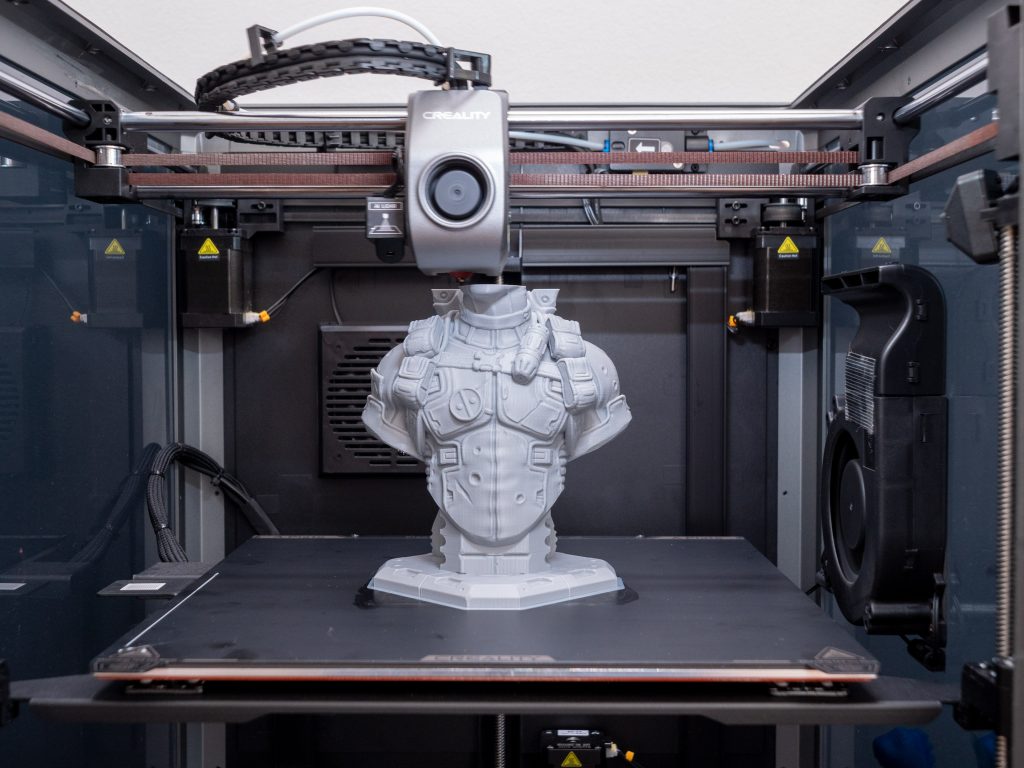
Deadpool Bust
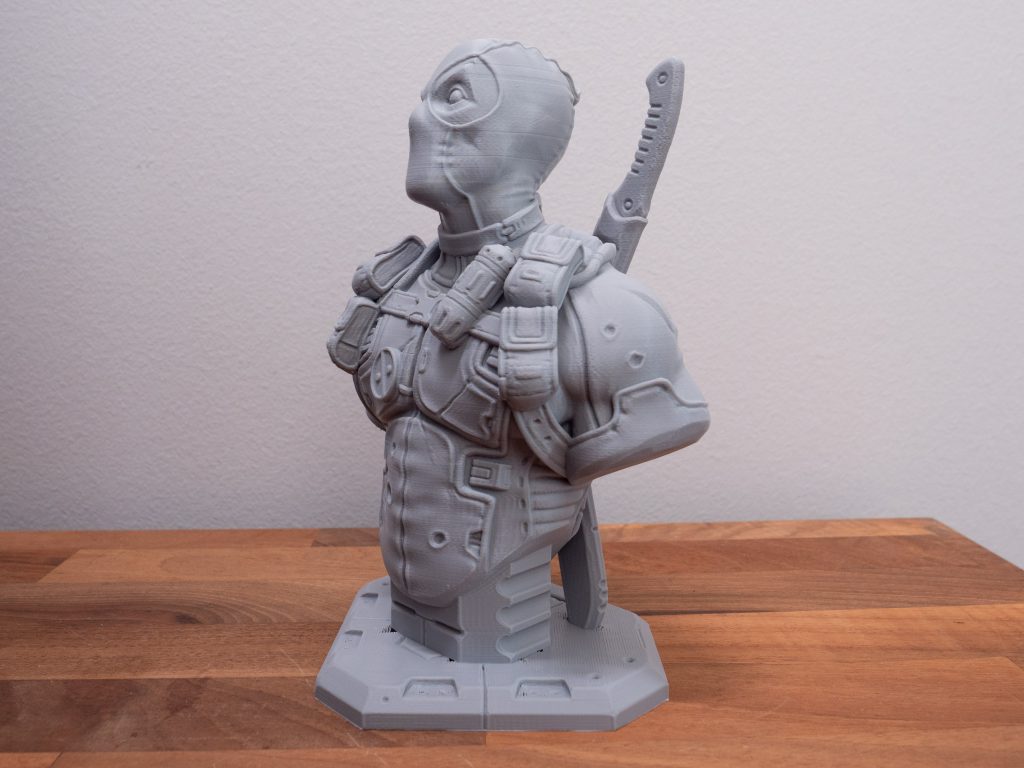
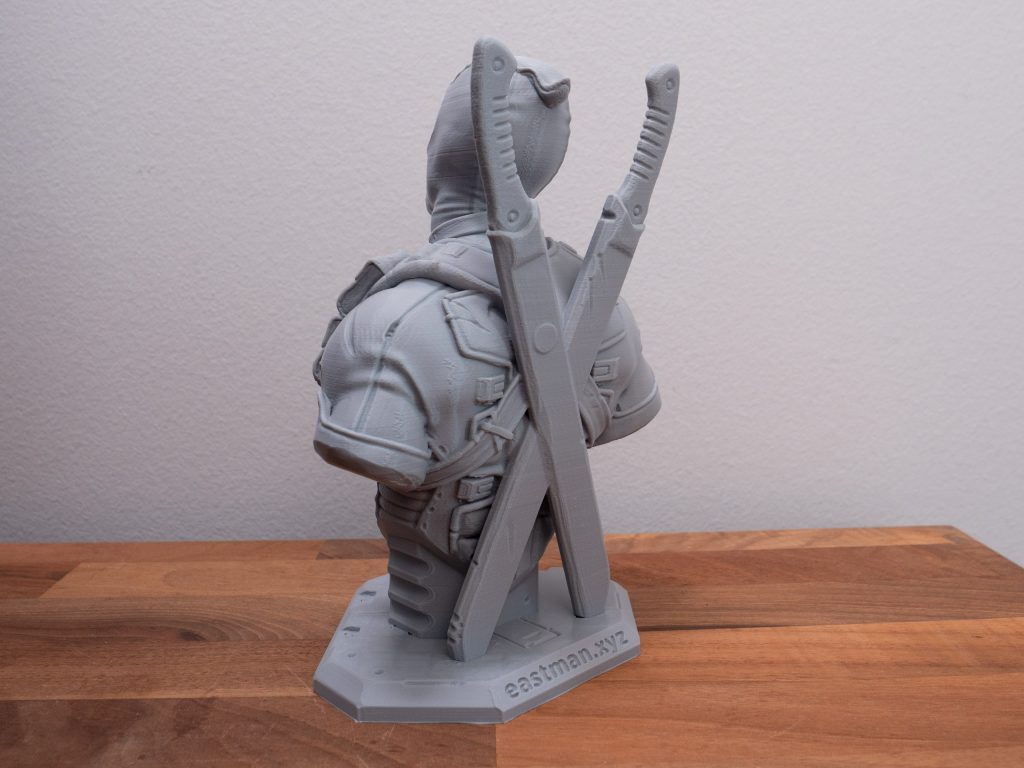
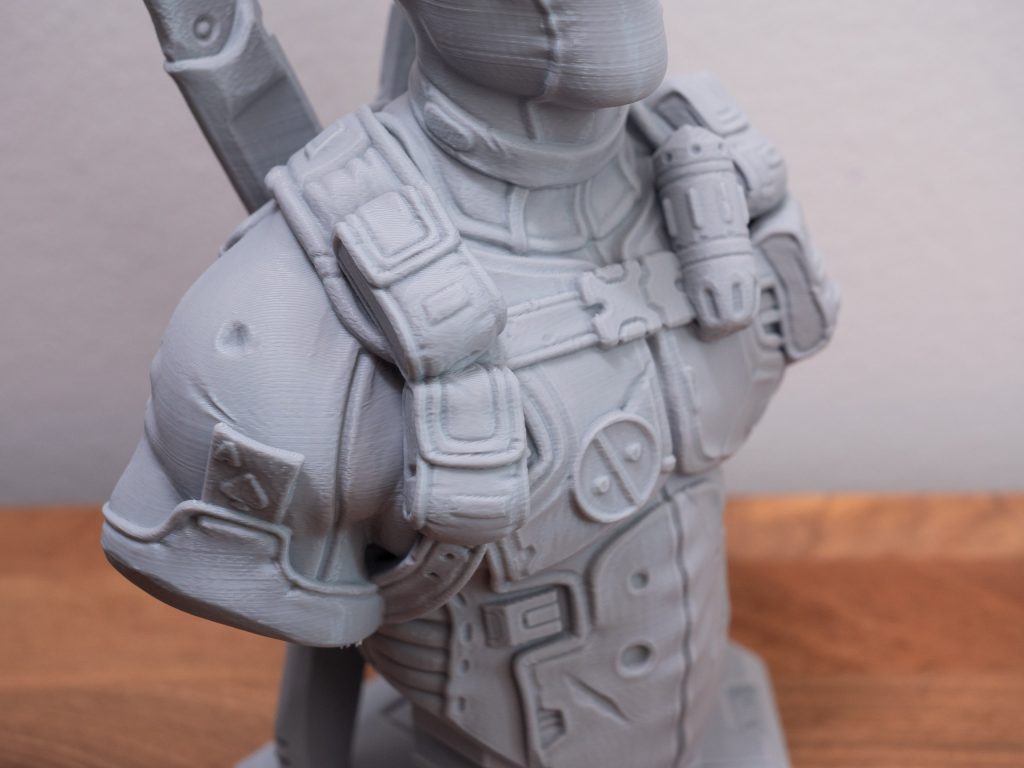
I couldn’t help but print some of the bust by Eastman. This time I went for the Deadpool bust.
It took 8h30min at 120mm/s printing speed. The bust came out great.
ABS
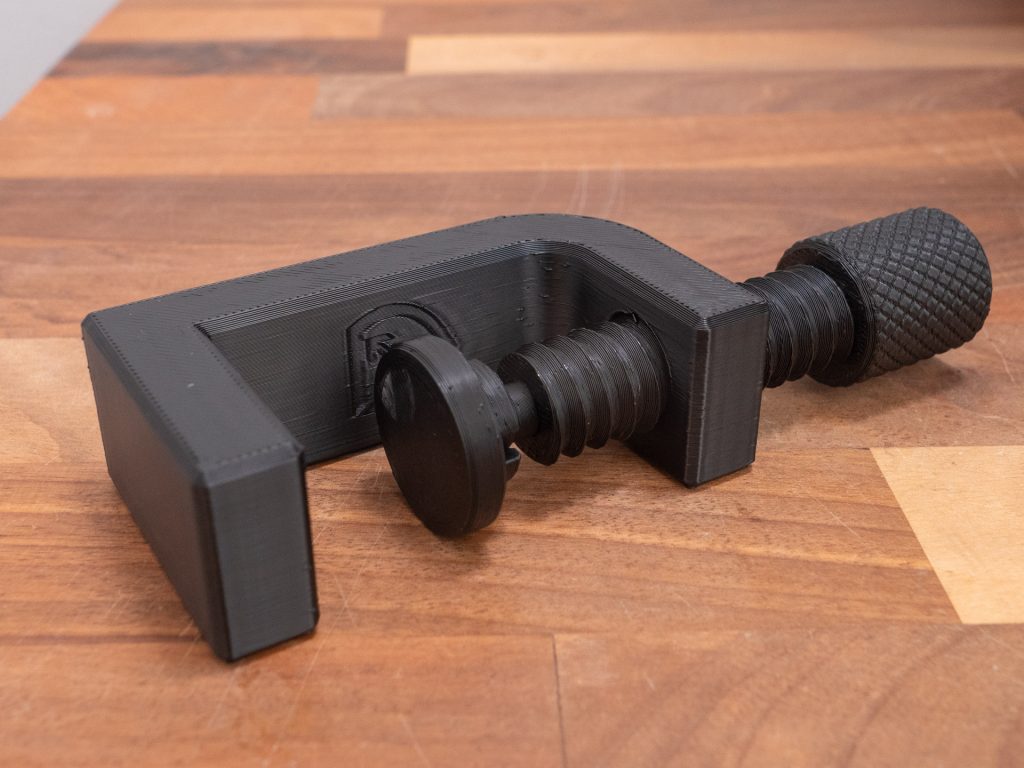
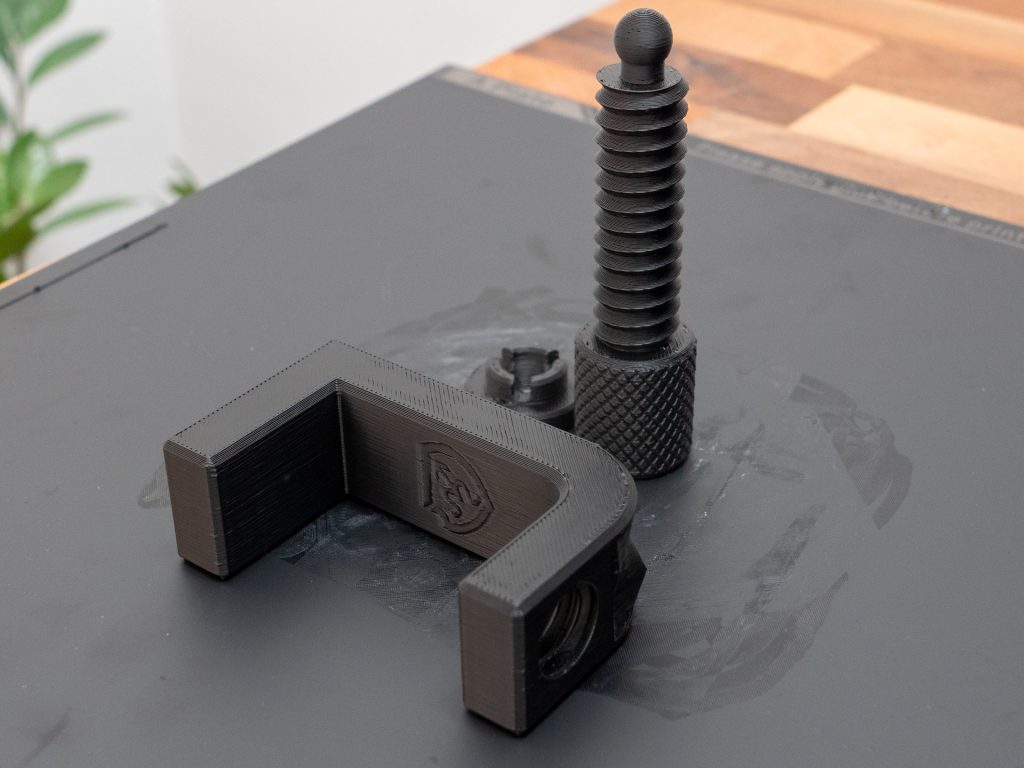
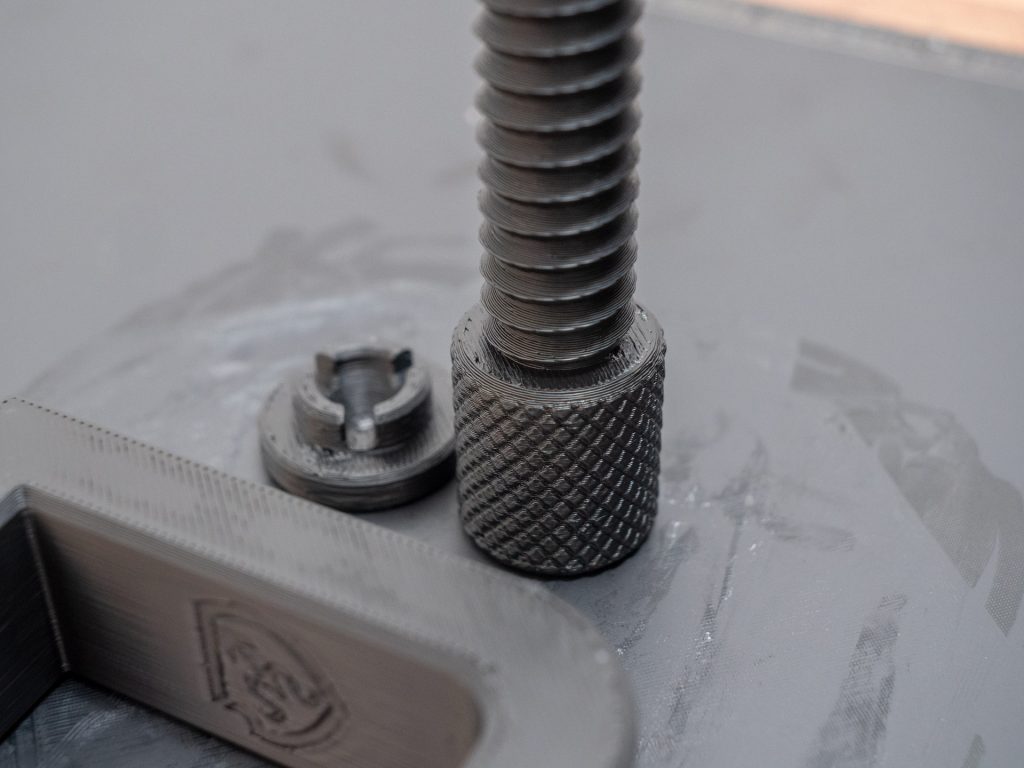
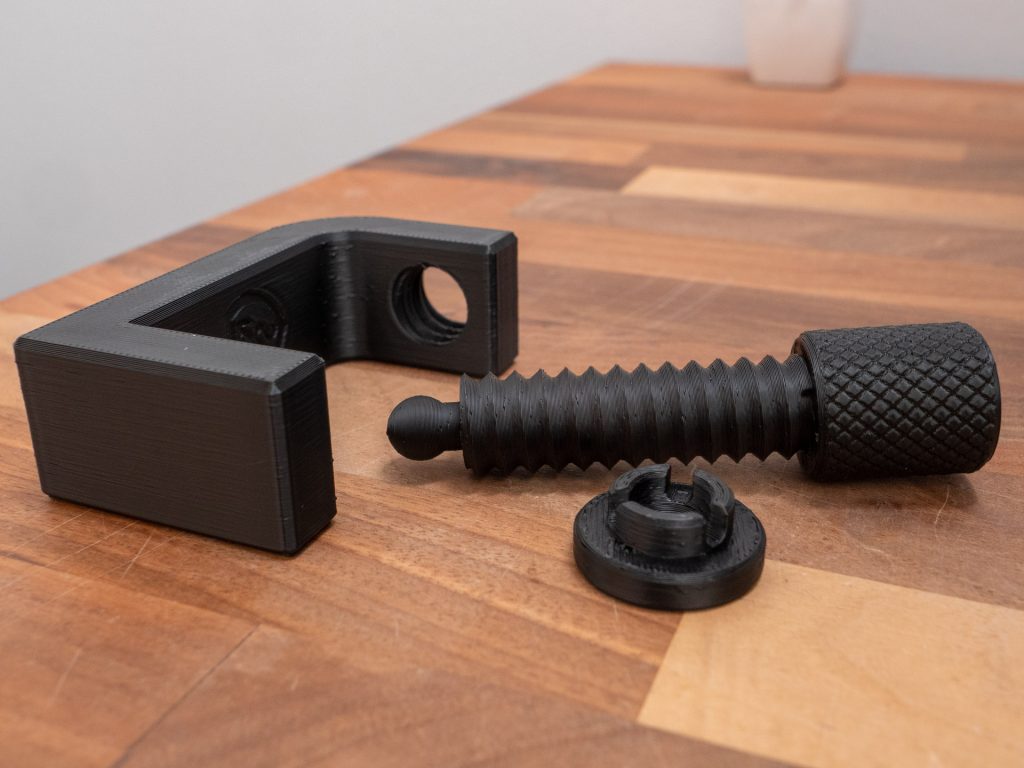
Let’s take a look how K1 Max can handle ABS material. For that purpose I 3D printed this simple clamp with decorative low-poly inlay.
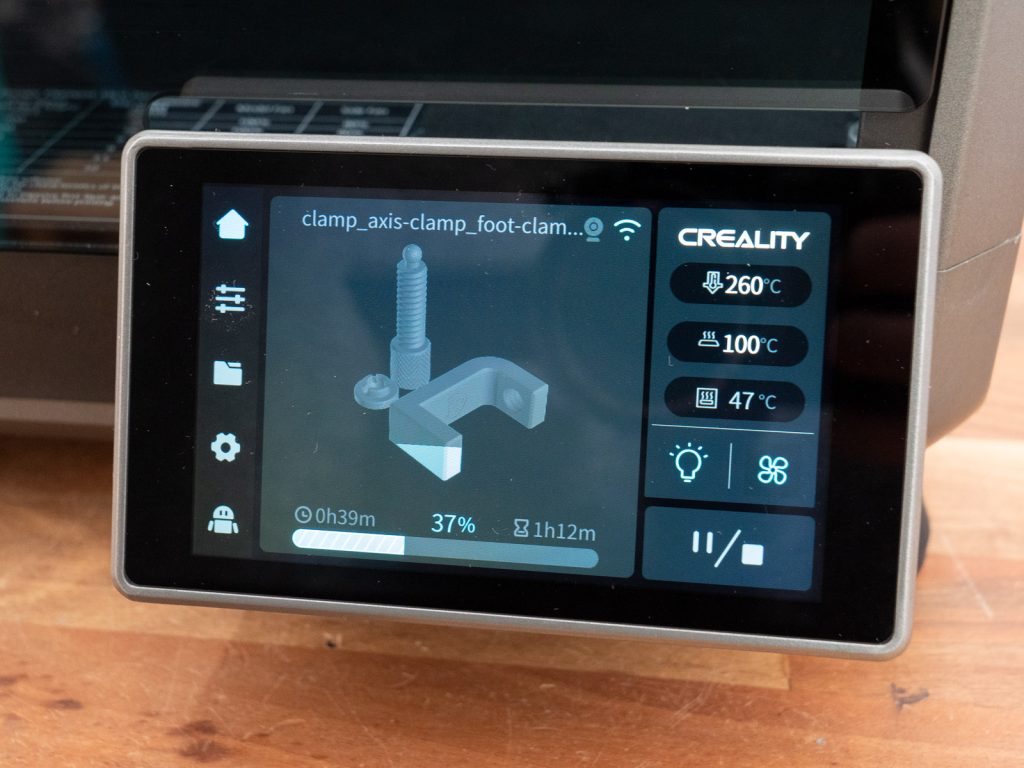
I used 260°C on the nozzle and 100°C on the hot bed. When 3D printing ABS the top lid of the K1 Max should be closed in order to maintain higher temperature. The K1 Max chamber easily reached 47 degrees Celsius.
The ABS print came out really great.
TPU
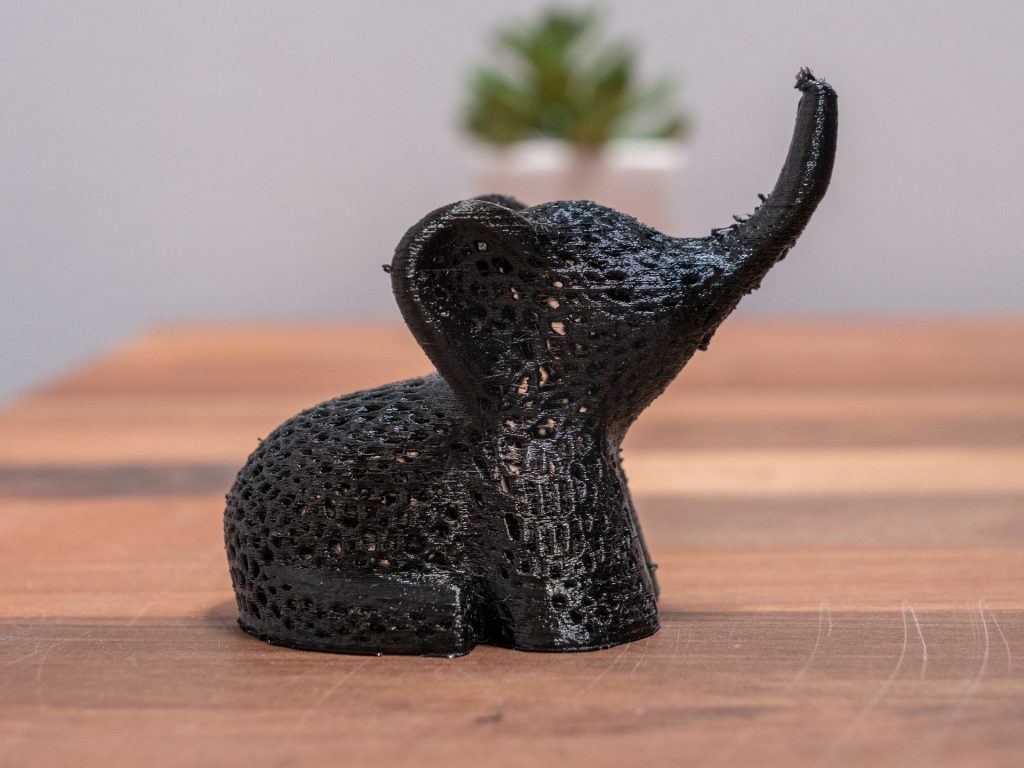
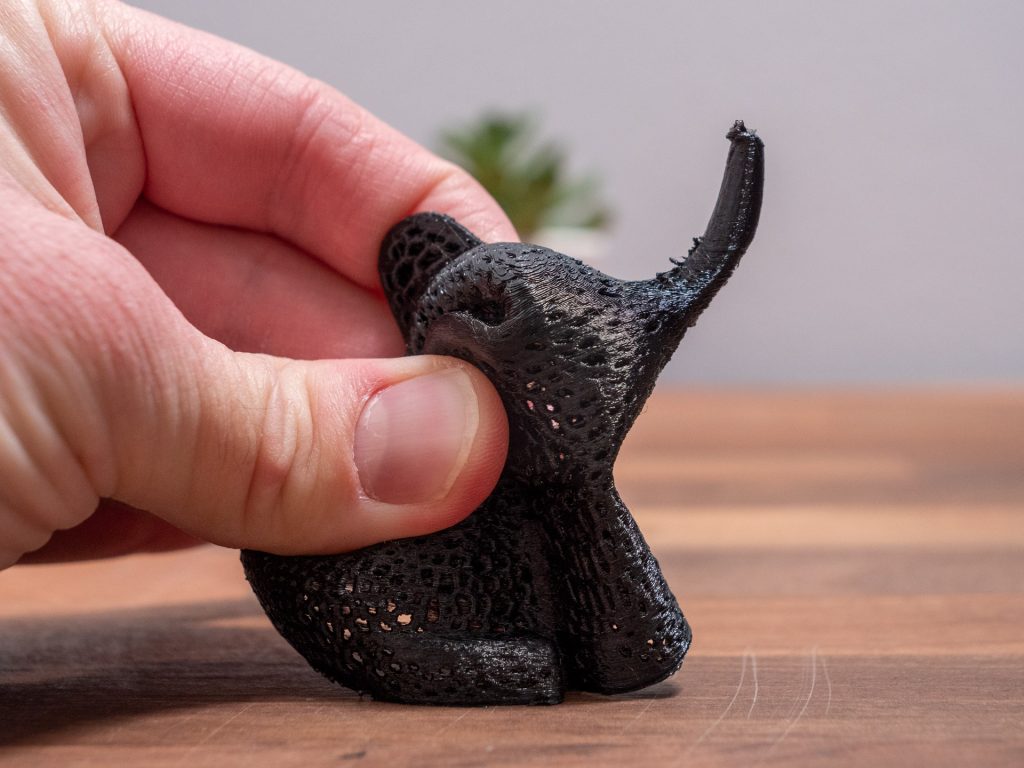
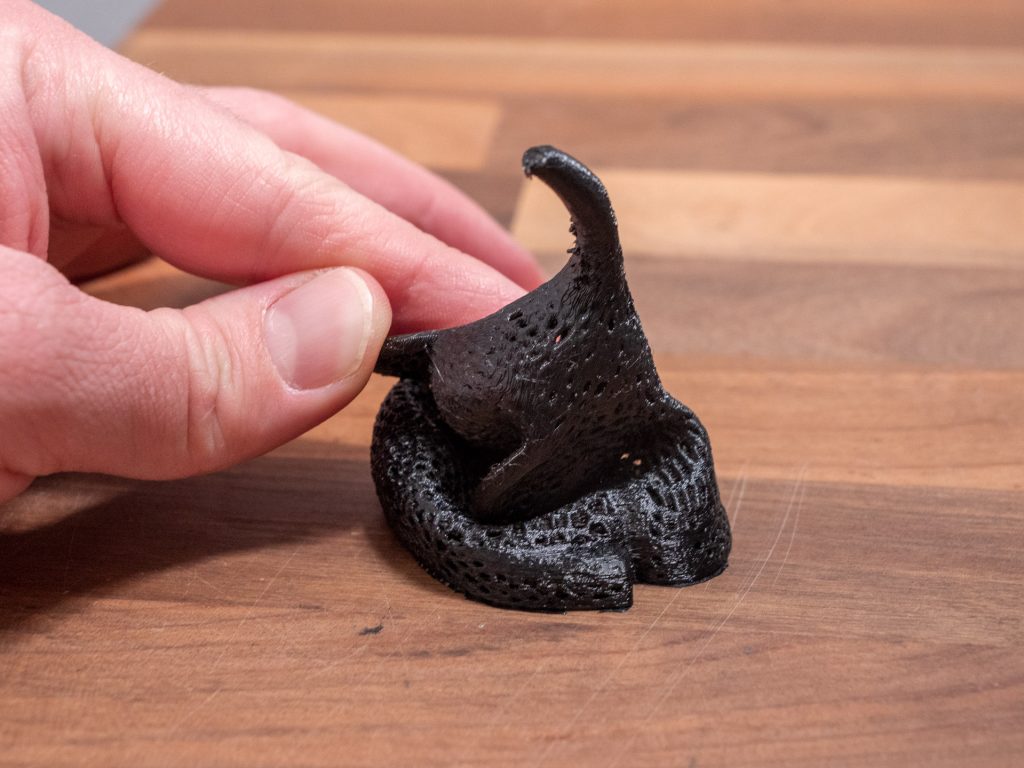
The K1 Max can also easily handle TPU material. Here I 3D printed this Voronoi Elephant which cam out nice and squishy.
Dimensional accuracy
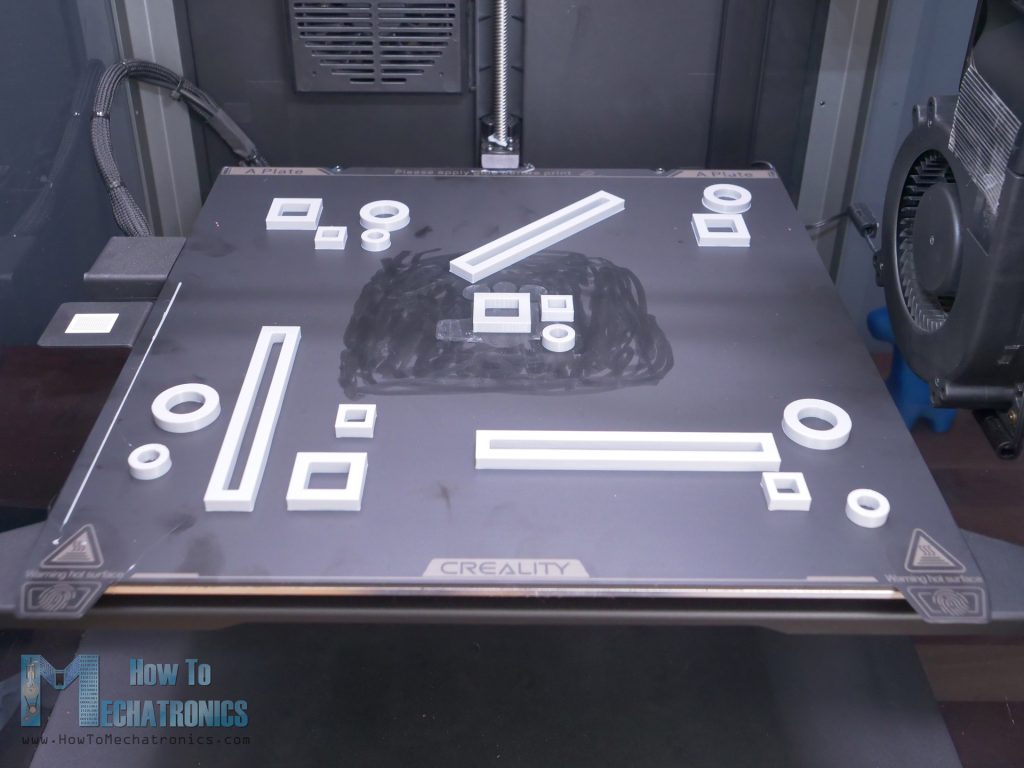
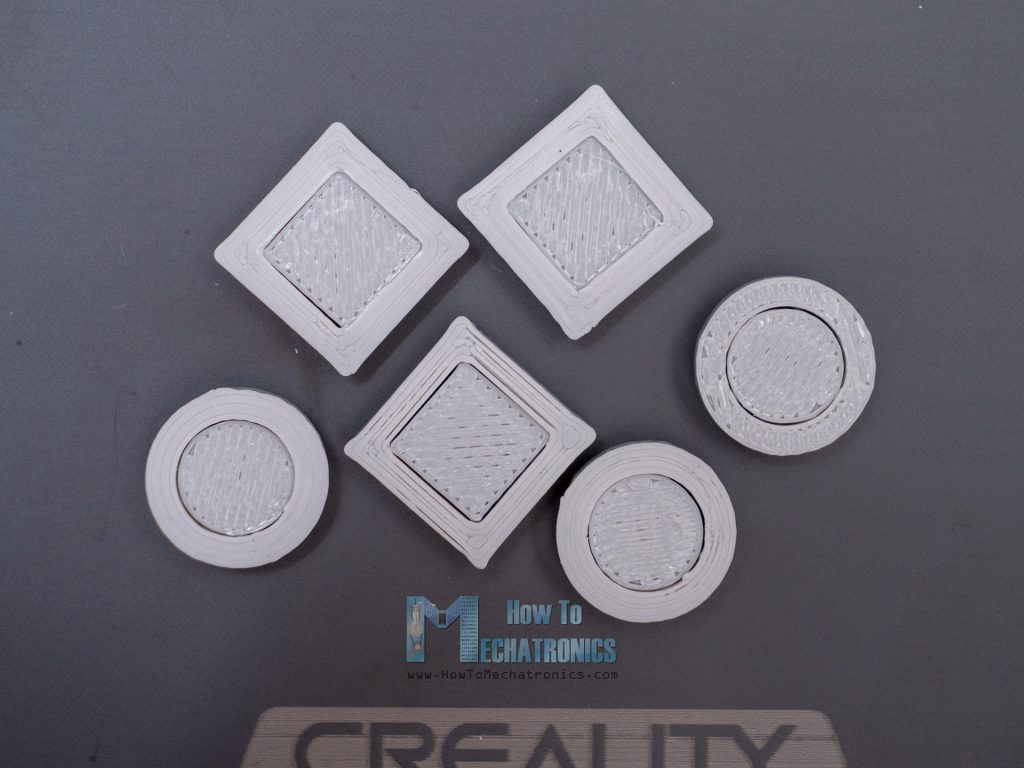
For me, 3D printing dimensionally accurate prints is very important, as most of my projects consists of some kind of 3D printed assemblies. So therefore I did this test to see how accurate the K1 Max is.
I printed circles, squares and rectangles on each corner of the print bend, as well as in the middle. I measured the prints with caliper and the results were not perfect but good enough I think.
There was a difference of around 0,1mm on each side on the square prints.
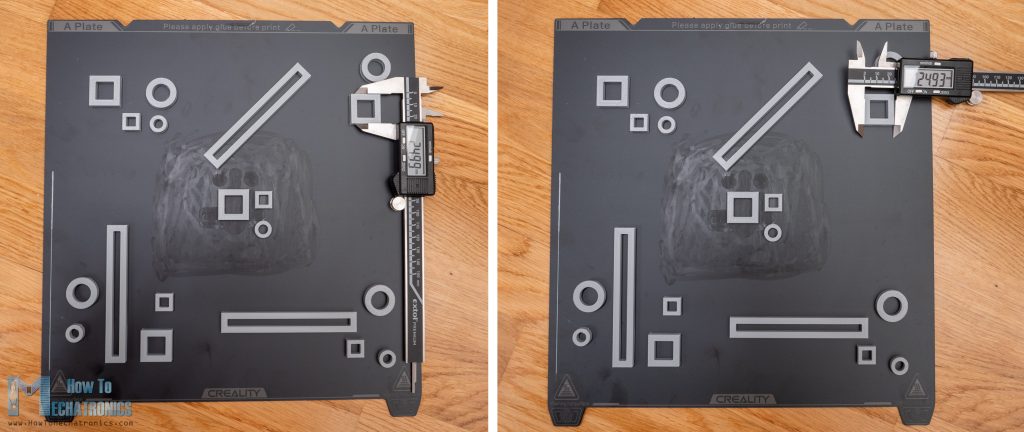
On the other hand, the circles were a bit more off with around 0,3mm difference measuring them along the X and Y axis.
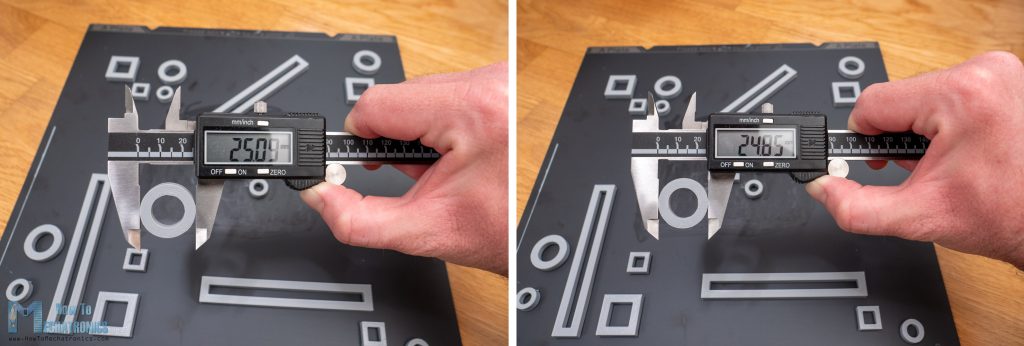
I managed to easily fit the prints one inside another, but the differences could be felt and seen.
Overall, the dimensional accuracy of the Creality K1 Max is good enough for fittings parts together or make assemblies.
Conclusion – Is Creality K1 Max Good 3D Printer?
The Creality K1 Max is an excellent 3D printer that checks all the boxes you would ever need from a 3D Printer. You can throw any type of filament at it and you will get great print quality at super fast speeds of up to 600mm/s and acceleration of 20000mm/s².
It has auto bed leveling, Wi-Fi and LAN connectivity, AI LiDAR and camera for improving print quality and preventing print failures, direct extruder with ceramic hot end for fast heating, filament run-out sensor, 4.3 inches color touchscreen with nice user interface and so on.
The enclosed design makes printing materials like ABS and ASA a breeze, and as a bonus it looks super slick.
The Creality K1 Max is currently my favorite 3D printer. It’s a great choice for both beginners and enthusiast.
