In this electronics project I will show you how you can make this awesome looking Infinity Mirror Music VU Meter. You can watch the following video or read the written tutorial below for more details.
Electronics Part
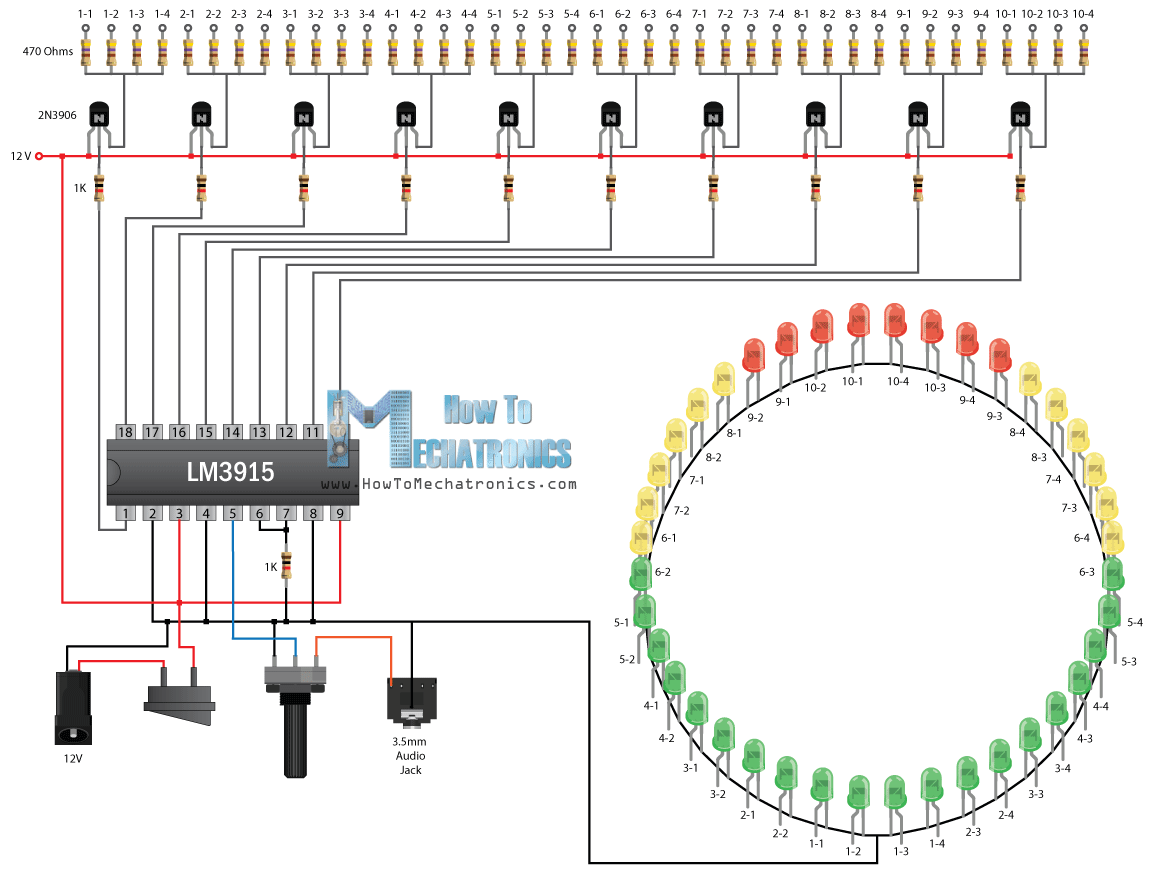
We will start with the electronics part. This project is based on the LM3915 integrated circuit which can sense analog voltage levels and driver ten LEDs. Here’s the basic circuit schematics.
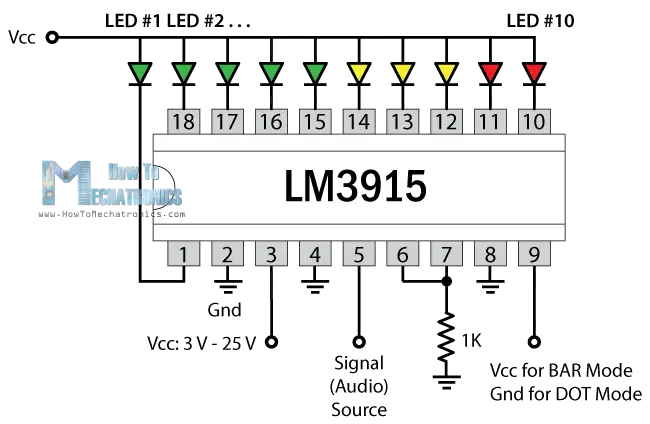
The IC can be powered from 3 V to 25 V at the Vcc, pin number 3 and the Gnd, pin number 2. The analog signal goes into pin number 5, the pins from 6 to 8 are used for adjusting the voltage reference or the sensing and the pin number 9 is used for selecting Bar or Dot mode. The ten output pins are active low with a current from 1mA to 30mA so the LEDs should be connected with the negative lead to the IC outputs and there is no need of resistors.
Now because 10 LEDs are just too less for a project like this, I made a little modification to circuit schematics.
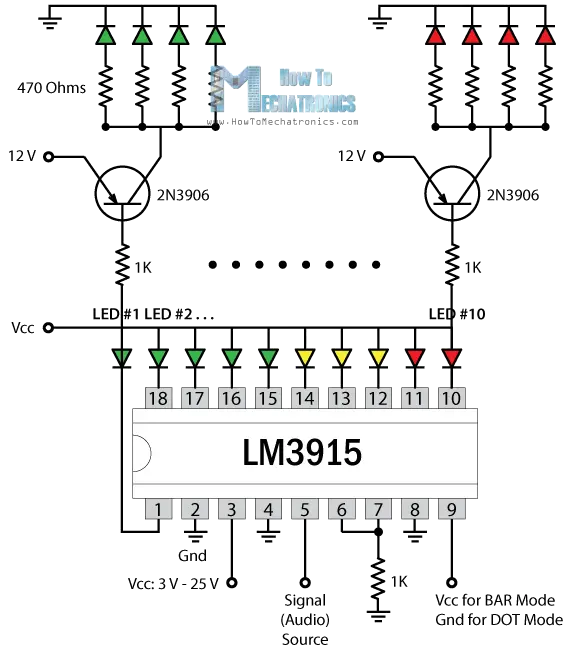
At each output instead of a LED I connected a PNP transistor, through a 1K resistor for a protection, and at the collector of each transistor I connected 4 LEDs through 470 Ohms resistors. So it that way I connected a total of 40 LEDs.
You can get the components needed for this project from any of the sites below:
- LM3915 IC…………………………. Amazon / Banggood / AliExpress
- Ultra Bright Red LEDs………… Amazon / Banggood / AliExpress
- 40 x 470 Ohm Resistor……….. Amazon / Banggood / AliExpress
- Switch………………………………… Amazon / Banggood / AliExpress
- Power Jack…………………………. Amazon / Banggood / AliExpress
- Audio Jack………………………….. Amazon / Banggood / AliExpress
- Potentiometer……………….…… Amazon / Banggood / AliExpress
- 12V 2A Adapter…………….……. Amazon / Banggood / AliExpress
- Reflective Window Film……… Amazon / Banggood / AliExpress
Disclosure: These are affiliate links. As an Amazon Associate I earn from qualifying purchases.
Here’s the complete circuit diagram of how everything should to be connected.
How Infinity Mirror Works – Explained
Now we are ready to move on and start building the infinity mirror. The point of the infinity mirror is that the LED, or the light source, needs to be placed between a mirror and a glass on which is attached a 50 – 80 % reflective window film.
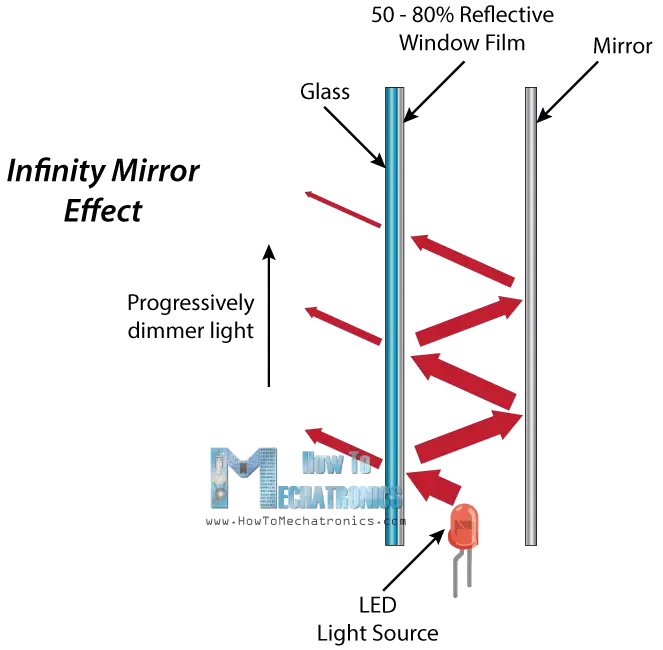
Depending on the quality of the film and the amount of reflection it provides, the light will keep bouncing between the mirror and the glass but at the same time some of the light will escape through the glass. Therefore from the other side of the filmed glass you will be able to see the infinity effect.
Building the Infinity Mirror
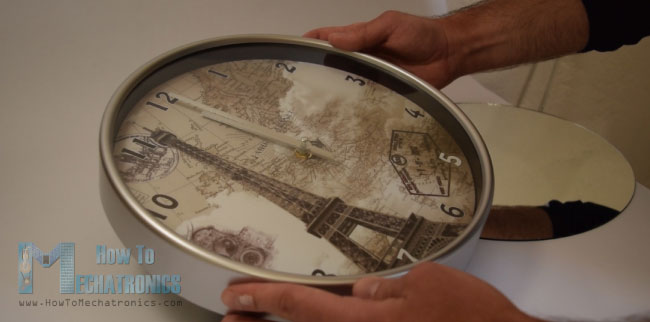
So the glass and the housing that I used for this project are from a wall clock and I managed to find a suitable same size mirror. Next we need something on which we will attached the LEDs that will hold them between the mirror and the glass.
For that purpose I used a 5mm tick Styrofoam but a cardboard or something like that can be also used. After inserting all LEDs we need to solder all negative leads together and solder a separate wire to each positive lead.
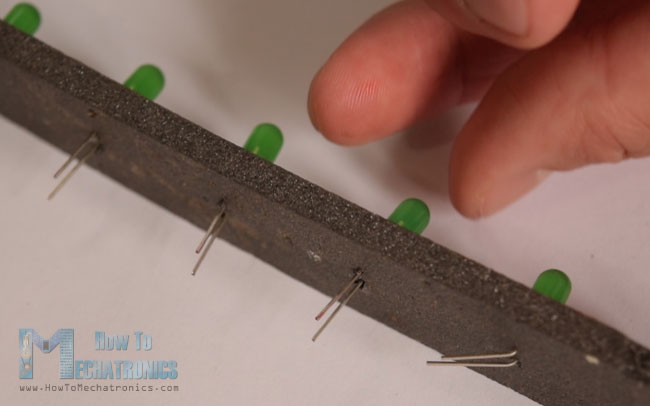
Next we need to solder all electronics components as described in the circuit diagram previously. Once we are done with that we also need to solder all wires coming from the LEDs to the circuit board.
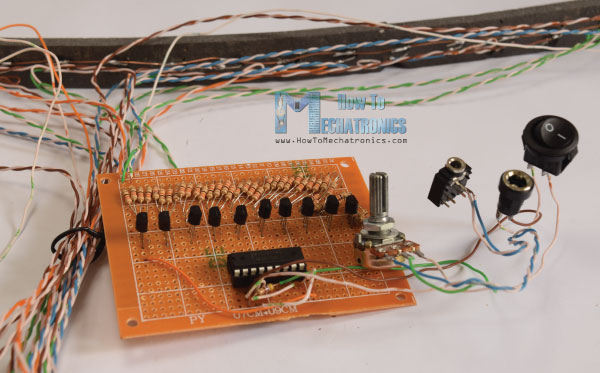
At this point it can get a bit messy because of the many wires so you should be careful when connecting them. Once you are done with this, you should test whether the electronics work properly.
Next we need to assemble everything together. So, in the housing first goes the filmed glass and on top of it the Styrofoam with the LEDs.
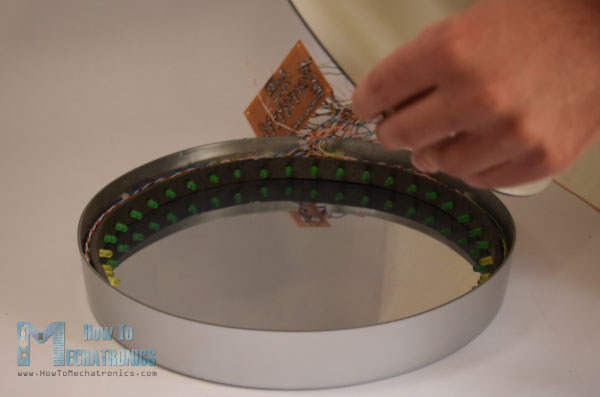
Once they are secured in place on top of them goes the mirror which is also secured using a glue gun. What’s left now is to make a stand for the infinity mirror. For that purpose I used a metallic box from a perfume which was the exactly same size as I needed.
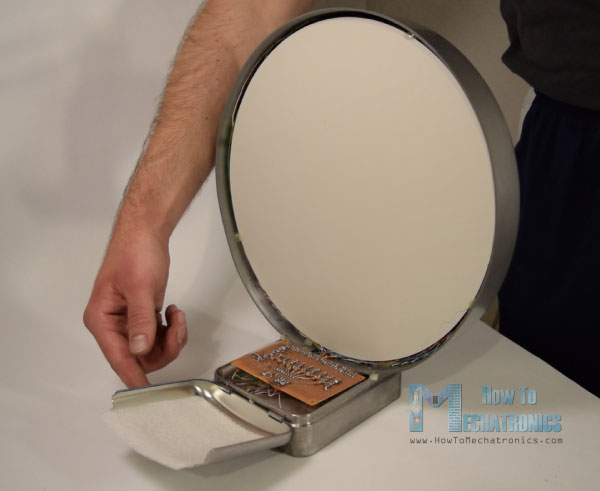
So I secured the infinity mirror to the box using a glue gun, cut its cover to size, made the holes and attached the power jack, the audio jack, the potentiometer and the switch.
That’s all and I hope you enjoyed this electronics project. Feel free to ask any question in the comments section below.
Hello,
Can I use 9Vdc power supply without doing any modification?
Yes, you can use 9V DC power supply. Just make sure it has the appropriate current rate.
Hi Dejan i have a question
Will you make a Video about how to build a Led Music Visualizer with for instance an Arduino and Ws2812b Led Strips. With a huge spektrum?
That would be great
I could add this to my to-do list, but I couldn’t say when I would make one.